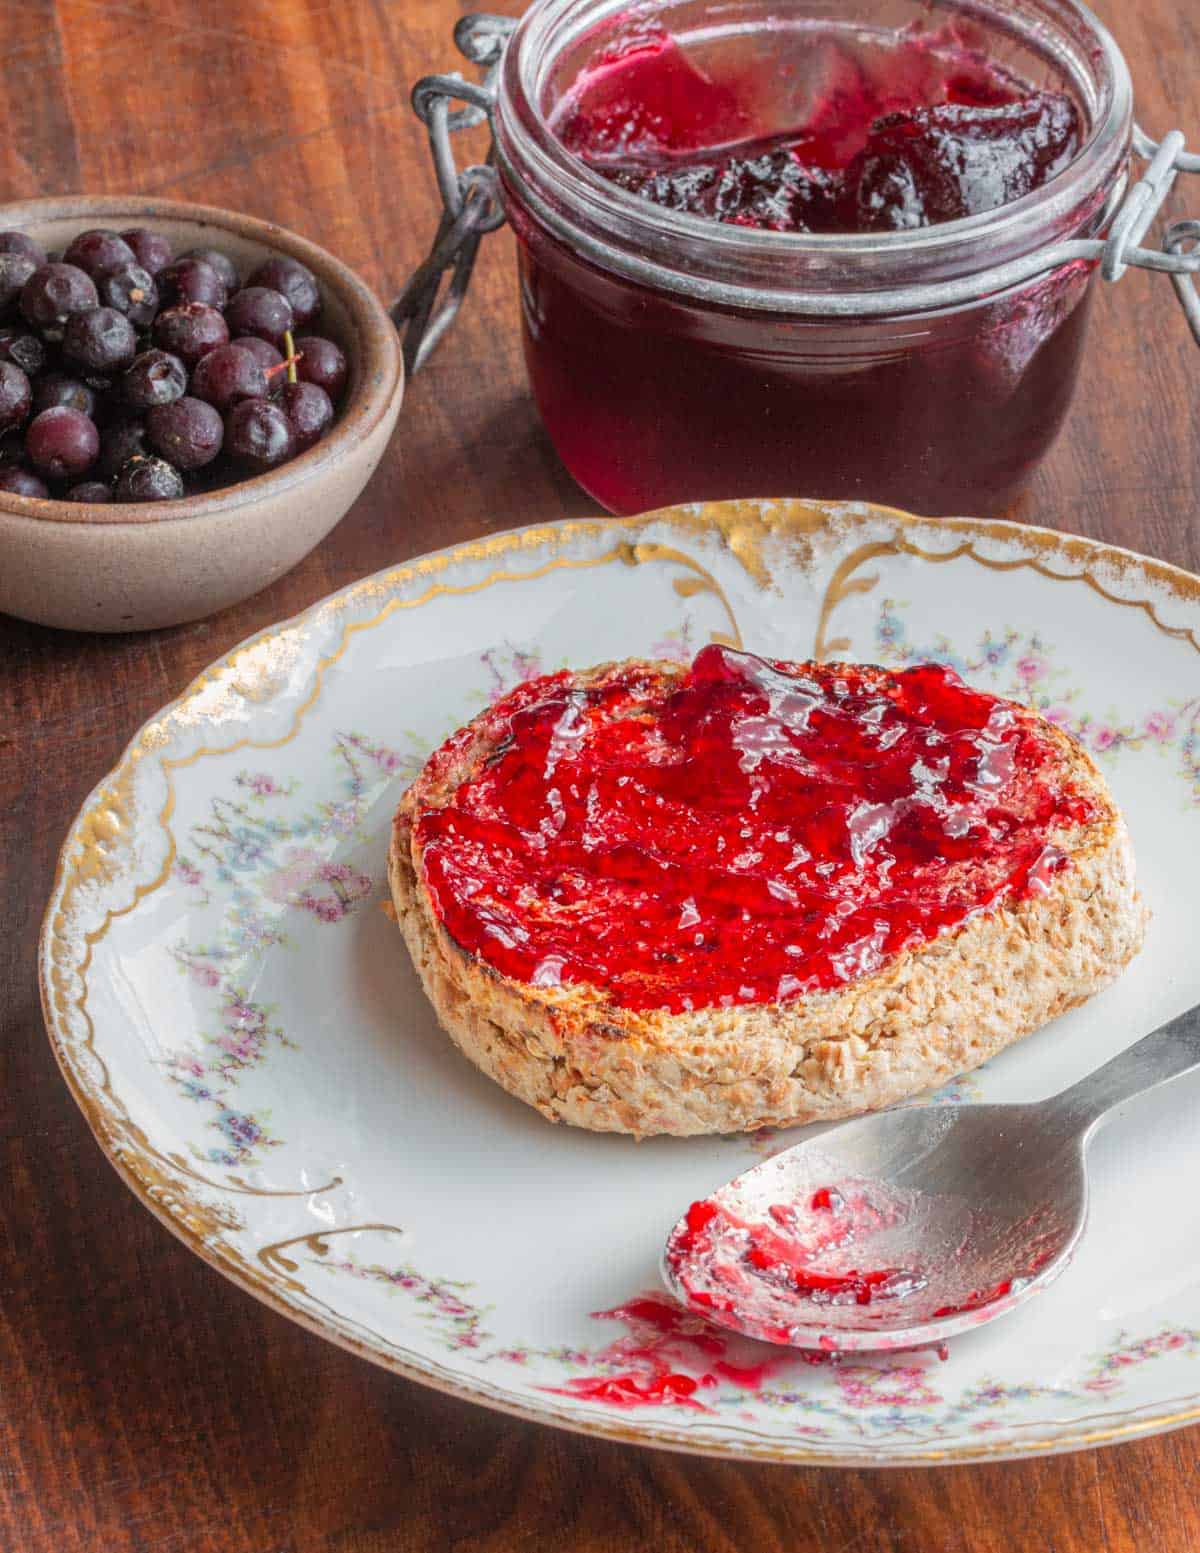
With its gorgeous red color and a taste of days gone by, a classic chokecherry jelly recipe needs to be in every forager's repertoire. This is a family recipe made how my friends Grandma did after she'd pick cherries in Northern Minnesota. It's the best because of the special way the cherries are crushed to make chokecherry juice. Read on and I'll share the secret.
Lots of different cherries can be used here. Two wild cherries that ripen after chokecherries (Prunus Virginiana) are sand cherries (Prunus pumila) and black cherries (Prunus serotina). Both of those can be substituted here, along with similar wild cherries like Prunus avium.

Pin cherries (Prunus pensylvanica) are a little different as they're tiny and have a high amount of pit compared to juice.
When Are Chokecherries Ripe?
One of the most important things is making sure your wild cherries are ripe. Choke cherries are ripe when they're completely black-not red. This can be confusing if you're new to foraging wild cherries.
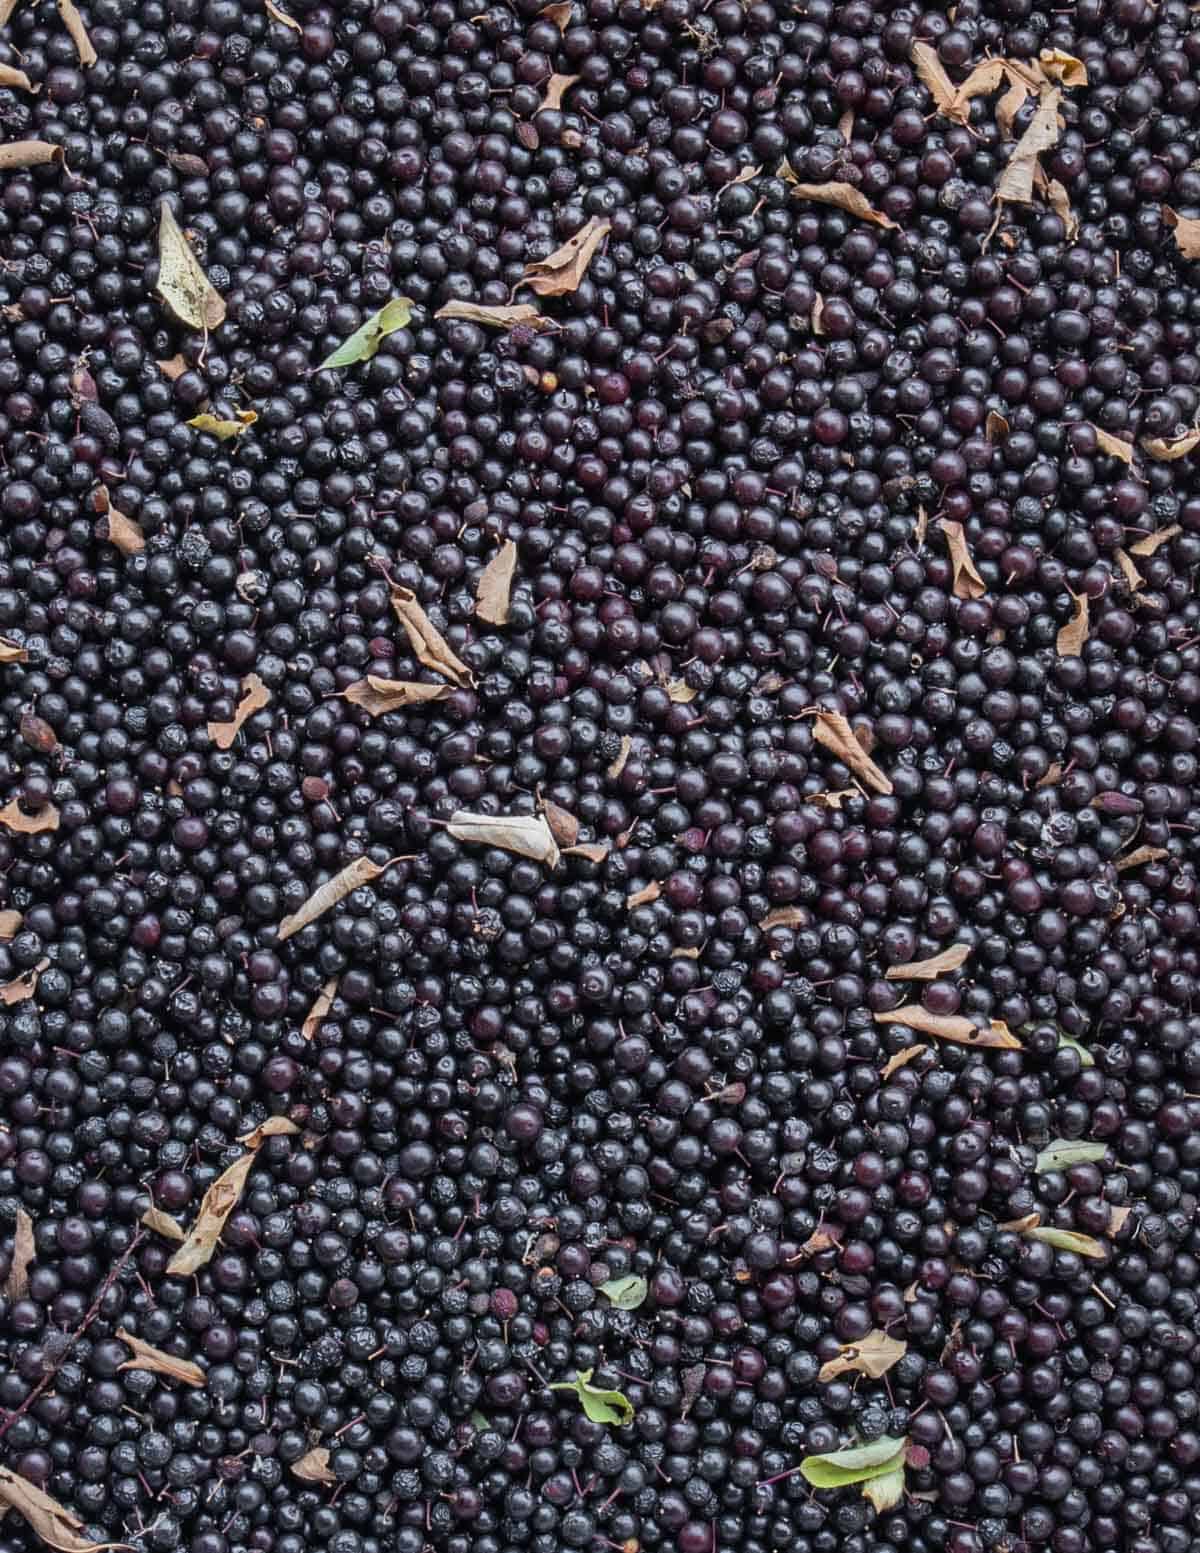
It can also be confusing as some cherries will ripen unevenly on the tree due to different circumstances such as how much sun they get.
How to Make Chokecherry Jelly
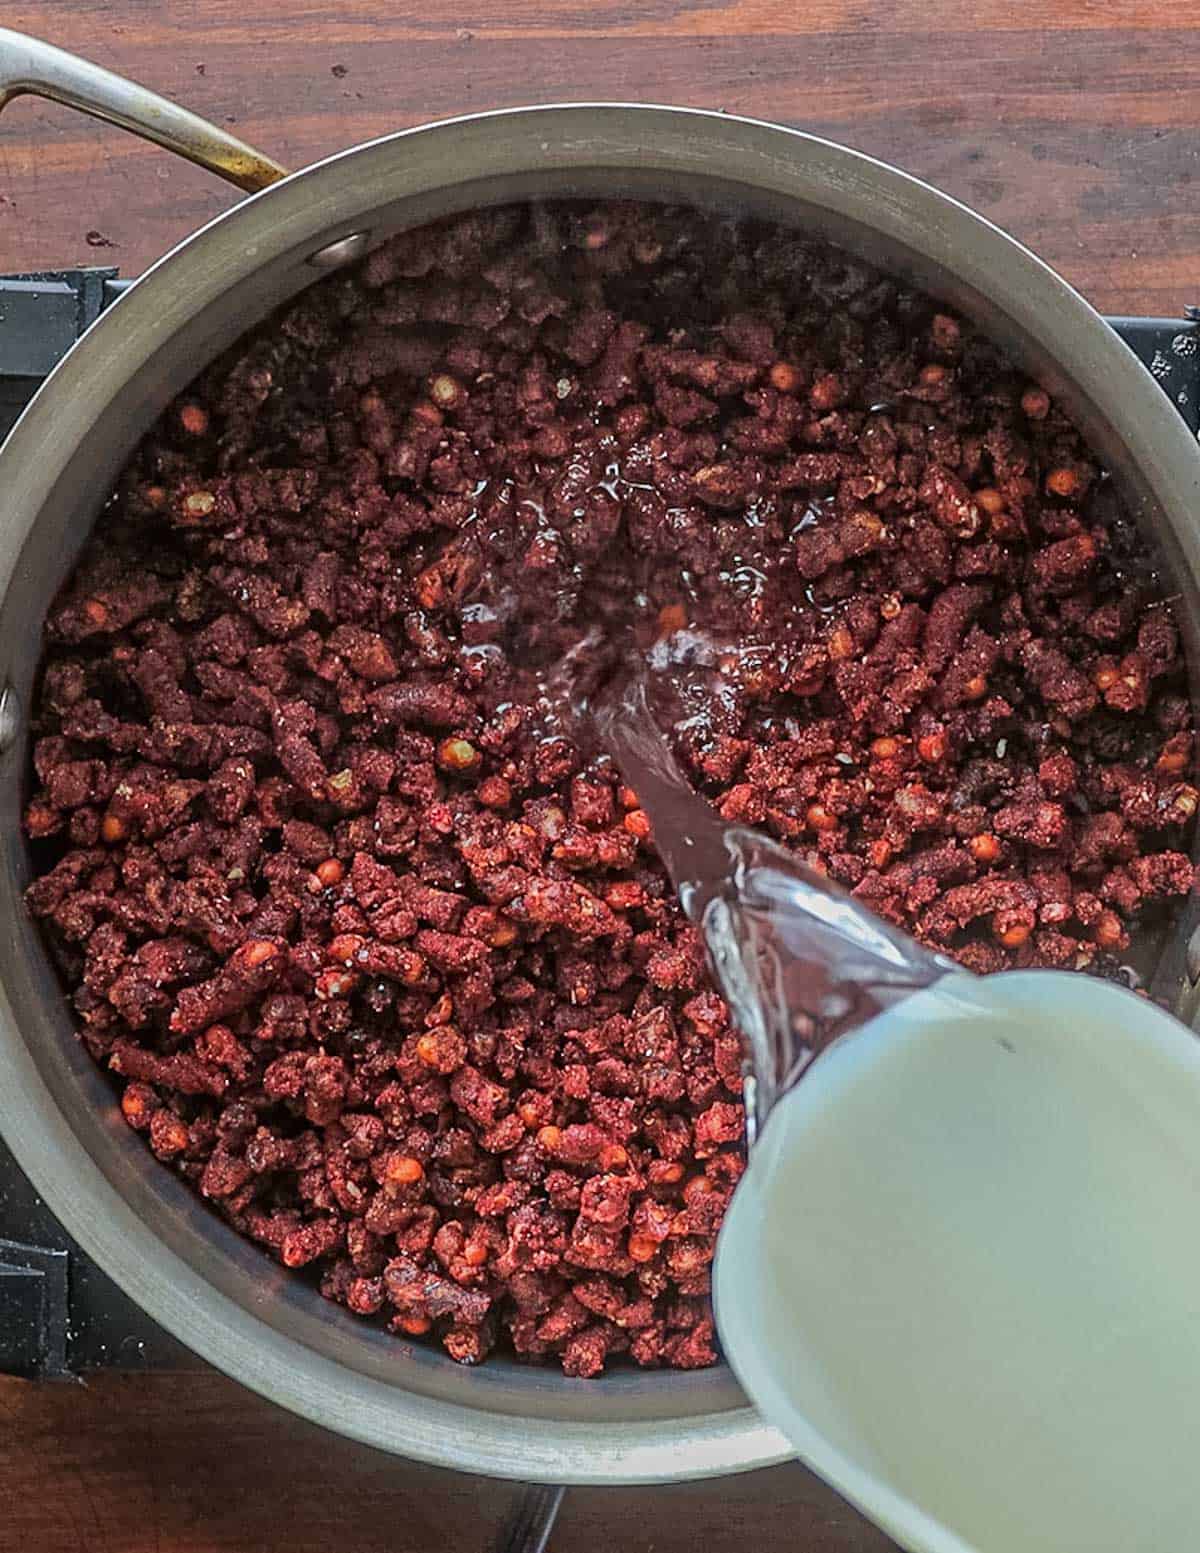
The first step to making choke cherry jelly is to make wild cherry juice. You'll need about 2 lbs of wild cherries to make a decent batch of jelly. The juice is made by mixing the cherries with water and cooking them.
I crush my cherries by putting them through a meat grinder like Grandma did, but you can put them in a pot with water to cover if you want-you don't have to grind them at all.
A few stones will get crushed this way, giving the jelly a subtle hint of almond extract. For those worried about cyanide, please refer to my post on cooking with cherry pits (and prepare to have your mind blown).

To make the juice, mix the cherries with water to cover and bring them to a simmer.


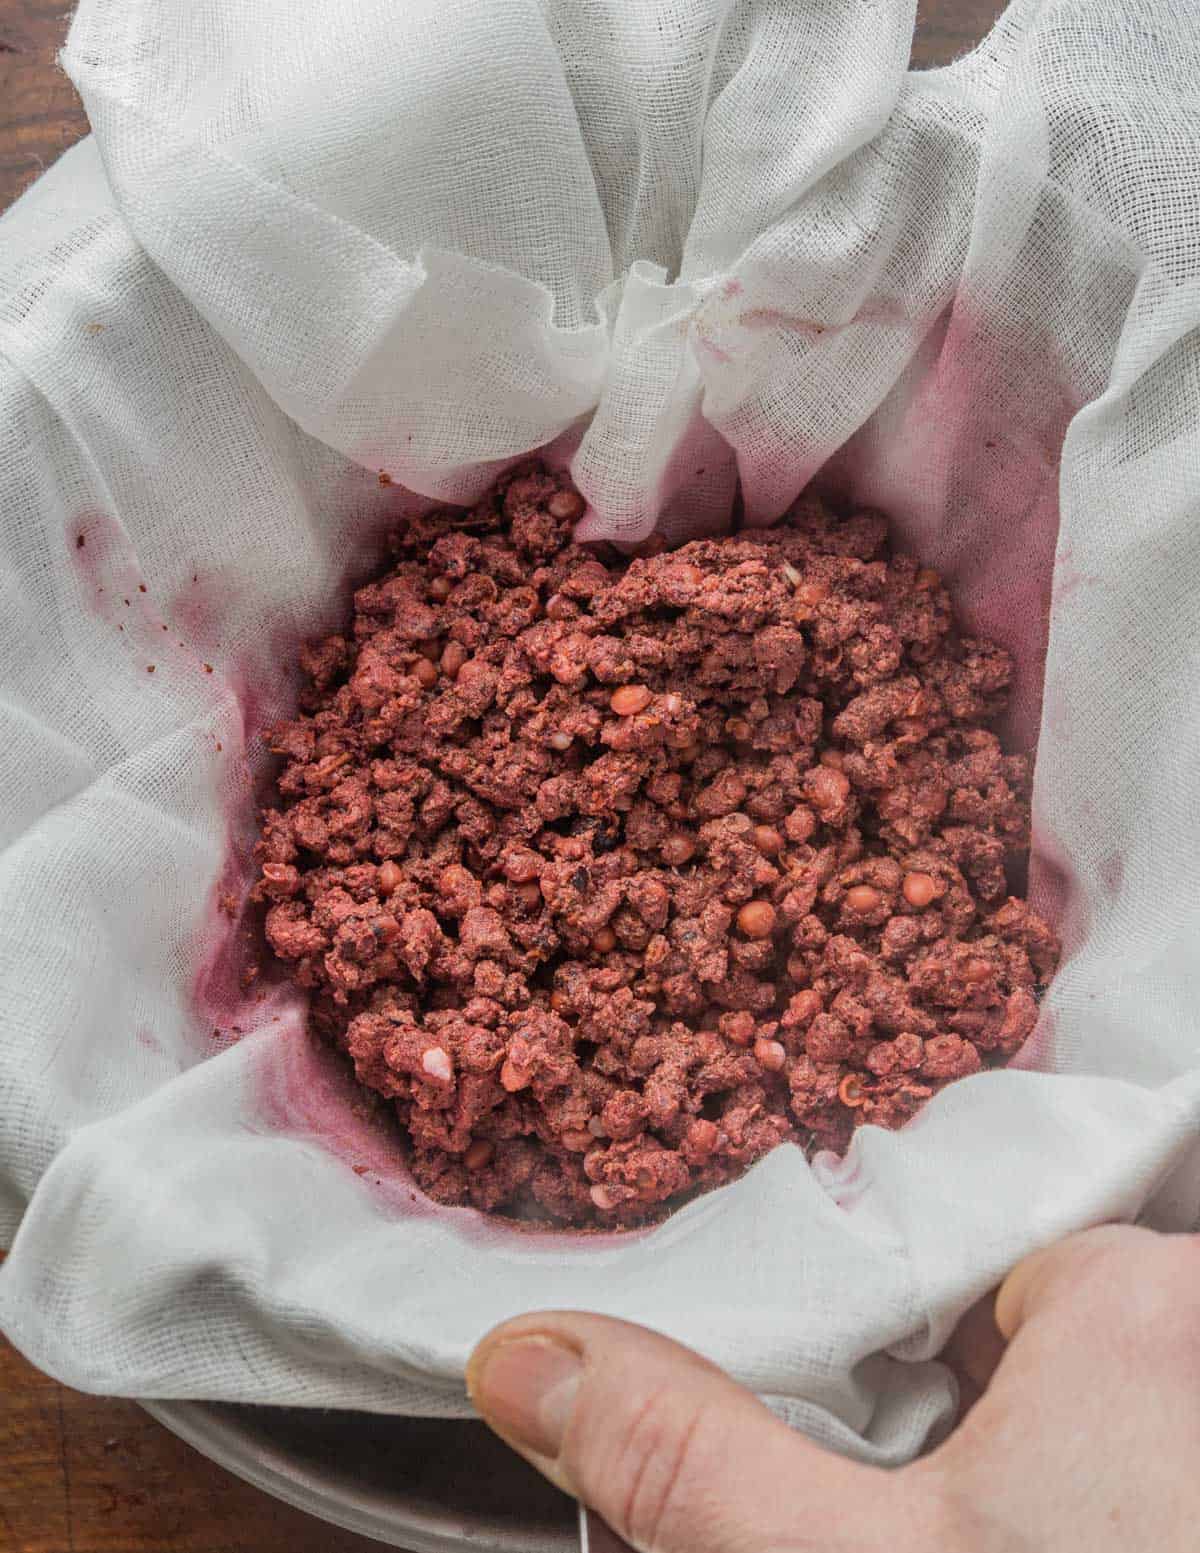
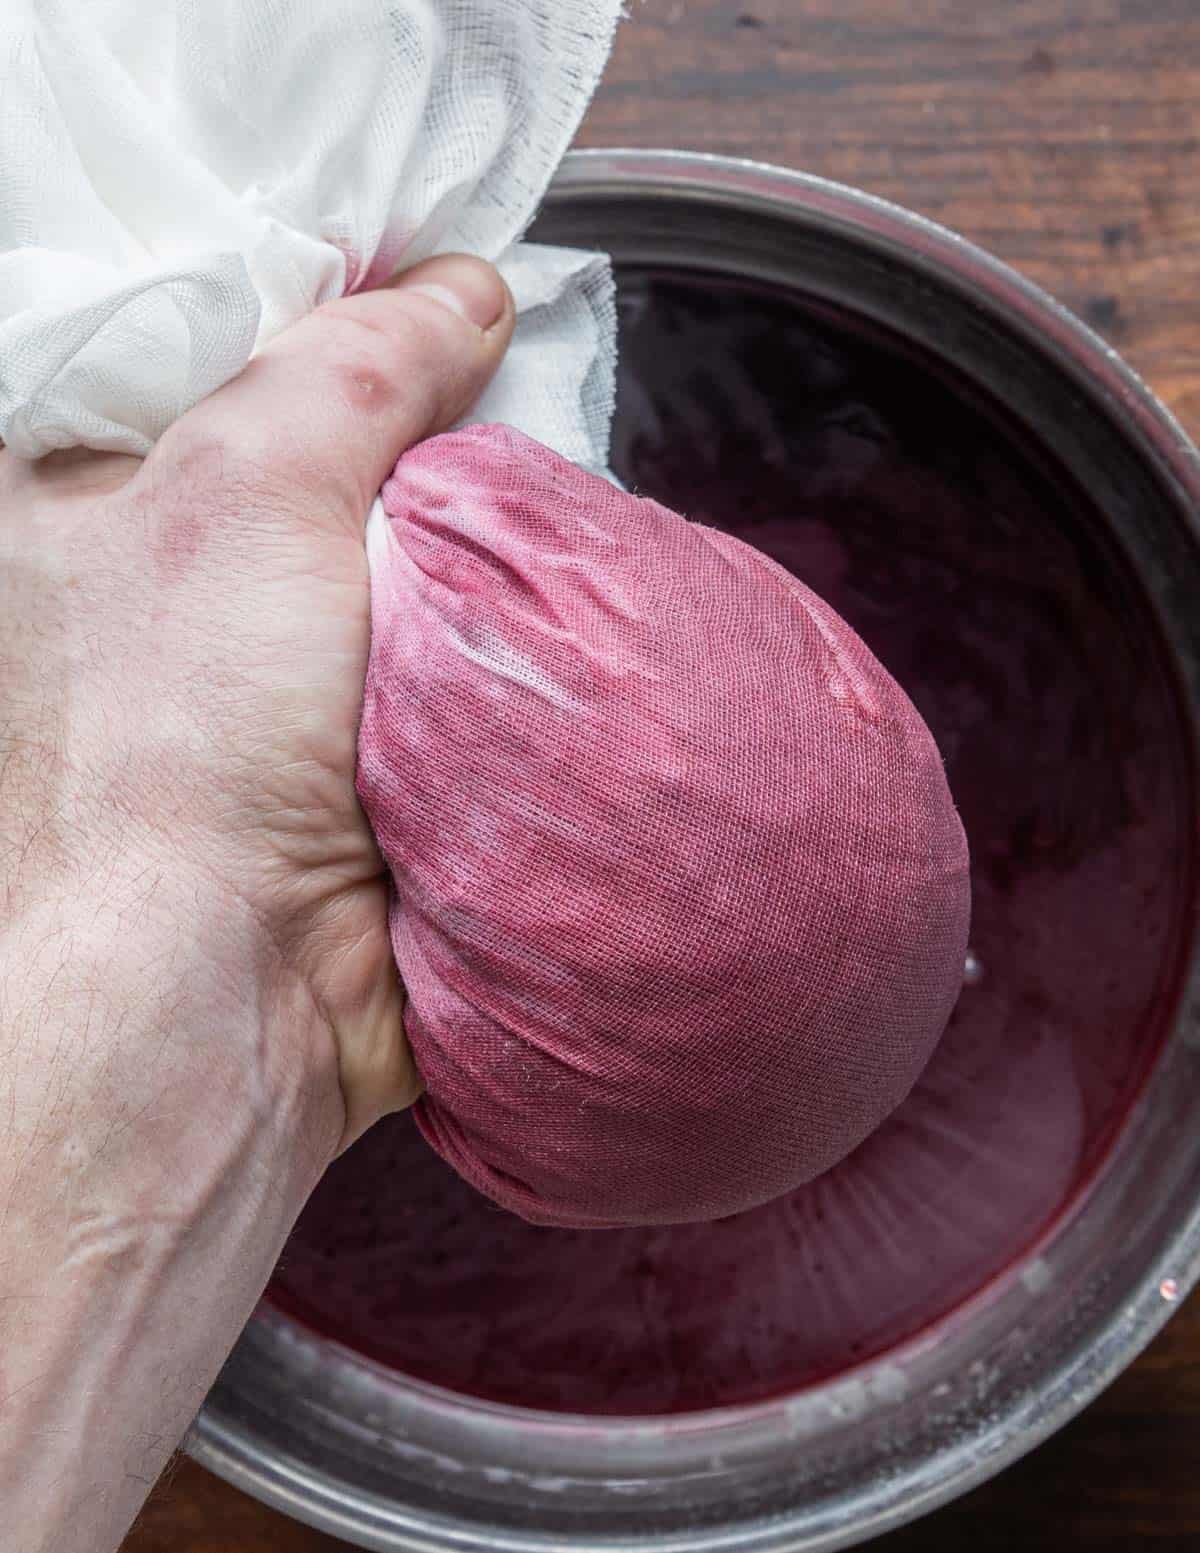
After twenty minutes, the cherries are strained and the juice is allowed to cool. I like to squeeze the extra juice from the fruit.
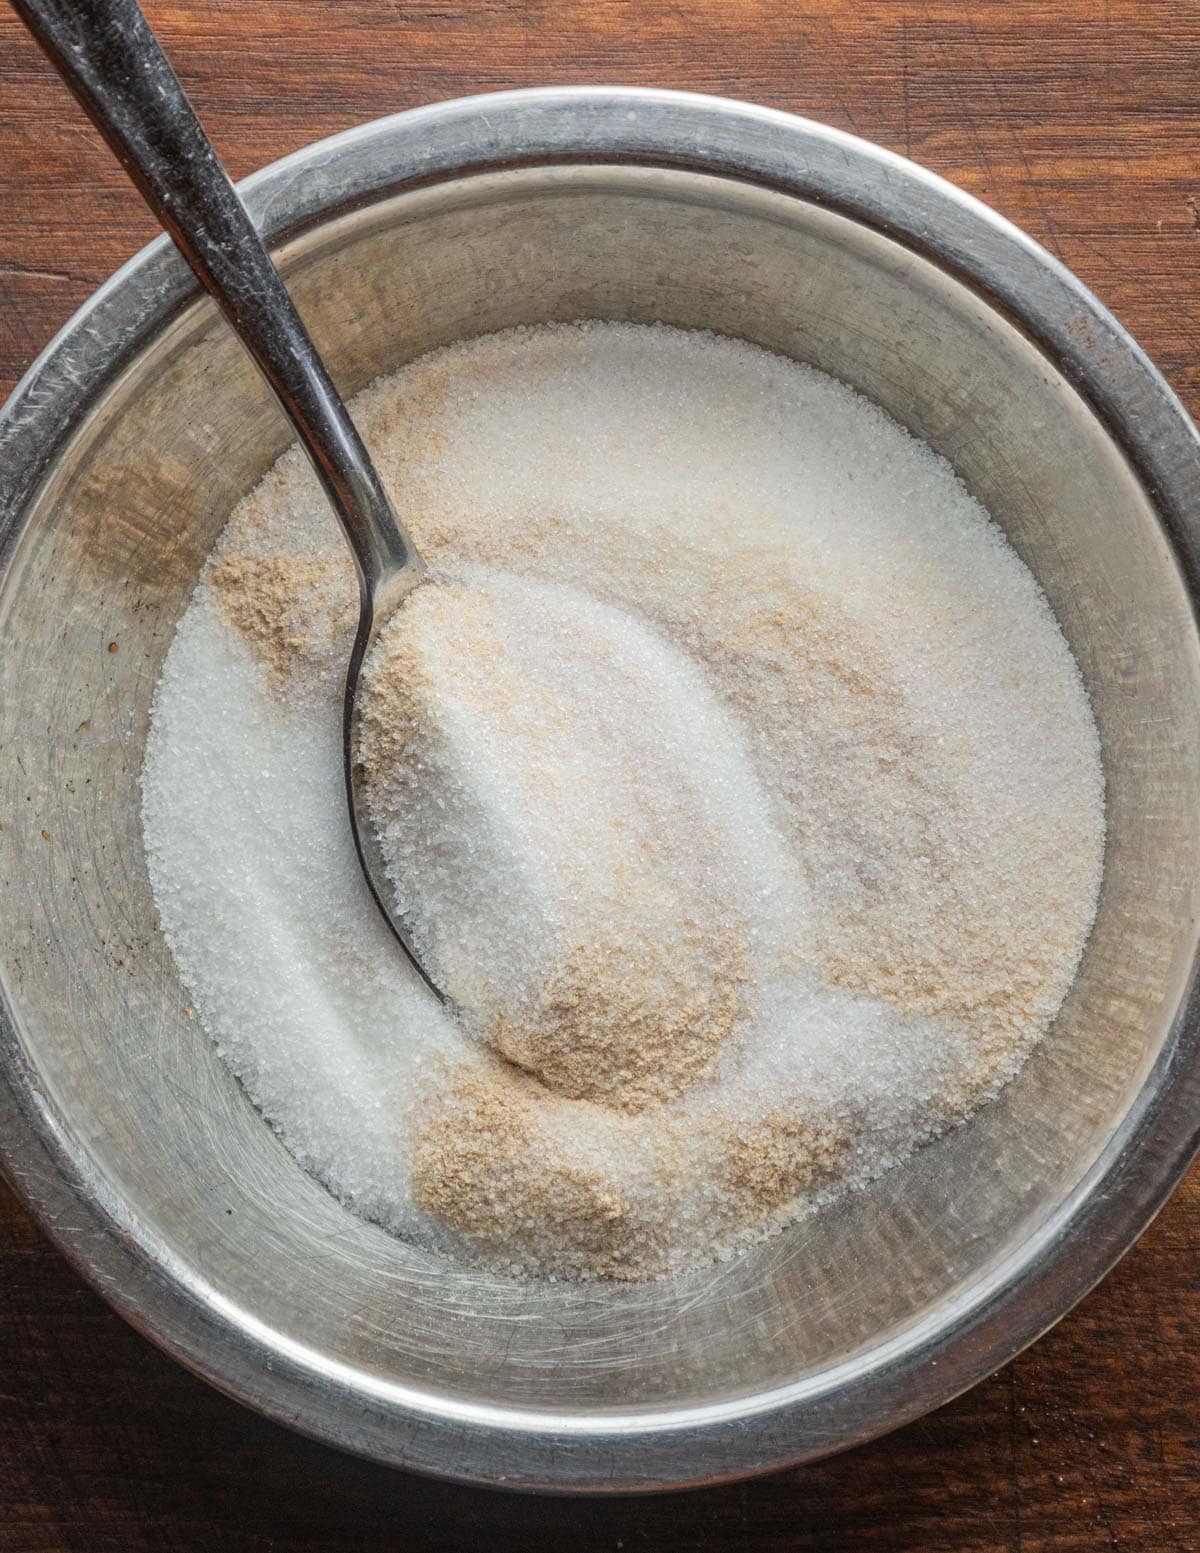
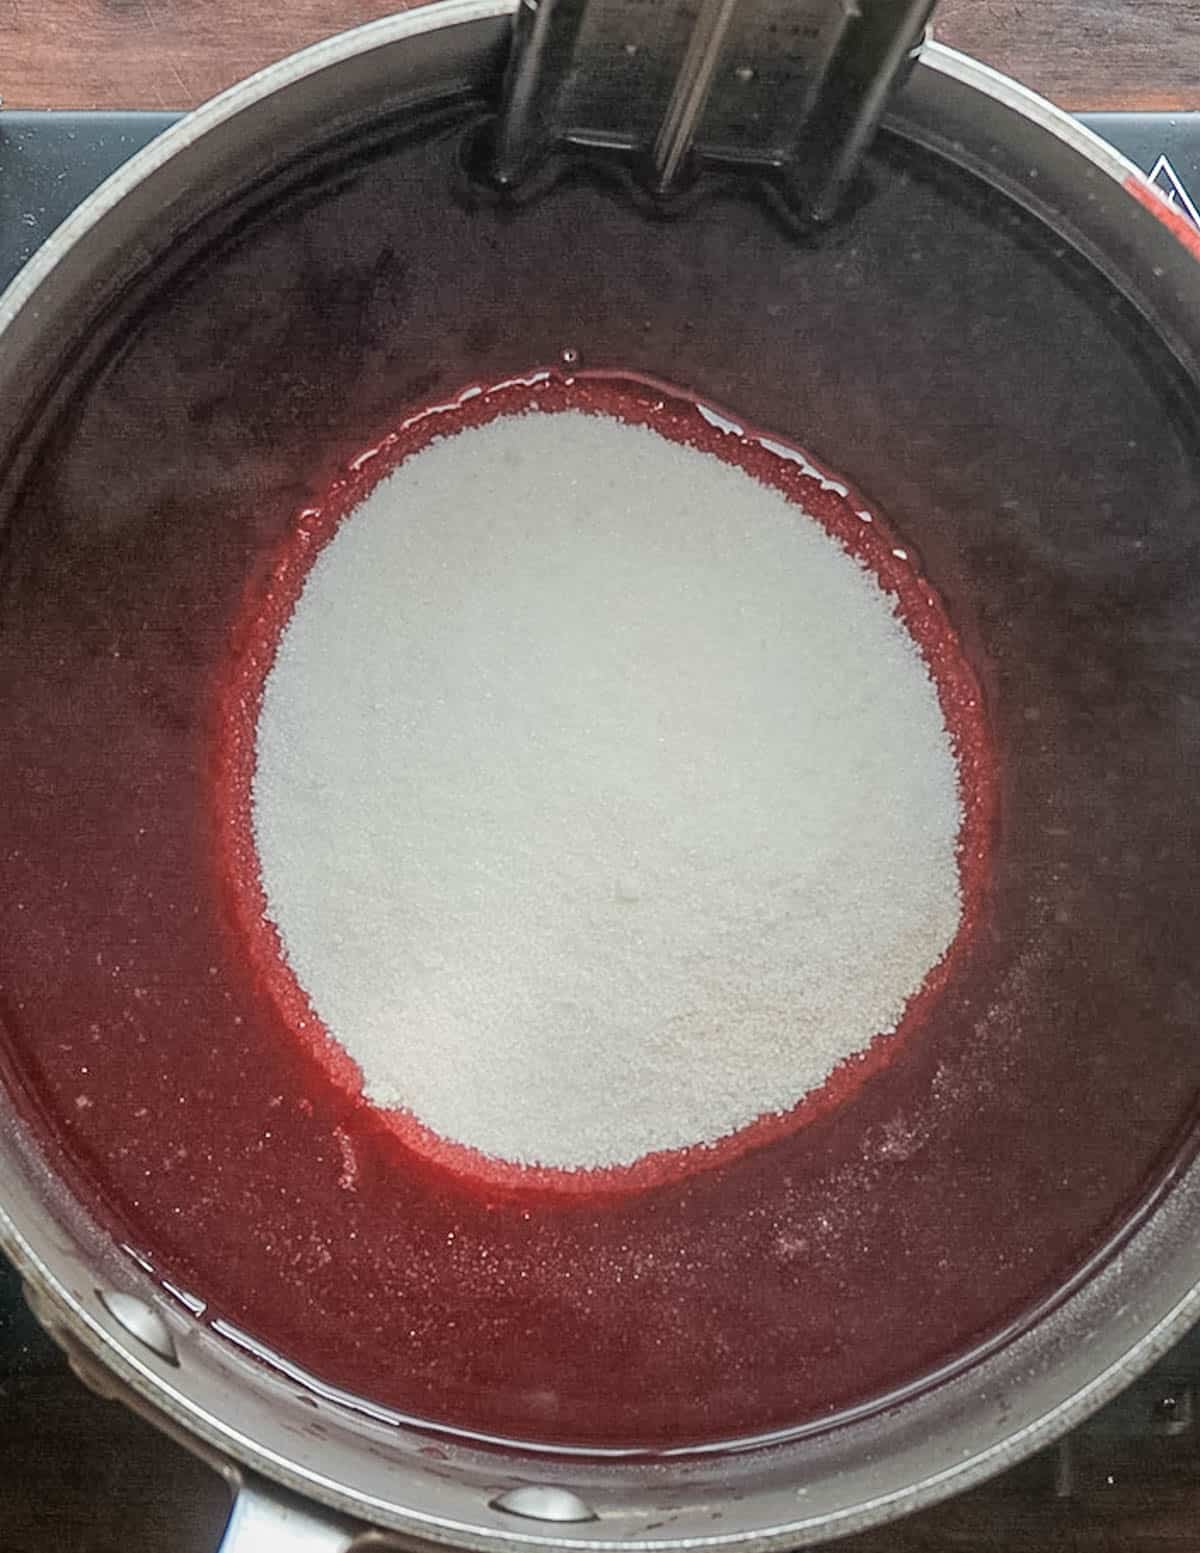
When the juice is cool it's mixed with sugar and apple pectin. I like to use Cuisine Tech Pectin, but any powdered apple pectin will work. The sugar-juice mixture is brought to a boil.
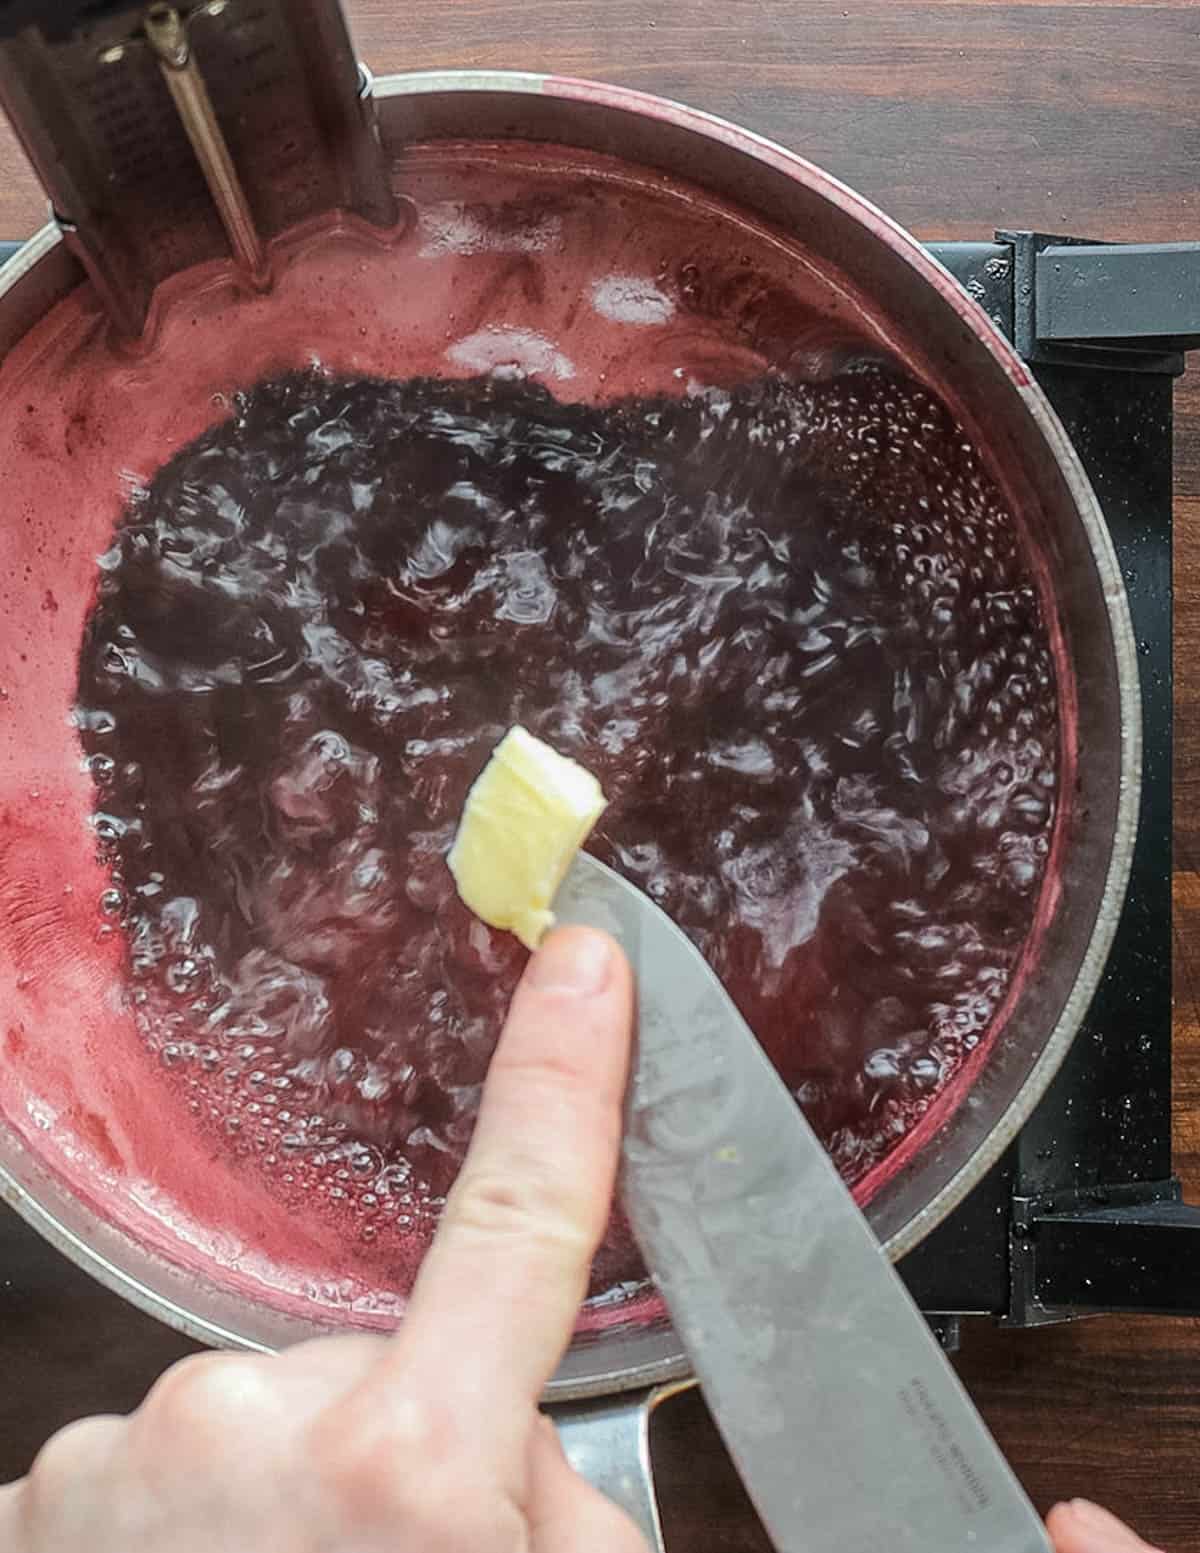
While the juice boils, it's important to skim any impurities from the surface. You can also add a knob of butter to prevent foaming and creeping up the sides of the pan.
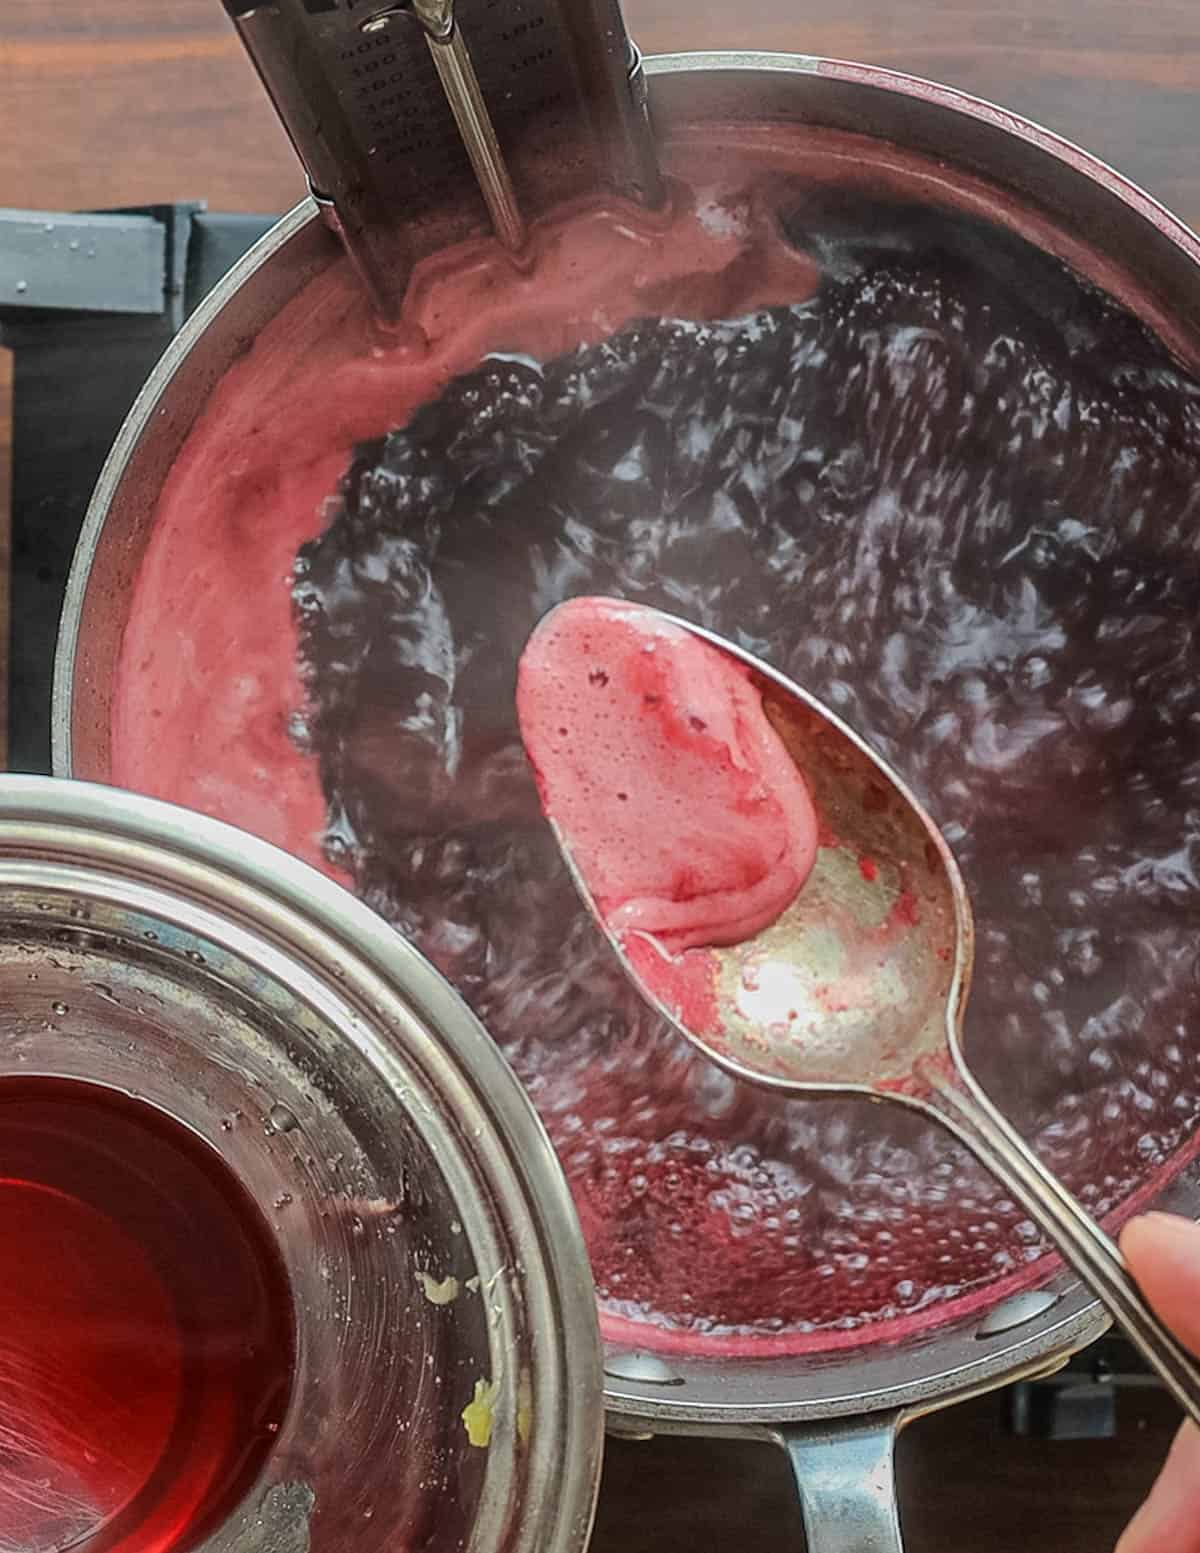
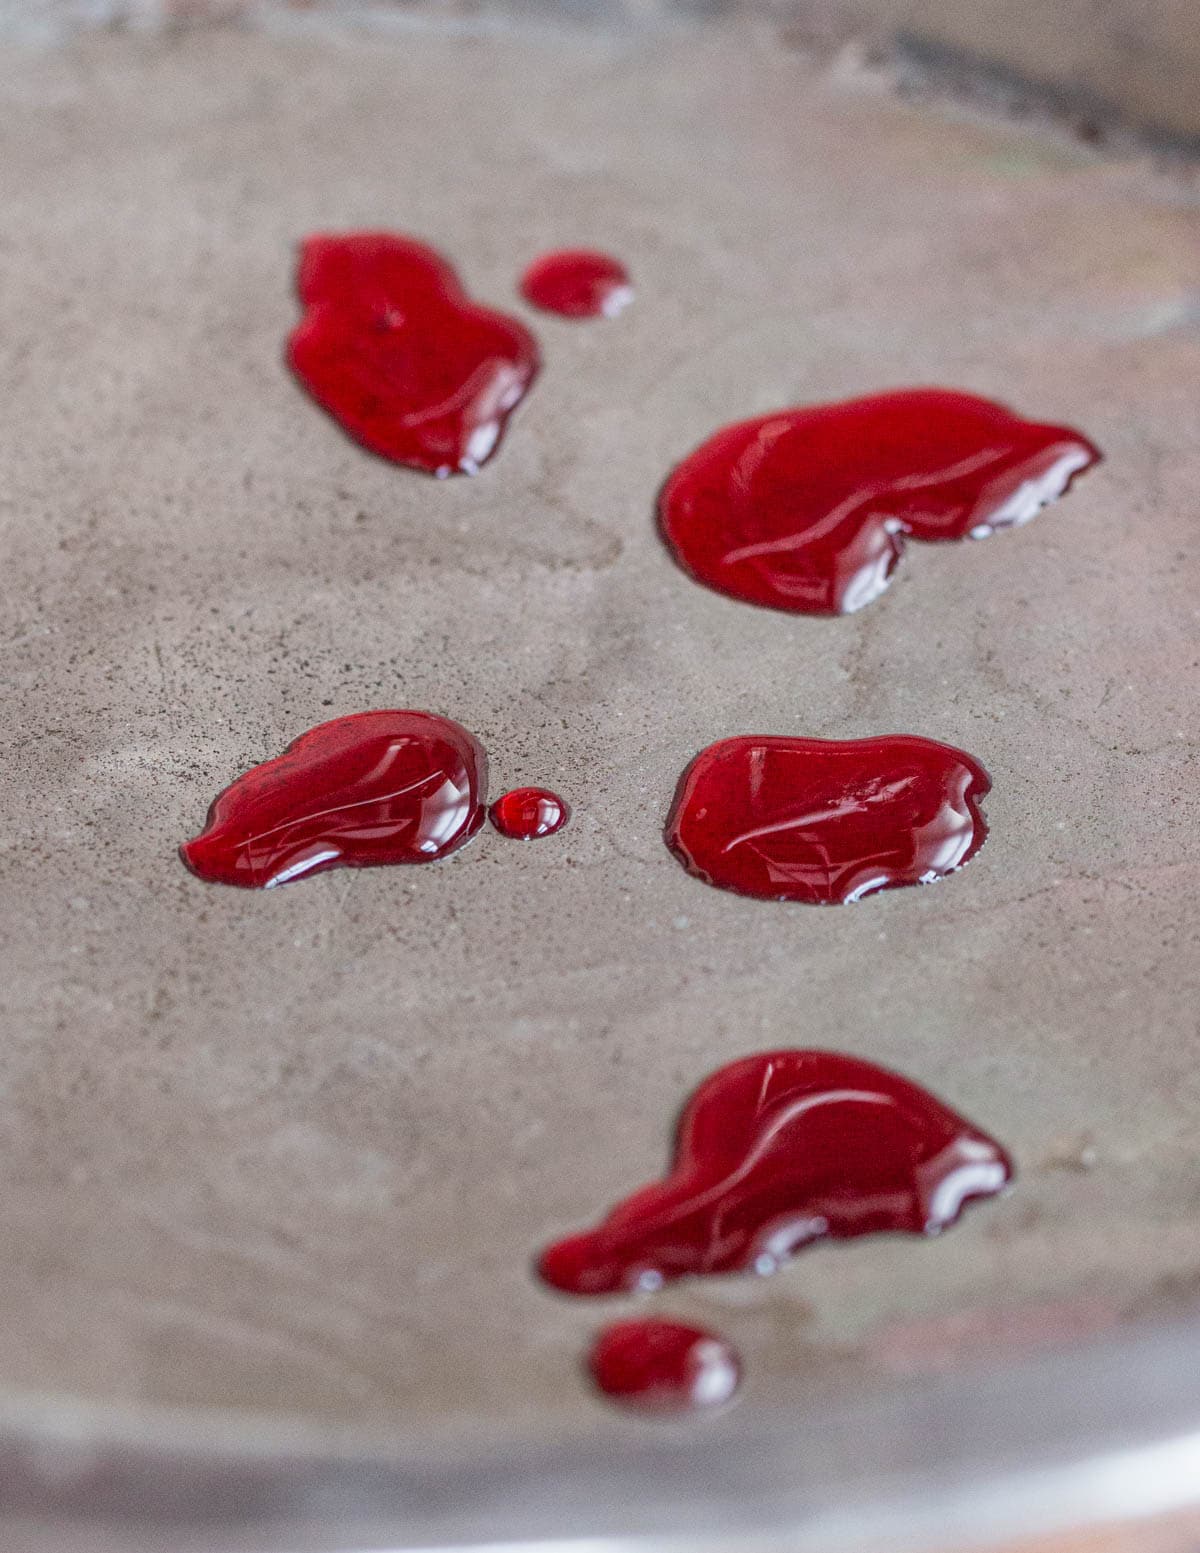
Once the juice starts to hover around 220 F it's time to do set tests. Spoon a teaspoon of jelly onto a small metal pie plate or something similar held over a bowl of ice.
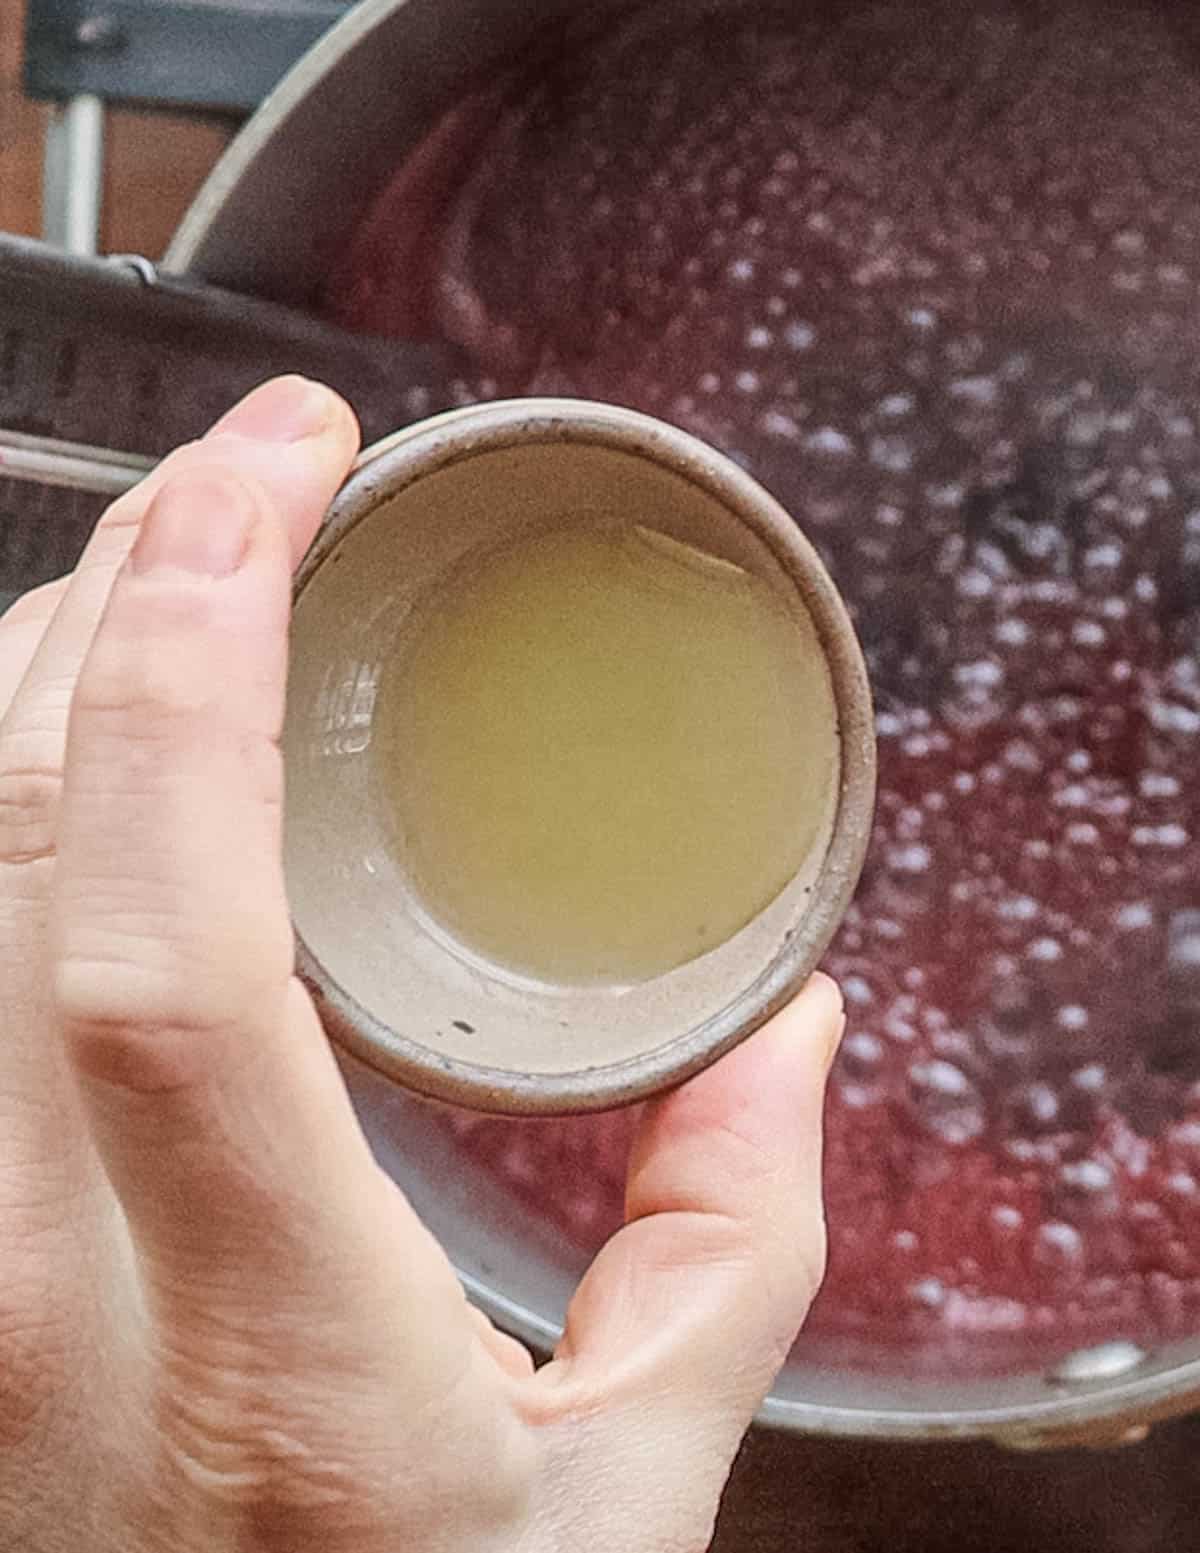
Once the jelly passes the set test and is around the correct temperature, turn the heat off and add the lemon juice.
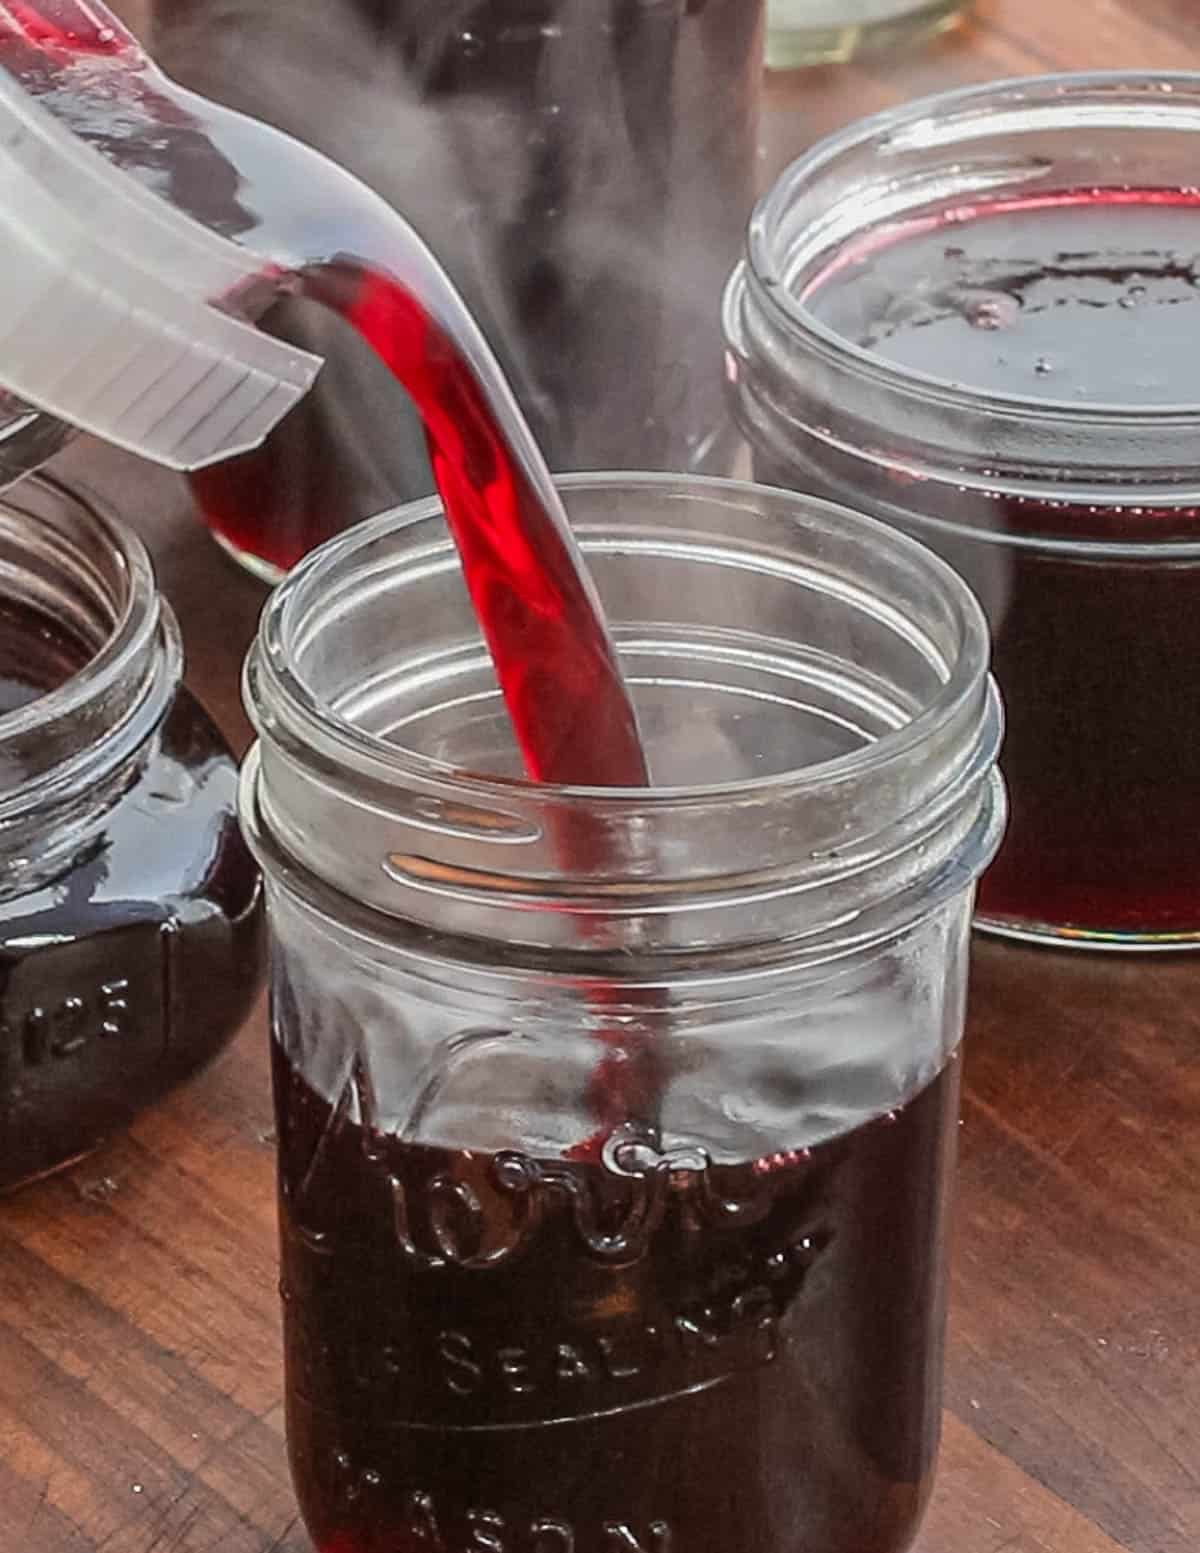
Then the jelly is poured into clean mason jars. From here it can be stored in the fridge for a month, or the jars can be processed in a water bath for long term storage.
Canning Chokecherry Jelly
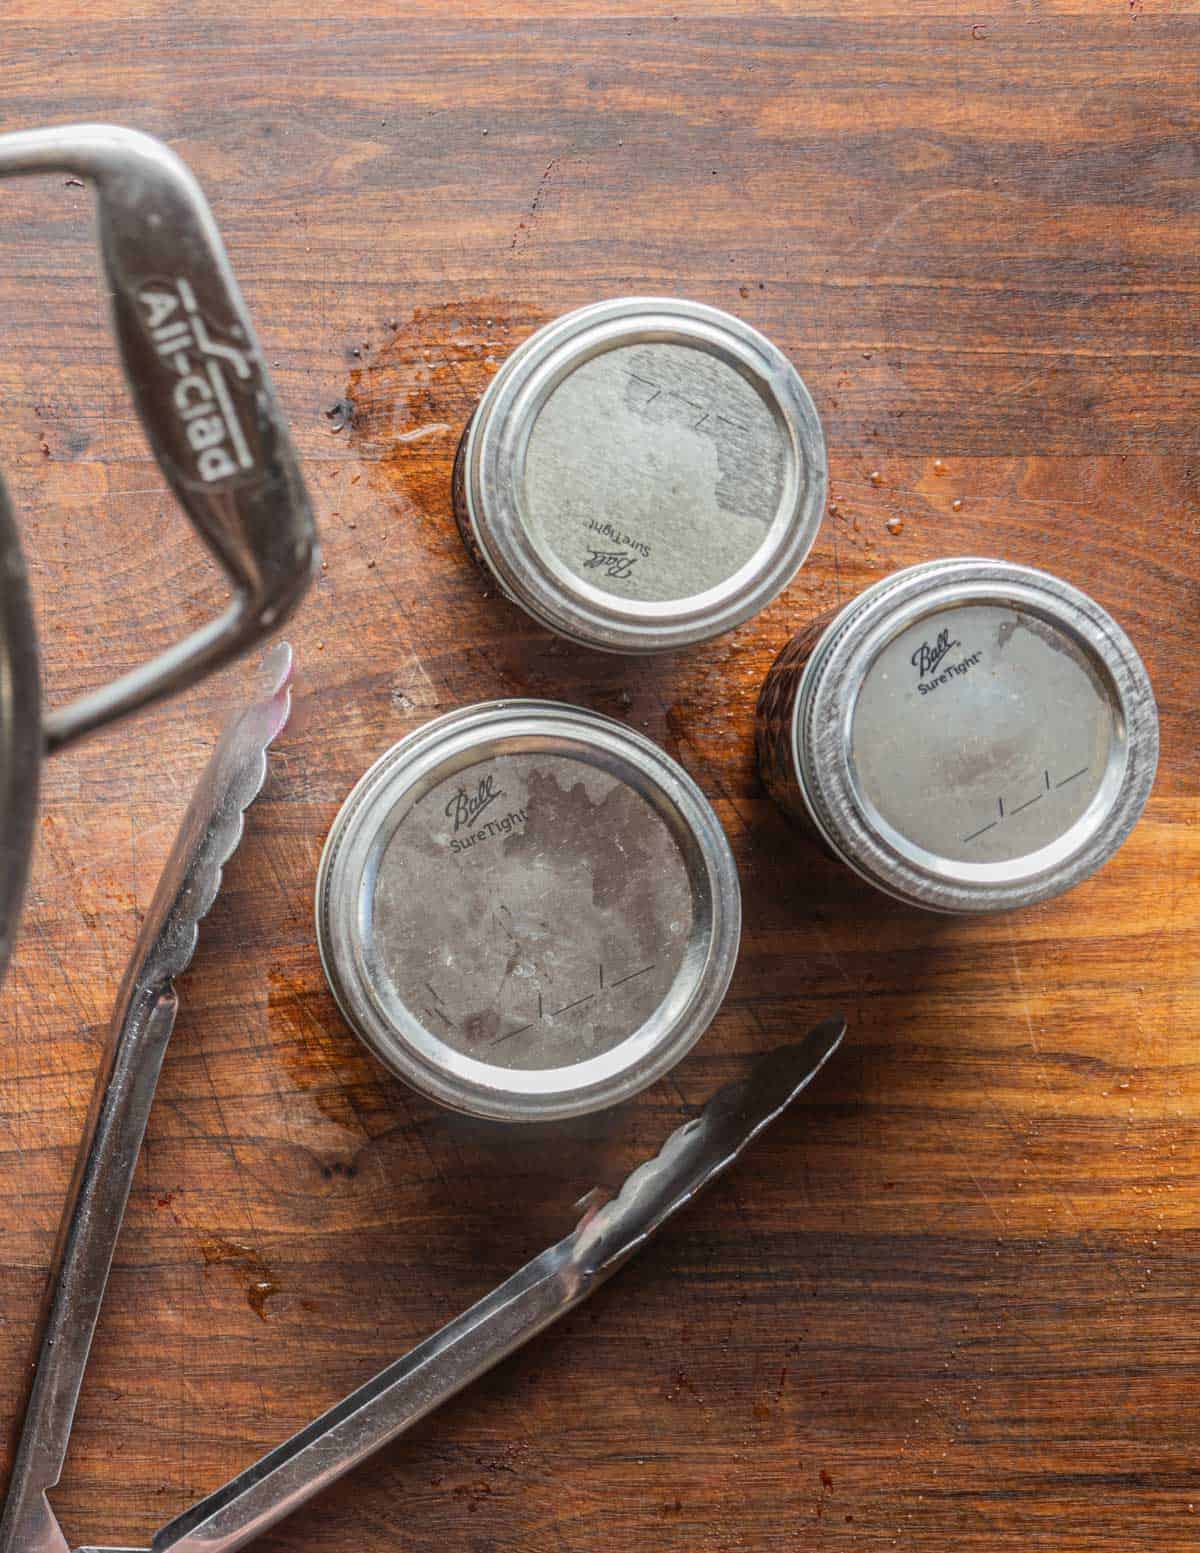
The canning process is the same for other preserves. Wipe the rims of the jars clean and screw on the lids.
Bring a large pot of water to a boil. It's important that there's enough water to cover the jars by 2 inches. Add the jars to the boiling water, put on a lid and set a timer for 10 minutes.

After ten minutes, remove the hot jars using tongs and allow them to cool on a counter. Finally, label and date the jars and store them in a pantry.
More Wild Fruit Preserves
Classic Chokecherry Jelly
Equipment
- 1 Large pot or water bath canner for canning, optional
- 1 Metal pie plate over a bowl of ice for doing set tests, optional
- 4 half pint mason jars
- 1 4 quart non-reactive cooking pot such as stainless steel
- 1 Meat Grinder For grinding the cherries, optional
- 1 Strainer or colander
- 1 2ft x 2 ft piece of cheesecloth or a jelly bag
Ingredients
Classic Jelly
- 2 lbs Ripe chokecherries or 4 cups chokecherry juice Equal to 6.5-7 cups fresh or frozen wild cherries,
- 3 cups water just enough so the fruit is barely covered
- 4 cups sugar
- ¼ teaspoon Kosher salt
- 8 teaspoons Full strength powdered apple pectin such as Ball Classic Fruit Pectin
- 4 teaspoons Lemon juice
- ½ tsp Unsalted butter optional, to help prevent foaming
Cherry Pepper Jelly
- 2 Habanero peppers seeded and finely chopped, optional
Instructions
Make the Chokecherry Juice
- Wash and clean the cherries if needed.
- Grind the cherries in a meat grinder or mash them with a mallet, etc.
- Combine the cherries and water in a tall 4 qt cooking pot.
- Bring the cherries to a simmer over high heat. Turn the heat to low, cover and cook for 20 minutes.
- Meanwhile, put the pectin in a bowl, add sugar, salt, and mix well.
- if you're more comfortable using liquid pectin like Sure-Jell that's fine too, just follow the directions on the package.
- Strain the chokecherry juice, squeezing the juice from the cheesecloth to get as much juice as possible. You can dehydrate the pits and flesh if you like.
Make the Jelly
- Cool the cherry juice to room temperature, then combine with the pectin-sugar mixture in the 4 qt pot. If you want to make pepper jelly, add the peppers now.
- Bring the cherry juice mixture to a full rolling boil. Make sure to skim impurities from the top as they appear.
- Add the butter if using to help prevent foaming and overflowing.
- Cook the jelly until it reaches 220F on a thermometer.
- When the mixture hovers around 220F begin doing set tests, spooning a teaspoon at a time onto a frozen plate, like a thin pie tin held over a bowl of ice. It shouldn't take long, but I typically get it to set a degree or two past 220F. Doing set tests is the most important skill to master here.
- When the mixture holds its shape and shows threading and beading / sheeting (watch the video for a close up shot) remove from heat, beat in the lemon juice and pour the jelly into jars leaving ½ inch headspace at the top.
- Wipe the rims of the jars and screw on the lids.
Canning the jelly
- Prepare a water bath canner. Bring a large pot of water to a boil filled with enough water that the jars will be covered by at least 2 inches.
- Put a lid on the pot and boil the jars for 10 minutes or the recommended time for half pint jars according to your elevation relative to sea level.
- Remove the jars from the water bath, label, date, and store in a pantry. Any jars that don't seal should be refrigerated.
Jane
Hello, I read your article on cherry pits and cyanide and all that. I may have missed it but all the examples of making ground chokecherries safe seem to be from dry heat specifically. I put my fresh chokecherries through a meat grinder and the almond smell was Astonishingly strong. My whole apartment smells great now but makes me deeply concerned.
The pits are crushed to tiny bits too and even after boiling for 30 minutes it seems quite strong. All the other online recipes and research have mentioned trying to keep the kernels as whole as possible even if you grind it, since the crushing releases the amygdalin or whatever compound that turns into cyanide. And apparently boiling doesn’t degrade all of it.
Alan Bergo
The cherries simply need to be cooked. The only danger here is if you were to puree whole, raw wild cherries in water and drink it, or eat them by the handful after crushing, which would prob crack your teeth. Remember that the jelly is also processed in a water bath after boiling so it's technically cooked twice. It's perfectly fine, just less documented than the indigenous methods of processing and drying in the sun.
Mike
I'm looking forward to trying this recipe. My mother used to make fantastic chokecherry jelly when I was younger, so I'm hoping this will turn out just as well. I'm wondering if it's okay to boil more cherries initially (as long as they are just covered in water) to have more juice to work with? I would hope to have 8 cups of juice after cooking, and then do 2 separate batches with your listed recipe. Would that affect the outcome?
Alan Bergo
Yes that should be fine.
Russell Nelson
OK, so Alan- are there any scaling protocols? I would like to make jelly at the rate of about a case- to two cases- of jars at a time- or maybe a case of whole pints, not half pints. I'm interested in making jelly- as all I've ever done with my chokecherries is make syrup or use it to infuse vodka- but the prospect of only 5 half pints to a batch is a deal killer. Not that I'm looking at going into production, but I'd like to turn out at least a case at a time. I know it possible since, while they don't do chokecherries, Welch's probably doesn't do jelly at 5 half pints to a batch. So how do you scale it up?? Straight linear progression doesn't work, I tried that with saguaro fruit and got a lot of cactus syrup when I was trying to make jelly- Thoughts??
Alan Bergo
Hi Russell. Scaling is tricky with jelly, jams is easier. 5 half pints is more than enough for most households, but I totally get wanting to do a bigger batch. Here's my advice:
1. Start with 2-3X batch to get the hang of it so you're not blowing your whole harvest if it doesn't set.
2. Make sure you use a large, wide pan, wider than you typically would use for a 5 half pint batch.
3. Pectin starts to degrade the longer its cooked, so you may need to add more if you're doing a batch larger than 2-3x. a double or 3x batch should be ok, but I haven't done them that big, although I have friends who sell jelly, but they rent a commercial steam kettle for the purpose. Another person I know swears by copper jelly pans as they conduct heat more evenly.
4. The cooking will take much longer than a typical recipe as you're evaporating water out. You could be boiling it for 30 minutes or more.
5. The most important are the set tests. While jelly is typically going to set at 220F or a degree or two over, you need to keep cooking it until you can visually see the set on a chilled plate.
6. Most jellies I've had made by home cooks doing large batches have been more firm and don't have the supple set of smaller batches (talking about multiple gallons here).
7. The faster the jelly boils, the better your chances are. If you have access to a large outdoor burner on a propane tank this would be my first choice for doing large batches as it's soo much more heat/power than a home stove. They're about 100 $ on AZ. I use this one.
Janice S
This worked like a charm. I will add I've been making jelly for many years (I'm nearly 70) and for those who have difficulty getting it to set, most of my jellies need to go up a little over 220F and yes you must test the set on a very cold plate but if the plate is put over ice it can sweat which makes it difficult to see the drops of jelly. It takes longer to cook than you think and you can't just bring it to a boil to 220 and put it in jars. Hope that helps!
Monica
Hi Alan,
Followed the recipe but missed the lemon juice. My jelly turned out like syrup. How do I fix it.
Thanks,
Monica
Alan Bergo
Hi Monica, you do need to add the lemon juice as the citrus helps the pectin set. You can empty the jars into a pot, add another 1/2 cup water, 1/2 cup sugar mixed with another 2 T pectin and repeat the process. As another commentor who had good results mentioned recently it's really important to do the set tests. The jelly needs to hold its shape and not run like water.
Peter Nielsen
You mention in steps to use the butter if you plan to for foaming. What butter? Ingredients dont call for butter.
Alan Bergo
I don't just mention it, it's actually in the recipe, video, and in the instructional images. It's optional.
Newbe canner
I thought chokecherry pits contained cyanide so they should be mashed not ground up.
Alan Bergo
Hello, as I mention in this post, and in other posts linked here, as well my book, this is true, but it only refers to the stones when they're raw. Please read the article linked in this post on cooking with cherry stones, everything will make sense. Indigenous people's of the great plains have used wild cherries in their entirety for thousands of years-always dried and cooked.
Kellie
Hi Chef- my choke cherry jam is more like choke cherry syrup… I can’t get it to set. I’m using Mrs. Wage’s fruit pectin and have tripled the amount with zero success. I still have at least 4 batches to go…(we had a bumper crop apparently) EEK!
I can only eat so many crepes, pancakes, waffles. Please advise. Thank you!
Alan Bergo
Hello. I’ve never used this fruit pectin before, but using that amount should be fine, and is probably a little overkill on the pectin. Since we know you're using enough pectin, If it’s not setting then you need to pay attention to your set tests and temperature, that allows you to see the changes in the consistency in real time. Like another reader did you could also add chopped granny smith or green crab apples to the mix for added, strong natural pectin. I would start with 1 lb of grated green apples or 8 oz crab apples, including skins and seeds, if I did that.
Theresa
What what point would you add in the shredded green apple?
Alan Bergo
You would add it during the preliminary cooking of the fruit, then it is strained out. On a separate note, I made this again last night with cherries I picked using Classic Ball Pectin for the first time and I actually found it easier to use than my fancy chef pectin, for what it's worth.
Ariana
I would LOVE instructions on making a crab apple/chokecherry jam with no pectin!
Rachel
Ever used honey to replace the sugar?
Alan Bergo
I haven’t. The only thing I could really tell you here is that if it would work it would be a very cloudy jelly.
Val Bennett
I'm using powered certo. Do you know how much I would need to add per receipe?
Alan Bergo
Hi Val, Certo isn't as strong as the full strength apple pectin I use so I would use 8 teaspoons for 4 cups of juice. Keep me posted on how it turns out for you.
Smart farmer
It's a known fact that the pits are poisonous. Why are misleading people to get them sick? You are all idiots if you believe uou can eat the pits..Happy Hospital Trip.
Cheers
Alan Bergo
Hi Darla, thanks for commenting. I wrote an entire article on cherry stones, with plenty of documentation about how they're used as a seasoning around the world. The seeds are problematic raw, but cooking makes them safe. Ground cherry pits are sold on Amazon under the name mahlab/mahleb. I also wrote about this in my book and in my recipe for Siberian Bird Cherry Cake which is literally made with half ground cherry stones and half flour. It's ok to learn something new.
MDD
Help !
My choke cherry jelly set too stiff !
Can I melt to reuse and dilute ?
Alan Bergo
Hi Marilyn. This should work. If you find a proportion of water that works for diluting please share for others on here in the future. Jelly making is a learned skill, I overcooked my elderberry jelly last year.
Brooke
I have choke cherry and crab apple trees in my backyard. I’m curious how you use the crab apples instead of the pectin.
Alan Bergo
It’s an old school trick. Cut up a handful of green until crab apples and cook it with the chokecherries.
Brooke
I have choke cherry and crab apple trees in my yard. I’m curious how you use the crab apples instead of pectin with the cherries.
Cheryl
Amazing! Thank you for sharing such a spectacular recipe. This was simply the best chokecherry jelly I've ever made. Tossed in a handful of underripe crab apples and shorted the pectin. Will make my own pectin for the future but simply ran out of time for this batch. Definitely a keeper. Thanks again!
Alan Bergo
This is a great workaround for if you're low on pectin. Thanks so much for sharing Cheryl.
Eric Nelson
Thanks for this recipe. I have made chokecherry jelly previously, but I'm intrigued about your information about grinding the whole fruit with pits to add almond flavor. I don't have a meat grinder. Is it ok to use a blender instead? Also, are you certain that the cooking process in making the jelly denatures the toxic compounds? This scares me a bit. Is the almond flavor noticeable in the jelly?
Alan Bergo
HI Eric, the almond flavor is subtle and not life changing, but it's cool. As for safety, I could be sued for information I share online, so it's not in my best interest to put myself in that position if I'm not experienced and versed in what I'm talking about. Of course it's safe, just don't try to juice chokecherries in a blender and drink it like a raw shake-someone did that recently and had a fun time at the hospital. Please read my longer article on that topic: Cherry Stones: a Traditional Almond Seasoning I also make a liquor from the stones. And I make an entire cake made with half ground cherries including the stones, which is also in my book.
Darcy Murray
I am getting ready to make chokecherry jelly and came across your post. I really like the idea of adding heat to the jelly - at what point do you add the habanero peppers?
Alan Bergo
Hi Darcy. If you read the recipe it’s in the steps there. You add them along with the sugar when it’s time to make the jelly. Great with cream cheese, obviously! 😋
Darcy Murray
Thanks Alan -
The recipe and instructions were very clear, it was my brain that was addled, not sure how I missed the step! I have successfully made the recipe, with the habaneros, and it is delicious. The flavour of the chokecherries and the peppers is a great blend and a nice change from pepper jellies I have made in the past.
10/10 recommend
Alan Bergo
Hey thanks Darcy glad it worked for you!
Chevonne Hall
Thank you for this recipe. I can't wait to try it! In step 1 of "Make the Jelly" it says let the juice cool - how long do you let it cool or what temperature are you looking for? Have you ever added almond extract to give a better cherry taste?
Alan Bergo
Hi Chevonne. You can just cool the juice to room temperature. If you're experienced making jelly you can also go for it right away, the cooling here is to help ensure there's no clumping or lumps from the pectin, but, mixing it with the sugar usually takes care of that. I wouldn't add almond extract here, the flavor of the chokecherries is good by itself and doesn't need any fancying up, imo.
A friend
Be aware that Chokecherry pits contain cyanide. Ingesting the pits can make you sick or even kill.
Alan Bergo
Cherry pits do contain a number of compounds.
They’re also a traditional seasoning used around the world that’s heavily documented as a food. I’ve already written about this years ago in this article, and in my book.
If you want examples of how small wild cherries and their stones are used in cooking, my favorite recipe is the bird cherry cake, also in my book.
Jacob
Worked like a charm. I was hesitant to buy that expensive pectin you use but dang it’s solid. I’ll be doing this every year.
Heidi Opland
Thank you for posting about grinding the chokecherries first! You will only find warnings about arsenic and not to do it. I use an electric grinder that have holes big enough to let the pits through. Whatever gets cracked is in the auger. Not much at all. I live in North Dakota and have processed chokecherries for years along with watching my mom and grandma and it is the only way I have seen done( hand grinder). I use a small fruit press after boiling and it works wonderfully, along with straining many times through cheesecloth. Thank you once again for posting!
Alan Bergo
Thanks Heidi, I just love chokecherries. The birds stripped my chokecherries this year and I was so sad. Next year I may need to come out to North Dakota...
Mike
Might be a stupid question, but do you grind with or without the blade? Seems, to me, using the blade would grind more pits than allow to pass. What size disc?
Alan Bergo
Yes you use the blade. Some meat grinders won’t work correctly without the blade, esp home models. And no, it doesn’t grind too many seeds, actually it grinds surprisingly few and I’ve had to pass the mash through mine multiple times because I actually want more of the pits ground. Pick a disc size-it’s flexible.
Erin
Hi Alan, how much water do you add in with the chokecherries during the 3rd step? Thanks!
Alan Bergo
Just enough to barely cover them, you can get by with a little less if you grind them. 3 cups or so should be fine here. I adjusted that to read more clearly, thanks for pointing it out.
Bridger
I did some research and I’ve figured out it is my elevation that was throwing off the jell point and caused it to burn. I live in Wyoming and our elevation is just above 5,100ft. So my final temp will be closer to 200-205. Next batch should be better 👍🏻 Thanks for the recipe Alan!
Alan Bergo
Hey Thanks Bridger. Sorry I don't have much experience giving advice for different elevations.
Holly
Choke cherry pits conyain arsenic. That "slight hint of almond extract" is arsenic you are releasing from the pits. DO NOT crush or grind the pits, you have to remove them with other methods.
Alan Bergo
I've written about this at length online and in my book. There's numerous examples of different cultures cooking the stones of wild cherries and denaturing the problematic compounds in different ways. Try reading my article here before you freak out.
Heather F
Hey, I'm hoping you can help me get to the bottom of a chokecherry street tree id question. After making several of the (excellent!) recipes from your book with Black cherry/Prunus serotina (the bird cherry cake, the gastrique, the extract- all fab) I've been on the lookout for all the local cherries I could use. I'm in NYC and the Parks department has an official map identifying all of the street trees, so I was excited to notice a couple of trees marked as "Canada Red" chokecherry/Prunus virginiana. It has what I think of as Prunus family bark, and in the spring the leaves were green, with beautifully fragrant flowers on racemes that flowered a few weeks before the local black cherries, and then the leaves slowly changed to purple and eventually black fruit appeared (fruit that's roughly the color and size of a black cherry, maybe the tiniest bit larger). I've never tasted a chokecherry, but after looking at many different resources, I felt pretty confident that the tree was accurately labeled, and after a small taste of the fruit I can say it tastes astringent like I've seen it described.
Now for the wrinkle- an identical tree on the other side of the neighborhood is labeled as Purple-leaf Plum/Prunus cerasifera, and on both trees, the fruit itself is black outside but green inside. The fruit is much smaller than any of the Prunus cerasifera images online, regular sweet cherries, or any wild plum I've ever encountered (mostly beach plums, Prunus maritima) or read about, and has "cherry" vibes much more than "plum" vibes, if that makes any sense. I unfortunately didn't see this tree while it was flowering which theoretically would id it definitively. At first I assumed that the Purple-leaf Plum was the one that was mislabeled, but the green interior gave me pause because I couldn't find a picture of a chokecherry with a green interior anywhere I looked online. Do you have any thoughts (or resources you'd suggest for me to investigate further)? Thanks so much!
Alan Bergo
Sorry I don’t know here, I haven’t come across those.
Teresa buell
We were so excited to get started. We live in Wyoming but over 6500 feet. Our jelly did not jelly, it is still liquid after 2 times in the pressure cooker. What did we do wrong? We are so sad
Alan Bergo
Hey Teresa. So I don't have a lot of experience with trouble shooting high elevation jelly, but cooking the liquid in jars in a pressure canner is not something I've heard of, if I'm understanding that correctly. I'd watch the video that I made here to walk you through the process. The most important thing is doing set tests which ensure you know the jelly is going to work.
Kelly
In an earlier comment above, Bridger had a similar experience. Bridger wrote, "I did some research and I’ve figured out it is my elevation that was throwing off the jell point and caused it to burn. I live in Wyoming and our elevation is just above 5,100ft. So my final temp will be closer to 200-205." Hope that helps...
Jennifer Rodriguez
My Canada Red Chokecherries have a green interior with black exterior and the pit is a light greenish-beige. 🙂
Jason
Alan, in the recipe you mention dehydrating the flesh and pits. What would you use them for once dehydrated?
Alan Bergo
Hey Jason, refer to my piece on cherry pits here. They make an awesome extract, crushed and mixed with brandy.
Bridger
What heat setting do you cook the jelly to reach 220? Mine was struggling to reach that temp so I turned the heat up and ended up burning the bottom.