There is a lot of info out there on how to process acorns, some better than others. I'm defintely not the first, or last to write about this process, but hopefully I can share some of what I've learned personally over the last few years.
I'm not going to go crazy in depth on different species of oaks, as that information is out there already, rather, I'm going to outline the process of selective harvesting, cold-leaching and drying, which is the best method for making acorn flour that will stick together after it's processed, or meal for making something like grits. Before you pick your first acorn though, it really helped me to know the difference between good and bad acorns.
Selective Gathering
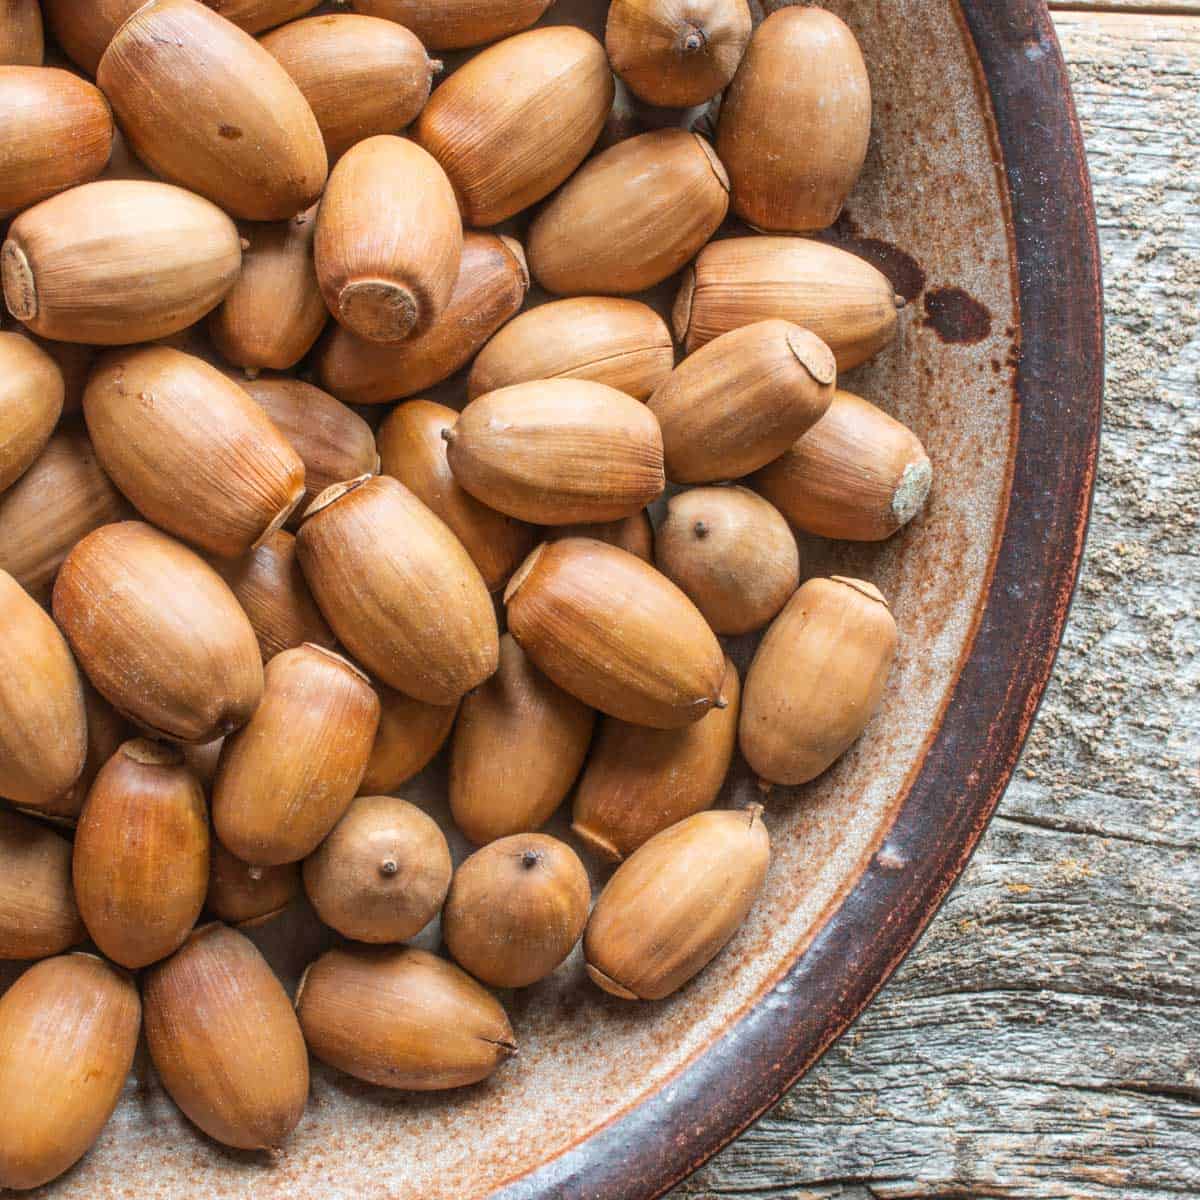
1.Don't pick acorns with a cap attached
The only thing acorns with caps attached are good for are craft projects. These are acorns that have been rejected from the tree, and they're not what you want to eat.
2. Don't pick acorns with holes in them.
Acorns with holes in them have been eaten by something else: grubs, wriggling, writhing grubs. Recently a very popular foraging book came out where the author said "I just go out and pick acorns that look good to me". If you don't mind having ½ the acorns you pick bieng spoiled and filled with half-digested acorn grub excrement, or if you're an entomophagist bent on eating live, writhing acorn grubs, "cool".

I've been picking acorns for a few years, and when I pick them, I want nuts, not grubs, and making sure I pick acorns without a hole in them means that I have, not a single time, had an acorn come home with me that had a grub in it. I'm sure the time will come when I get some visitors, but it hasn't happened yet.
3. If you can, gather white acorns
Red acorns are high in fat, and my friend Sam Thayer makes acorn oil out of them occasionally (It's delicious), but, unless they're the only acorns available to you, I suggest picking white. The reason is in the skin inside the acorn. The skin, or the testa, that hugs the nutmeat inside the shell, is incredibly tannic.
The composition of the inner nutmeats on red oaks is different, and, kind of similar to a chestnut, there are folds inside and the skin can be a bit wrapped up in the nutmeats. To make it more difficult, red acorn skins tend to stick to the nut meat, and are a pain in the ass to remove. The result, from the red acorns I've processed, is a darker flour as an end product, and one that takes much longer to leach to remove the bitter tannins.
Basic Acorn Cold Leach Method
Here's the basic method I use for making flour or meal
1. Dry the acorns
When I bring the acorns home, the first thing I do is fill my dehydrator with nuts and let it ride on the lowest heat setting for 24 hours, then, I'll repeat the process with the rest until they're all dry. From here, the nuts will keep, preferably in a cold garage, for a long time, but I will try to crack them during the Winter while I have some free time.
The drying ensures the nuts don't go rancid before you get bored enough to sit in a chair and process them, but it also makes them a breeze to crack. Cracking fresh acorns is pointless, and possibly dangerous in my opinion, since the shells are bouncy. Trying to cut into hundreds of fresh acorns with a paring knife means a few hundred chances to put that knife right into your pointer finger or thumb.
2. Cracking
Lots of ways to do this. Once the acorns are dry, the shells will be brittle. Sam Thayer like a davebuilt nut cracker, and if you plan on shelling lots of nuts, I'd reccomend it.
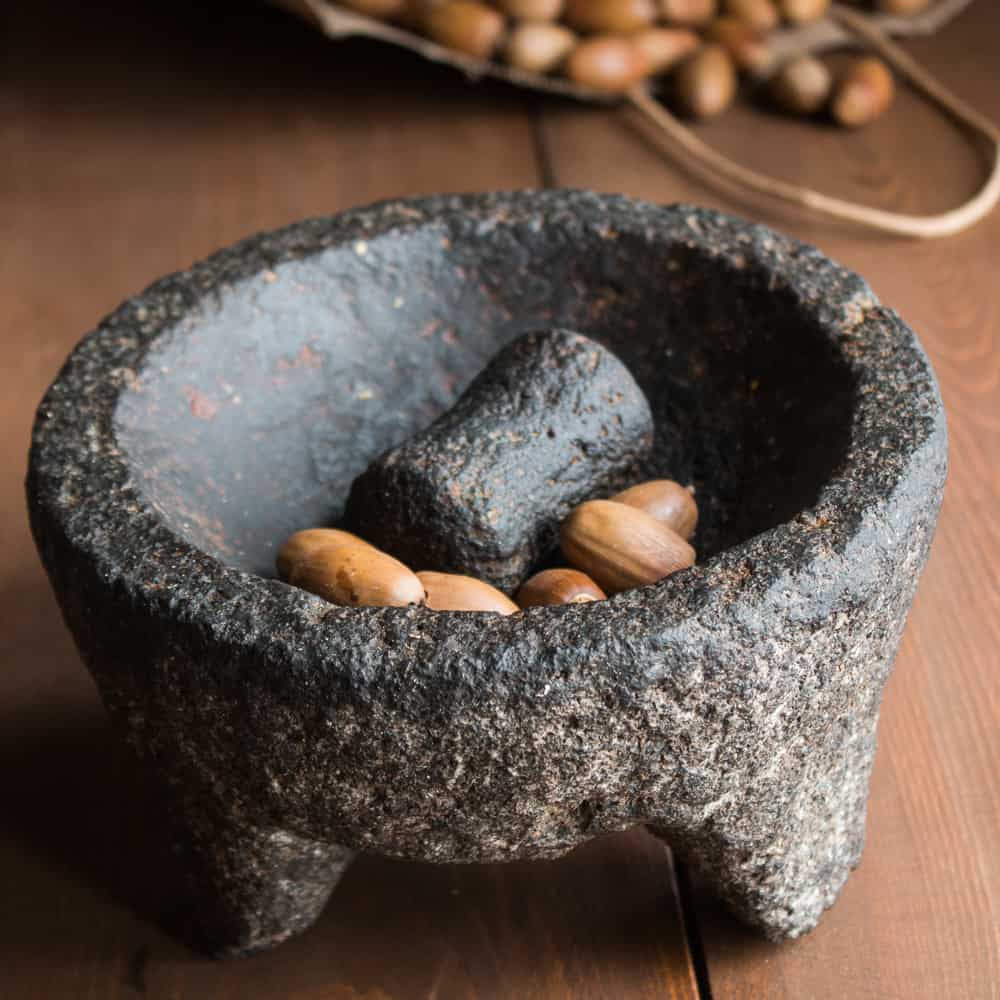
I don't have the space for one, so I use the "old man" method. I turn on the tv, get out my mocajete, and crack crack crack. I fill the molcajete with a small handful of acorns at a time, crack them all, then empty the cracked acorns into a bag. When all the acorns are cracked, I remove the nuts and discard the shells.
3. Removing the testa
There's some debate on whether you have to remove this or not. To be clear, the testa will rise to the surface of the water while leaching, so it isn't a huge deal, but I do try to remove it as it will shorten the leaching time.
With white oak acorns, the testa should slide right off if you roll the dried acorns between your fingers. With red oaks, the testa can stick to them, and it will be a pain to remove.
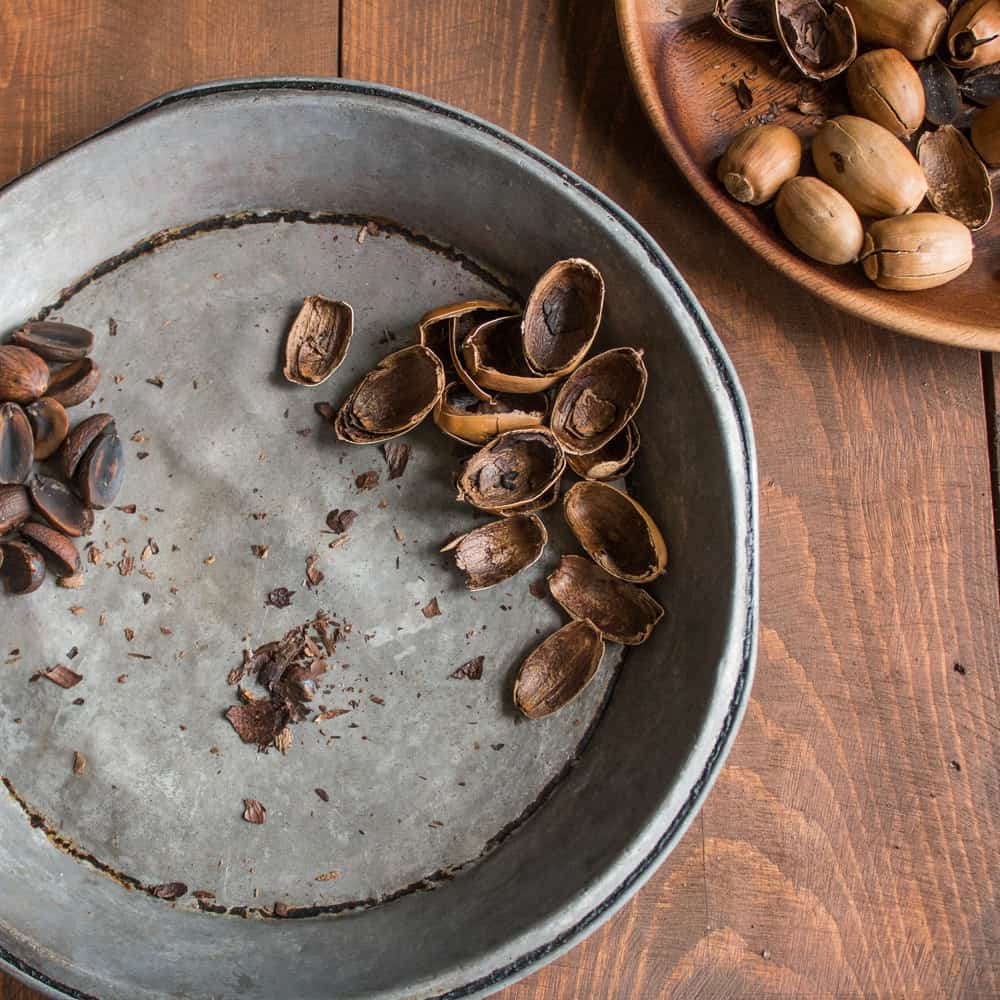
What I do is roll the acorns around in my hands, and let the skin fall off, or, if it's not too cold outside, bring a large bowl of them out, and, after rubbing with your hands to loosen the skins, toss the acorns in the bowl in front of a fan and watch the skins blow away.
3. Grinding
The next step is to grind the nuts. I do this in a vita mix with a mix of 1:3 acorn to water, as I'm going to be cold-leaching them. You could also grind them in a grain mill.
4. Cold leaching
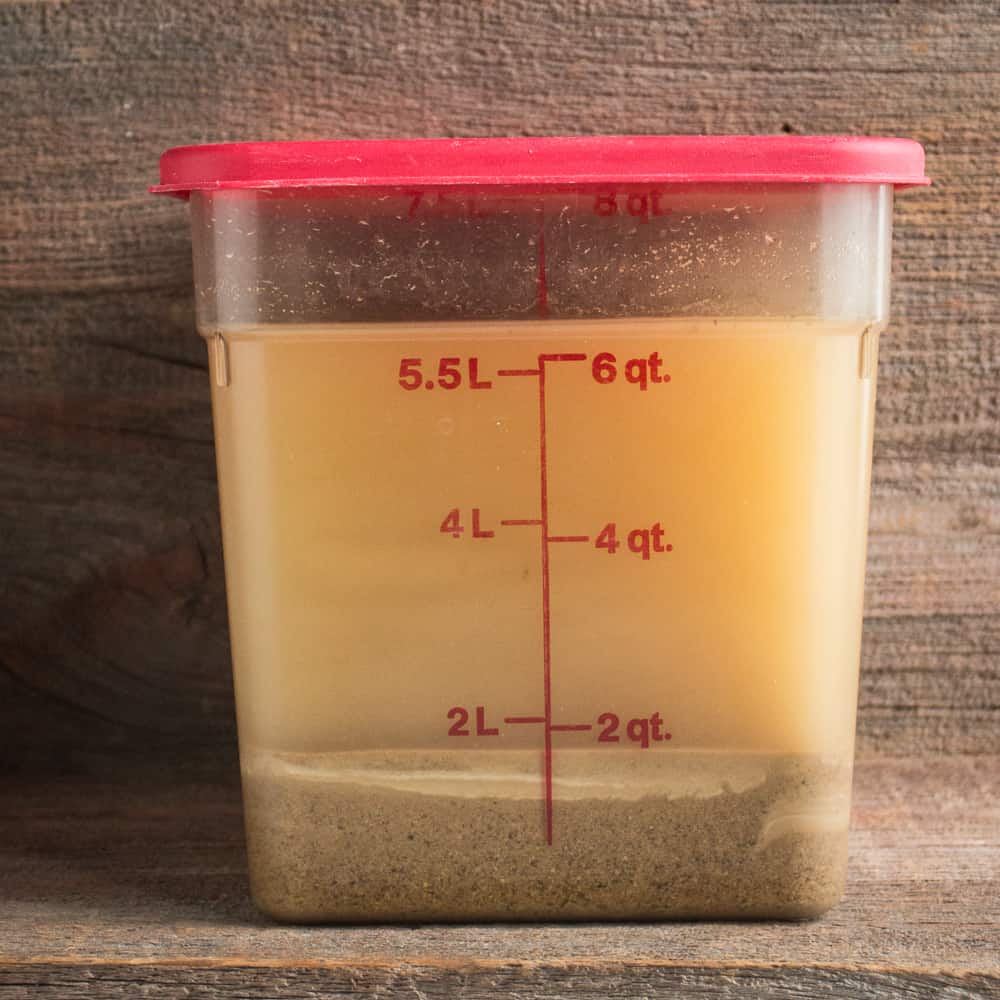
Once the acorns are ground, you cover them with 3x their volume of water. It should look like a brown slurry. Store the slurry in the fridge. Every day, for as long as it takes, carefully pour the water off, and add new water. After a few days, taste a bit of the nut meal and check for bitterness, once the bitterness is gone, the acorn meal is done leaching.
5. Straining
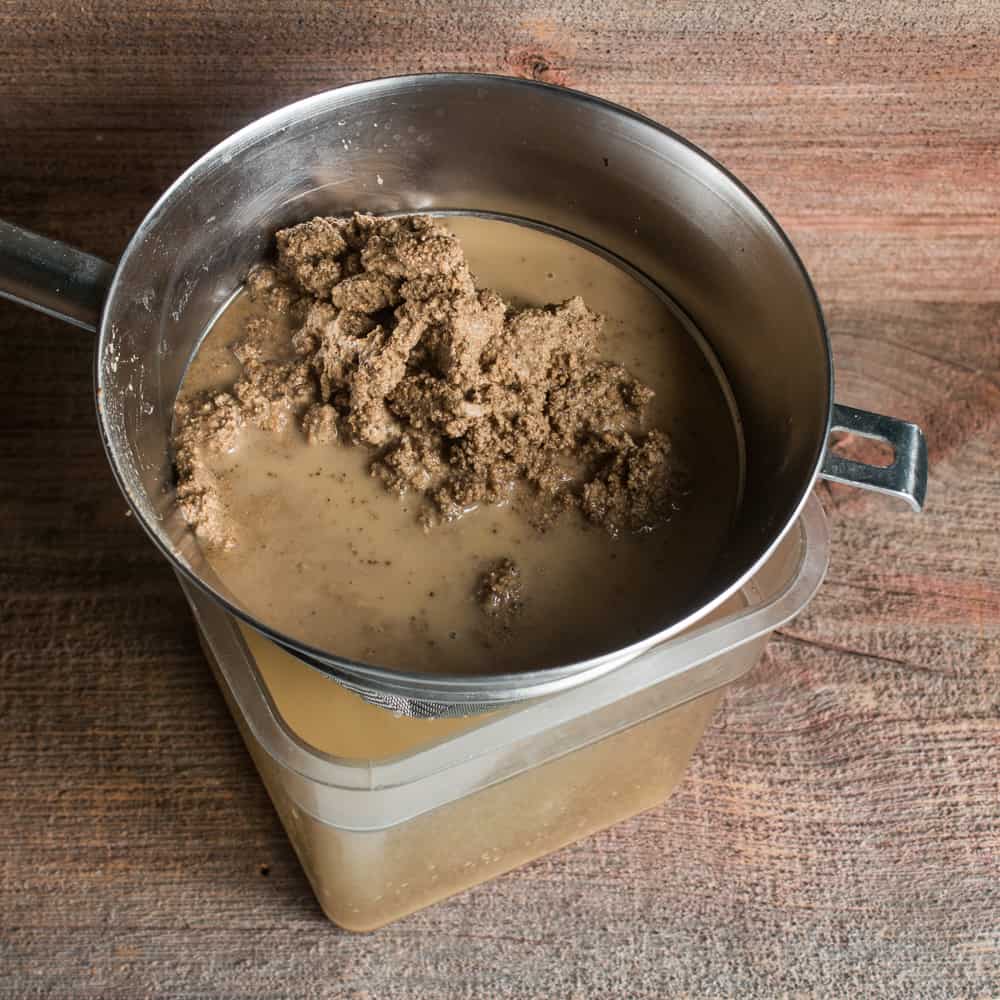
Once the acorn meal is compltely leached, you're going to strain it out. But, not so fast. This time, instead of straining out the liquid and discarding down the drain, you can harvest it for eating. Think of it as low-tech nut milk. Indigenous cultures have been cooking with nut milk like this for a long time, and it is a really good base for a soup, or if some of the starch and fat is in it, cooked down into a sort of milk shake or sweet drink with a touch of cinnamon and maple syrup.
There will also be a layer of starch you could harvest off the the layer of soaking meal, but I haven't done too much with that yet, so I pour it into the liquid and cook it down for cooking wild rice in. I don't usually save all of the pour-off water, but I'll save it when I start to get close to "the good stuff" if that makes sense.
When you strain the acorn milk, line a strainer with cheesecloth, or use a chinois strainer (what I use) that is very fine to catch what will look like a big mess of clay. Leave the strainer in the fridge for a few hours to drain, and if you want, add the drained starch and water to what you poured off before for cooking or whatever.
6. Dehydrating
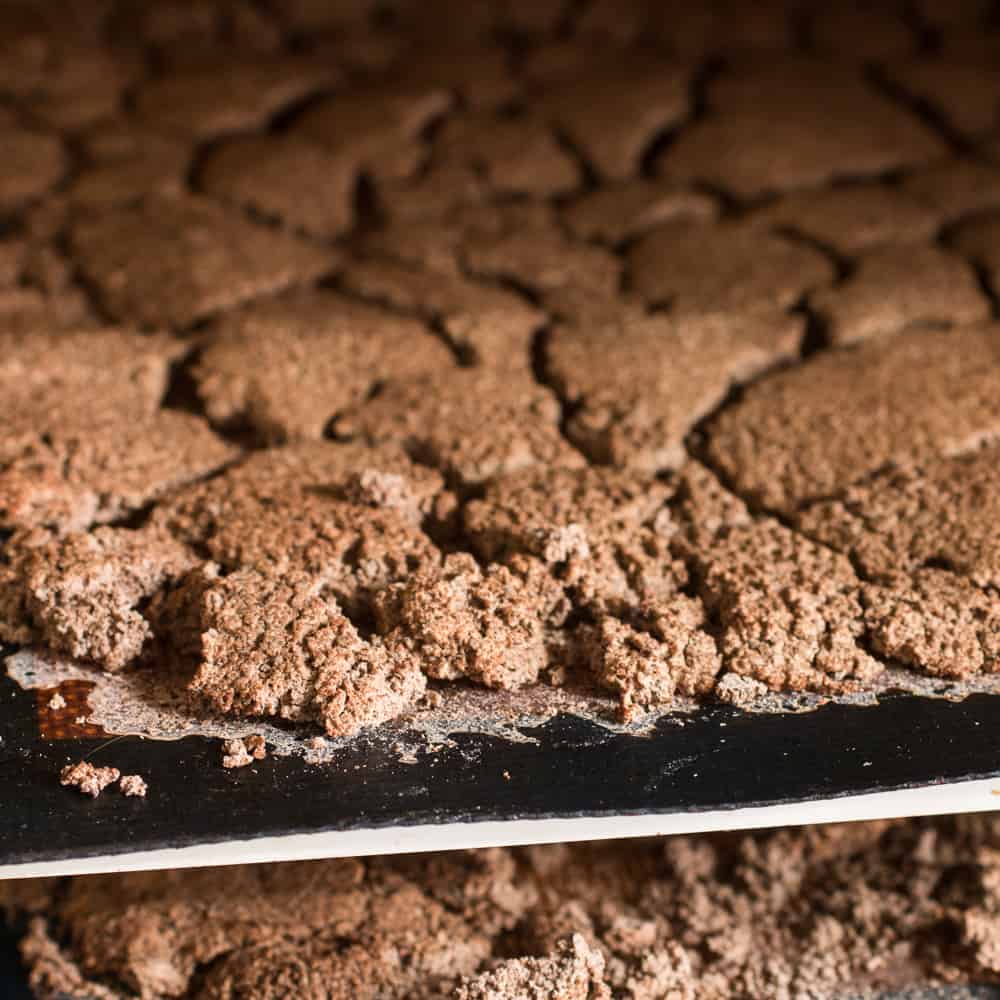
Finally, take the acorn ball of clay and spread it out on a tray to dry. I put mine on silpats and dehydrate at the lowest setting. From there, I take the dehydrated acorn and either put in a jar in the fridge, or vacuum seal and freeze. Remember that acorns, especially red, are high in fat, and that fat can get rancid, just like any other nut, if left at room temperature for too long. Rancid nuts, if you haven't tasted, are foul-tasting-you'll know if they go bad.
Caroline Ailanthus
Hi, Alan! I'm a novelist researching stuff my characters might eat, hence the possibly odd questions: is it possible to make an acorn-equivalent of "quick oats," a pre-cooked, dried product useful as field rations? Just mix with hot water! It would have to be a low-tech solution, something pre-modern people could have done.
Also, how would the dry volume of such a product compare to that of the acorns they used to be? I'm guessing it would be a lot less, but by how much?
Relatedly, can you get oil, meal, and starch from the same acorn, or do you need to choose which product you want?
Thanks!
Alan Bergo
Hello.
As for “quick oats”. Dried acorn flour/meal is essentially the same as dried cornmeal. It could be cooked with water into a paste, dried in the sun spread on a hide, etc, held in a saddle bag, skin, etc then rehydrated instantly with boiling water. Instant breakfast comparable to a packet of oatmeal.
Dry volume: I don’t know off hand. I’d compare to corn and cornmeal yields.
Oil, meal and starch.
This depends on the processing methods that people would use some tribes would pound nuts and their shells into a paste cover it with water in a ceramic or cast-iron pot boil it and extract or skim the oil from the top. More modern methods use a small oil press that you can buy online.
Starch is extracted by running water through the ground up acorns after the starch is extracted and then evaporated from the water you can dehydrate the ground nuts into a flower/meal. You could potentially get all three products from an acorn, but not without using an oil press, imo.
Dana Bagshaw
I have a similar question. Was the water used leaching then used for tanning?
Alan Bergo
No, I don’t have time to process hides.
Aaren
Hi- I saw that someone on the ole inter web suggested adding a bit of baking soda to the water while kee big to make it more alkaline and this leech faster. Have you tried this? I’m currently doing my first ever batch of red oak and I floated all of mine in a bucket of water and only took the sinkers. That was quick- only a few with grubs escaped that method. The smell is heavenly- maple and Horlicks!
Jeanne
Dear Alan,
Where were you when I made acorn flour in the early 90s (also could have used the internet). I think I only made maple flavored muffins with the flour I made but at the time I was intensely interested in foraging - and then kids happened …
Many thanks for sharing your knowledge and curiosity of wild foods - I really appreciate it.
Alan Bergo
In the early 90's I was in gradeschool 🙂 Thanks for commenting.
Emily S
Hi Alan! Thank you for sharing your process. I'm wondering if you have any observations about discolored nutmeats NOT due to pest damage. I collected red oak acorns in late October (I'm in Maine) and thought I'd done a good job scouting for quality - no caps, no holes, no cracks, no discoloration around the disk, and the shell color was vibrant, not old and dull. Right after collecting, I dried them for 24 hours at 95 degrees. I let them sit in a cool part of my house until now, and upon cracking them found most to have a concerning dark discoloration on the nutmeat, though there is no pest damage. I'm worried they're no good, but now I see in one of your photos, yours also look dark and somewhat similar to mine. Do the nutmeats darken upon drying in a dehydrator? Some have rings and lines that remind me a bit of spalted wood, as in it's more streaky, not solidly dark, and often emanates from the center. Should I be concerned? Thank you for any advice you may be able to offer.
Alan Bergo
Hello. The only time I've had discoloration happen with my dried acorns was when I put some in an oven on low to attempt to dry a lot at once. The heat was a little too much for them. I didn't have any issues making flour with the discolored nuts, but I also caught it pretty quick, within a few hours.
Heather
I'm excited to try this! I have so many acorns in my front yard right now. Do you have any idea on how many acorns you need to create a cup of flour? Thanks
Alan Bergo
1 cup of flour is 8 oz, assuming some loss from processing I would go with 12 oz of acorns.
Lynn Hutzler
Cannot wait to try this! I plan on freeze drying it and making a true flour consistency. Will the replacement of other flour be a 1:1 with the acorn flour.
Alan Bergo
That's a great idea.
Jess
Thank you for this! Any tips for drying the flour (or whole acorns)without a dehydrator (ideally in an oven)?
Alan Bergo
Hello. Do not use an oven. The acorns have too much water and they’ll burn. You can dry them naturally by shelling and blowing a fan on them.
Elliot Jackson
Hi, any comment about trying this with scrub oak acorns? We live up at 9000 feet in Colorado and that's the kind of oaks we have growing up here.
brian
hey Alan, have you noticed any difference in taste post-leaching between white and red oak flour? I've noticed that Q. rubra acorns have this nice maple-y aroma and I was wondering if they carry that into the flavor of the flour (I've only been using white oaks so far)
Alan Bergo
Hey Brian. No I can't tell the difference.
bart - c : munyan
I am trying to use acorns for the first time ever this year. I researched and was led to believe i needed to leach the acorns directly after harvesting and shelling. Where i am we had a cold snap and then it warmed up into the 60s so many have sprouted. I kept them but cut off any green. I found lots of them grubs and learned about the holes. Anyway your method is different than what i have already started to do/ I am finished leaching them whole, it took several days. I did not refrigerate either. i was told room temp was good. I did not want to boil them and waste nutrients and starches either. Anyway what are your thoughts on how i am doing this? My next step will be dehydrating, grinding then bread maker, with yeast, not baking soda. I'll use a bread maker. Any suggestions? i sorta feel like grinding then leaching is tedious and harder to do.
Alan Bergo
Hi Bart. There's more than one way to do it. The time of the seasons when acorns are ready most foragers are really busy, that's why I prefer to dry them, then shell, grind, leech, and dehydrate. Drying also makes the shell brittle so it's a simple process to crack them. Your method should work fine, but I would think it would take a while for the tannins to leach out.
Lynne
I have cracked/shelled my dry white oak acorns and leached some in halves (or however they ended up after shelling - no extra grinding, as well as grinding some down to more of a grit size. The smaller the grind, the faster the leaching process I have found. I always do mine in the refrigerator just to be safe (cold). My halves leached for 2 months and were still showing some tannin tea color in the water - I finally gave up on those after 2 1/2 months, and ground them to grit size and then they finished leaching after about 5 more days. I only change the water once every morning for any of the ones I am leaching and have had no issues yet. Also - per the comments I've seen - if you can see the teeny tiny spec, usually near the top of the acorn, you can be pretty assured a weevil has laid larvae in there. The small 1/8 inch round hole is an EXIT hole that the larvae hatch from AFTER eating the inside of the acorn to bits. When I first started harvesting my trees I noticed about a 60% "infected" rate. As I dry mine (I usually dry them outside for about 2 months - in the sun if sunny, or under the porch roof with a fan blowing over them if rainy) I make sure that any that hatch out larvae get thrown into a 5 gallon bucket to put on the burn pile later (so no acorn moths can make homes in them) and I also dump the larvae that are unable to get off the tarp or drying screen into the bucket as well. They all go into the fire. After several years of harvesting, I can finally tell that I have slowly made a dent in the weevil population in my trees. I imagine it would take 5 years or more to really improve it greatly. So even though it's work, just realize you are also helping to control the weevil population! Not that they hurt the tree - just the nuts. But nothing is more depressing that picking nuts, drying them, and finally cracking them open to find a weevil still in there - it's like finding a thief in your pantry hiding in the cookie jar and nothing but crumbs left in it.
Alan Bergo
Thanks for sharing Lynne. To who it may concern, too, I just spoke with the folks at Davebuilt co. They're up and running and producing nut crackers again. I'm unsure of what a Davy nut cracker is, the one on Amazon looks like a very small nutcracker. The Davebuilt nutcracker has a hopper and a crank-it's the best machine out there for cracking acorns and it can do it en-masse. Thanks for sharing about the grainmaker too, I'll be getting one as my other one didn't work.
Cameron A Brown
I've experimented with Oregon white oak (Q. garryana) acorns the last few years. After grinding in a Vitamix, I send the flour through a sieve and usually need to put 10-20% back into the Vitamix for a finer grind. It then seems to leach more efficiently when all sieved to a certain particle size. I let the nut milk settle and separate out into starch and flour again in the fridge, then mix into thicken chokecherry pudding.
I also have California black oak (Q. kelloggii), and very curious about what you mentioned in removing the testa of this red oak. Indigenous tribes all seem to have strong opinions it should be removed for better taste, and CA black oak acorns were some of the most sought after for acorn flour historically. Any more insights on testa removal? I've heard winnowing in a coarse basket...
Alan Bergo
Yes any way you can winnow them is fine. Rub them together, toss in a basket in front of a box fan, etc.
Denton Bragg
It's good to see what you're personally doing in processing and culinary uses. One comment: I'm sure you already know that once you see holes in them the weevil larvae have already departed (leaving ruin and waste behind). Sometimes more larvae are inside after one or two have drilled their way out. Thayer does have very useful ideas (garnered from his own experience-thankfully) about what to look for when gathering acorns. This would seem tedious and extra work until you really follow his (and your own if you've done it for years!) way to shun acorns having these signs. I've just been processing a bounty of chestnut acorns gathered behind a B&B in Gatlinburg-huge and almost none are infested. I added some white oak acorns from the prodigious mast at my property but noticed even when careful of what I picked a proportionately heavier infestation in them. I like to brown the grubs and mash into a sort of 'pate' '. I love the buttery taste, acorny but sweet. Enjoying your articles!!
Bridget
Just making sure you are leeching the nuts at room temp and not in the fridge? The term cold leeching makes me wonder if you need to refrigerate during the process.
Alan Bergo
Fridge.
Paul S.
Hey Chef, thanks for sharing your research. Have you ever tried leeching with ethanol (vodka)? Robert Murray-Smith suggested it as a faster leeching process. https://youtu.be/xSdF50twDCM?si=g38-PRJteXITF_sl
Alan Bergo
I haven’t. Personally I wouldn’t see the point and would think of it as a novelty. Water is free, and the leeching time is just kinda par for the course.
Greta
Dear Alan,
I’m two days into the cold leach process but I don’t have a blender, just a food processor. I tried grinding in this but the water went everywhere! After two days soaking the nuts don’t appear to be any softer, which is what I was hoping for. Any tips? I have only white oak acorns.
Alan Bergo
You won’t be able to do it with a food processor. You’ll need a stronger blender. Alternately, and much more putsy, you can crush them individually in a mortar and pestle like a molcajete.
steve johnson
Have you ever used a tenderizer on Dryad Saddle? I pickled some this spring with olive oil and salt with vinegar. They are good but sometimes tough. I'm thinking of several ways to deal with the ones I just picked...Kim Chi? some Kraut like thing maybe with a tenderizer...adolph's etc. Some are a little tough...tried to get the tender ones...but not all are super tender.
I always thought those Dryads...cerioporus squamous were bitter like Hydnum Imbricatum. I am totally surprised. Tried many ways to eat Hydnum...nothing worked.
Alan Bergo
Hi Steve, the reason that your Sarcodon imbricatus don't taste good is probably because around the country there's slightly different ones. West of the Mississippi it should be easier to find some that taste good. This is also not the right post to leave your comment on, as it's about acorn flour, not mushrooms. It's unnecessary to use a tenderizer on Dryads saddles. If you need to use that you've probably harvested them too old. See my post on Pheasant Back Mushrooms.
Miranda
Hi Alan,
This was very informative. I like the "old man" method of doing most things. Might as well keep your hands busy while watching tv. Thank you for sharing. I am looking forward to harvesting my acorns!
Alan Bergo
Thanks Miranda. I need to update this with some different, alternate methods this year. If you have any questions when it comes time to harvest and dry the acorns and process, don't hesitate to reach out.
Lynne
My hands have too much arthritis (and I'm a woman, so not as stupid as an old man lol) - I use a davy nut cracker to shell my dried acorns. I use a grainmaker model 35 (the 99 can be motorized if REALLY lazy) to grind my shelled acorns into a grit consistency for leaching. Once that is dry, back thru the grainmaker for a fine flour setting then into the freezer until I'm ready to cook up some GOOD stuff! And no - I don't have any paid links to these items but you can find them easily if you look for them. I want to try some of these recipes but my husband and kids keep making me make pancakes and waffles and I keep using up all my acorn flour on just those. One of these days I'm going to keep some at the grit phase after leaching and try to make a breakfast cereal by cooking them down - I may have to hide some from my family lol.
Emilee
Hi Samuel- Love the way you share info for us Newbie Foragers! I have ground dried acorns with the testa attached. It seems to float to the top of the water during the cold leaching process and gets poured off during the first few leach water changes. I never thought to keep the nut milk. Thanks for the tip!
Alan Bergo
I think you're confusing me with Samuel Thayer. Either way I agree with you.
Kelly
Hi Alan,
I'm curious, is there a way to blend the flour further to make acorn 'butter'? I live beneath two huge white oak trees, and I'm excited to finally forage and cook with the acorns. Thank you for sharing your methods!
Alan Bergo
You would need to cook it into a paste.
MARY
LOVE THIS INFO!!! THANK YOU!!!
Alan Bergo
Thanks Mary.
Jack Gilbert
What a great tip on keeping the nut milk! I had never heard of this. I will try it for sure. If I read you correctly, I can keep the water that is present at the time of the final soaking when the nut meat is finally “sweet”, yes?
I have heard from a number of folks that the removal of the testa from red oaks is difficult at times, but I find it interesting that some people say not to worry about it at all, and to let the leave Hong process handle it.
In their guide on processing the acorn for consumption, the New England Acorn Cooperative actually say not to bother removing the testa from acorns, and to just process the acorns with them on. https://docs.google.com/document/d/e/2PACX-1vTn7G3OY-xk7gDOsrJAb8ajsHoqRYYM89fYfQaZFsMBSCw69hyGamjIFaLIz-RZm6lyN8sL0WPkPGrC/pub
Alan Bergo
That's good info. I defer to Sam Thayer here RE: testa, as this is based on his description in his 2nd book, Natures Garden.