Sour, spicy, and loaded with umami, fermented dandelion kimchi is a good way to preserve bitter greens for use throughout the year in your cooking. Dandelions are only one of many different greens you can use though, and the method makes a good recipe for prickly lettuce or sow thistle too. It's also an easy way to acclimate your taste buds to bitter flavors, and a perfect fermentation recipe for beginners.
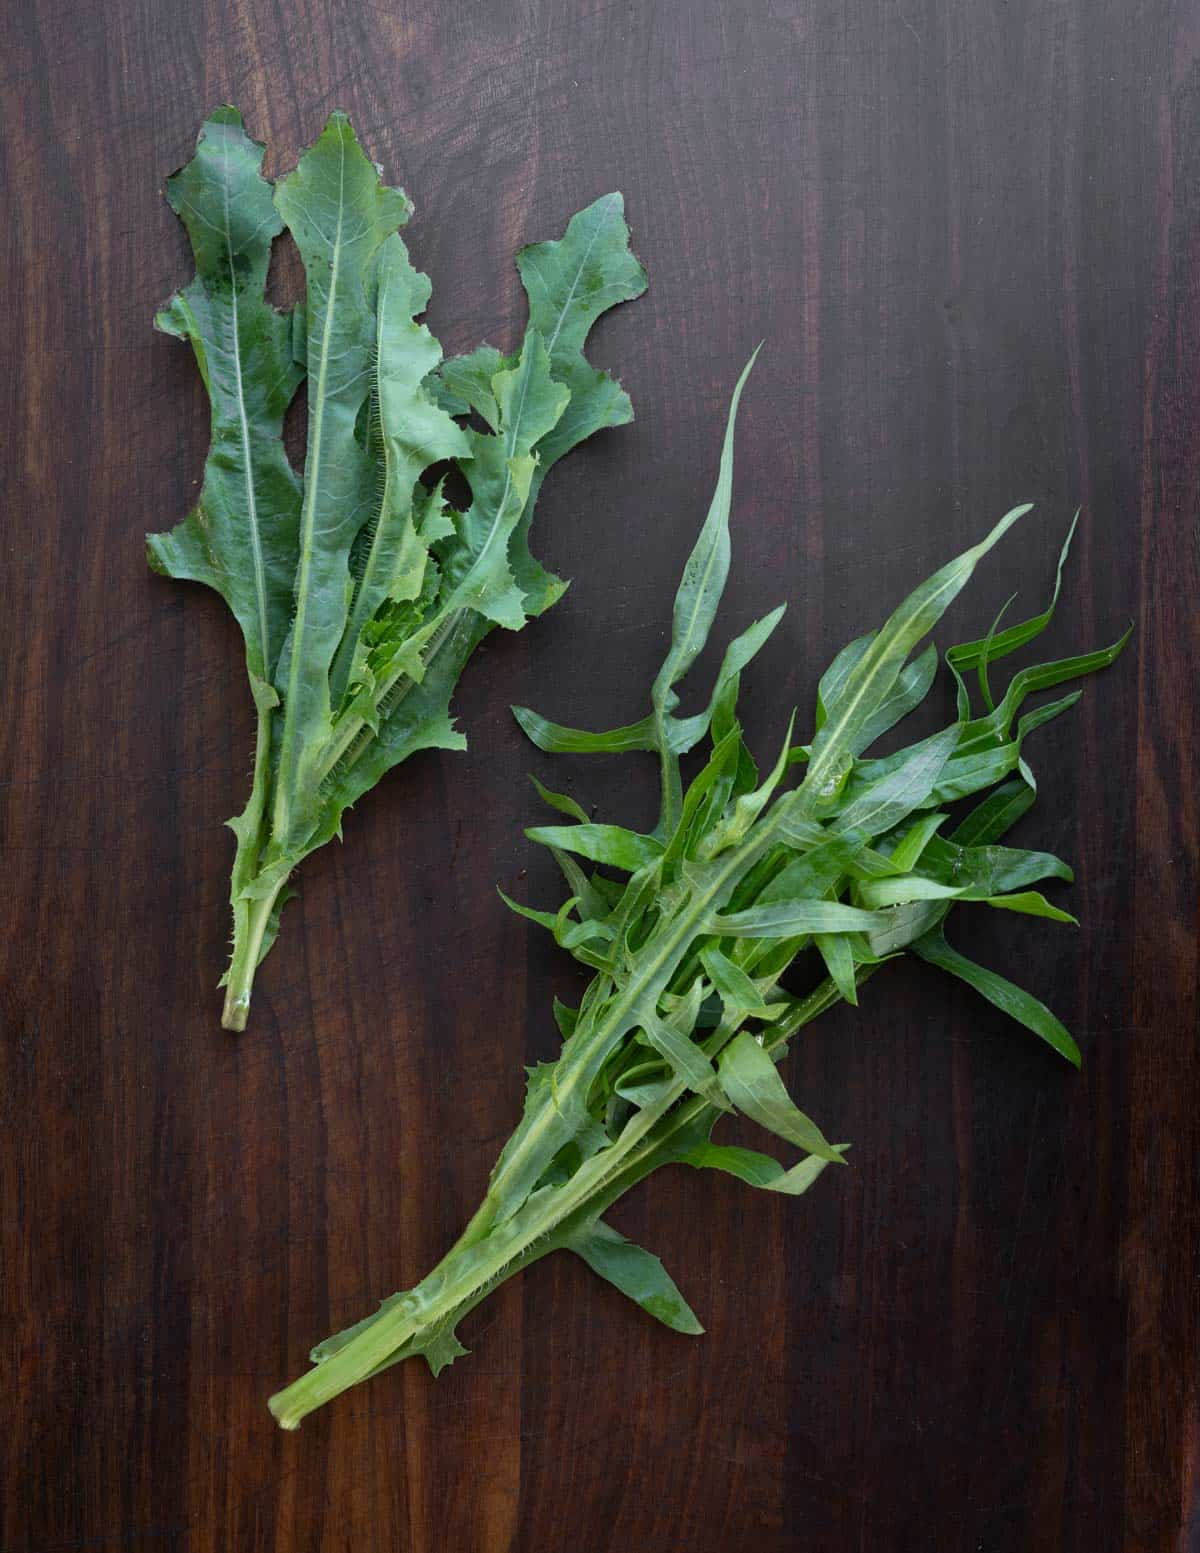
One of the best things to know about making dandelions into kimchi is that you don't have to use only leaves. If you catch the plants at the right time you could also add their crowns or unopened flower buds.
Since I blanch the greens before fermenting, you can also use the biggest, strongest-tasting leaves you can find. And, you can also use lots of other plants besides dandelions.
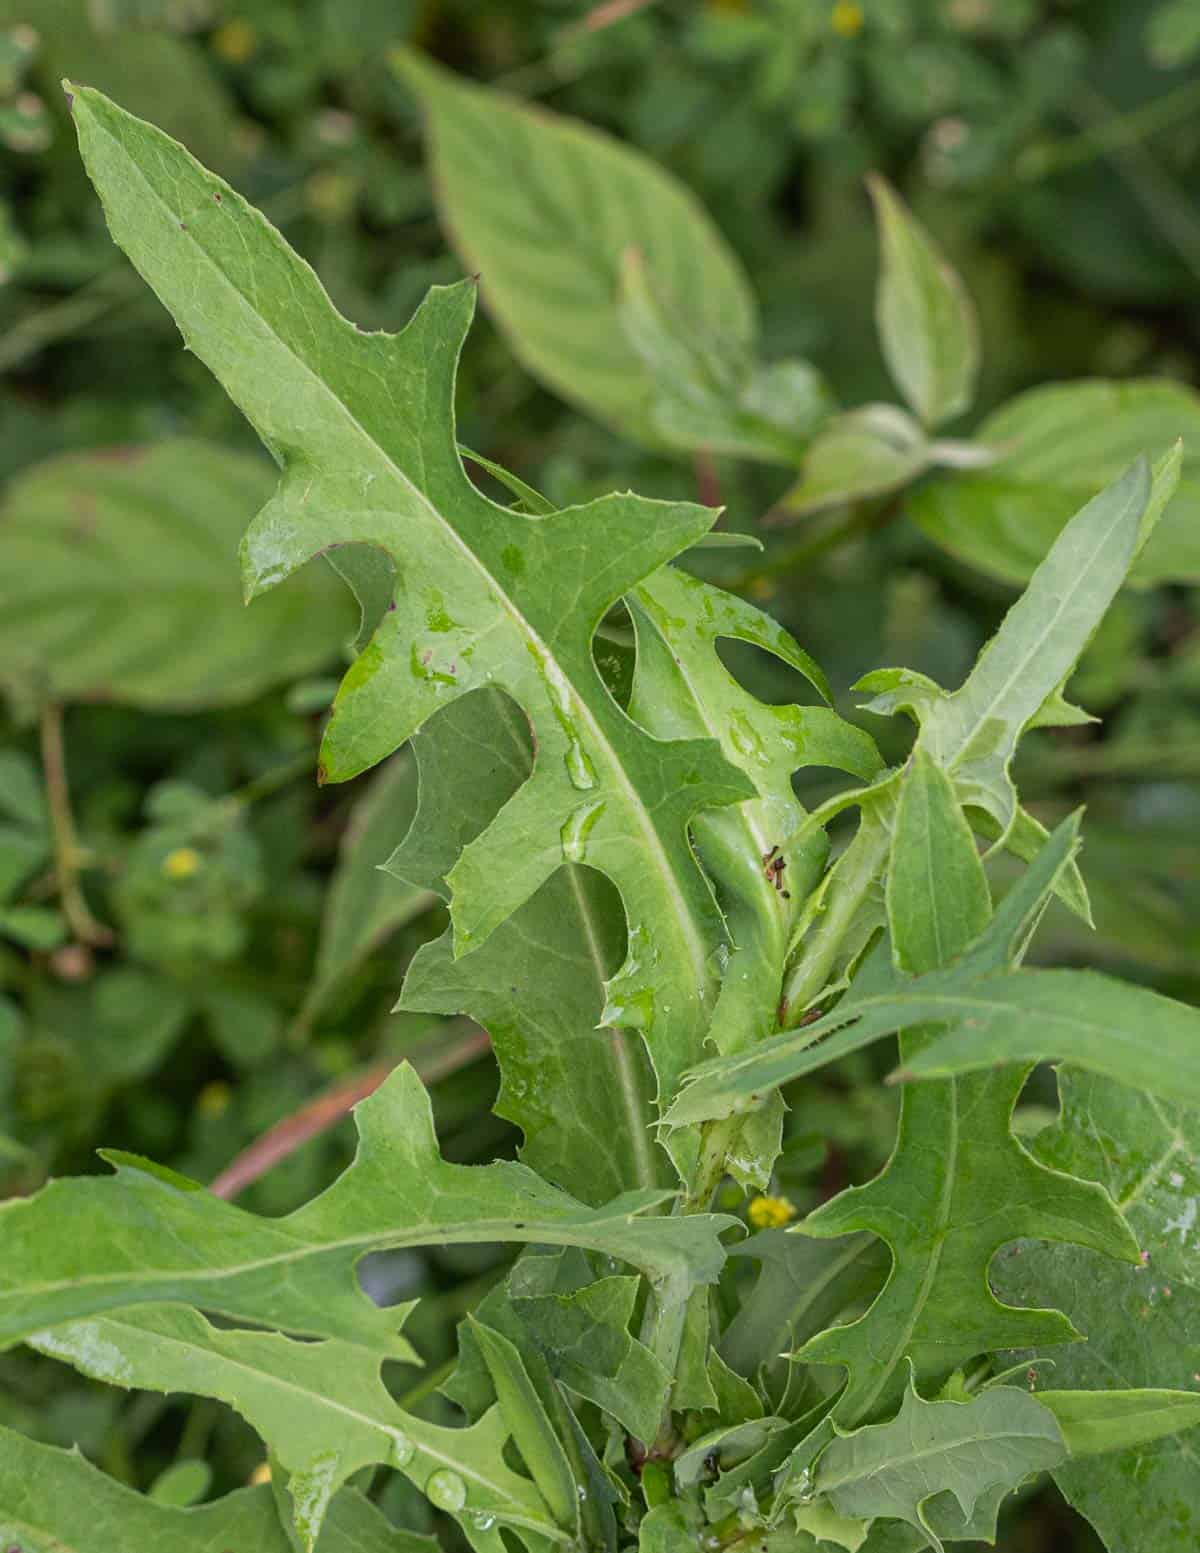
Right now (early June) the tender tops of wild lettuce and sow thistle are at the perfect stage for gathering, but you'll need to get them quickly as deer strip entire areas of them when they appear. The young tops have tender stem and greens, which gives a nice texture to the finished product.
How to Make Fermented Dandelion Kimchi
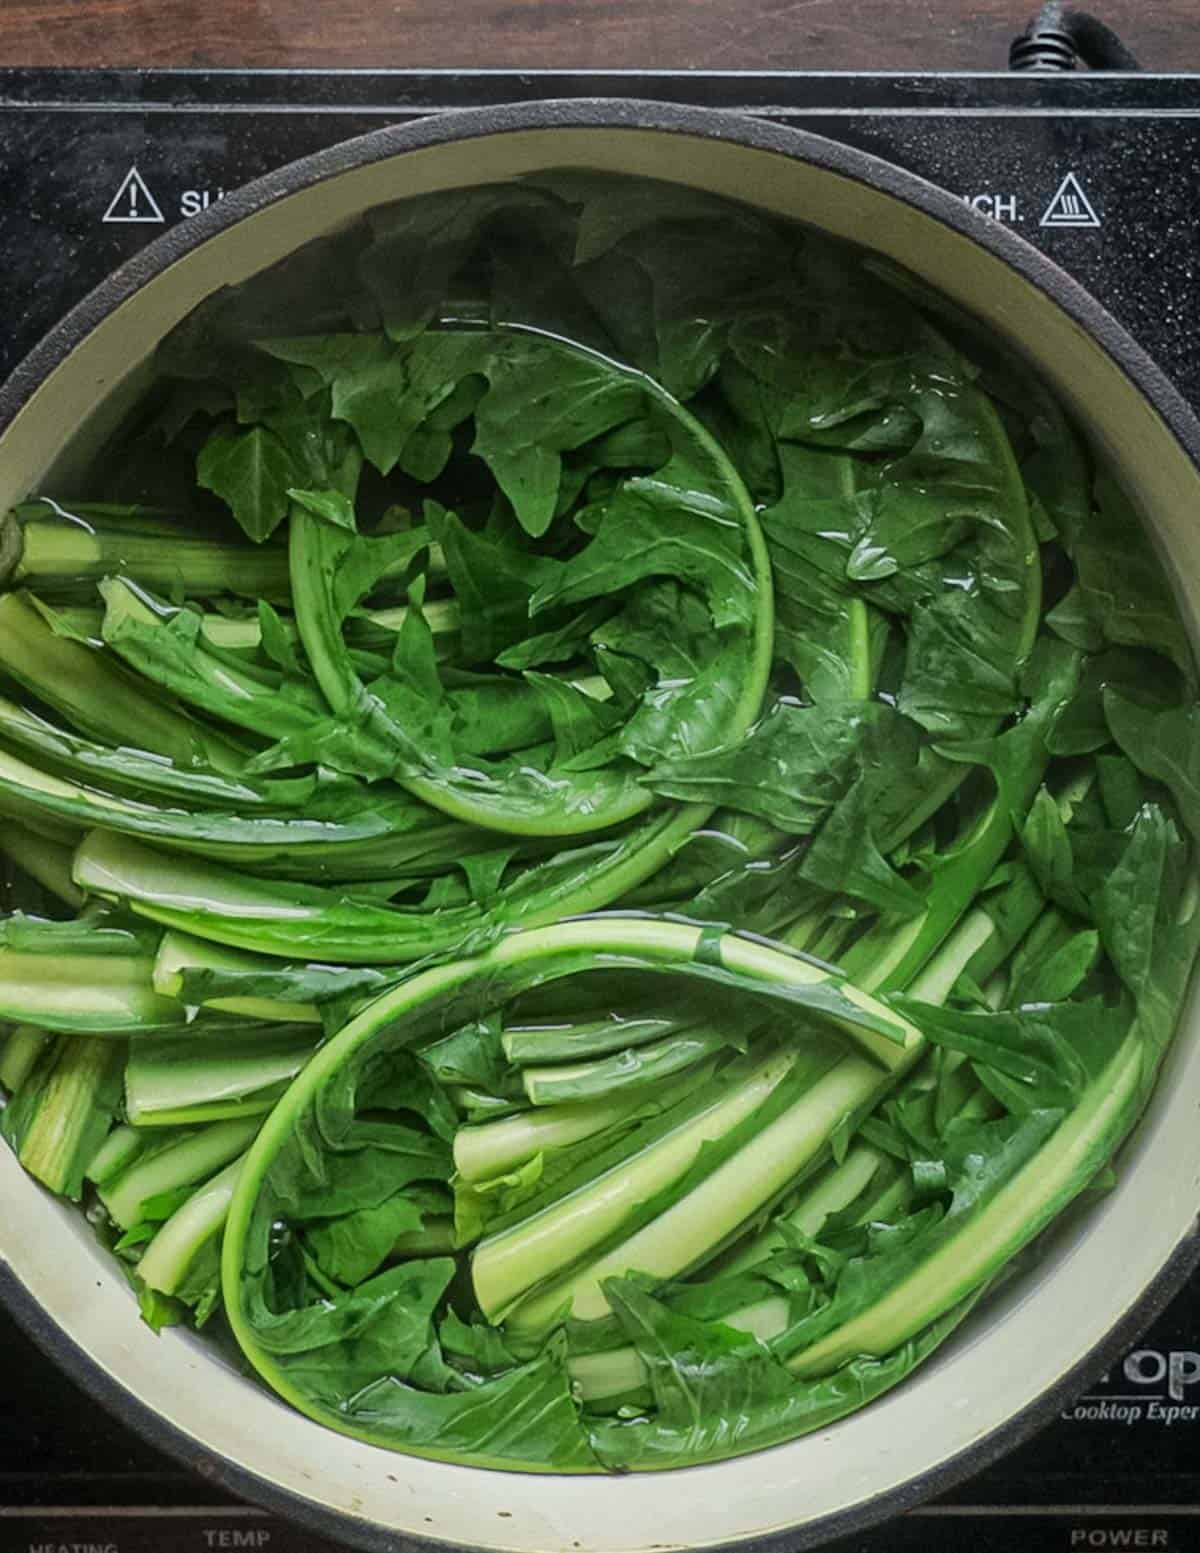
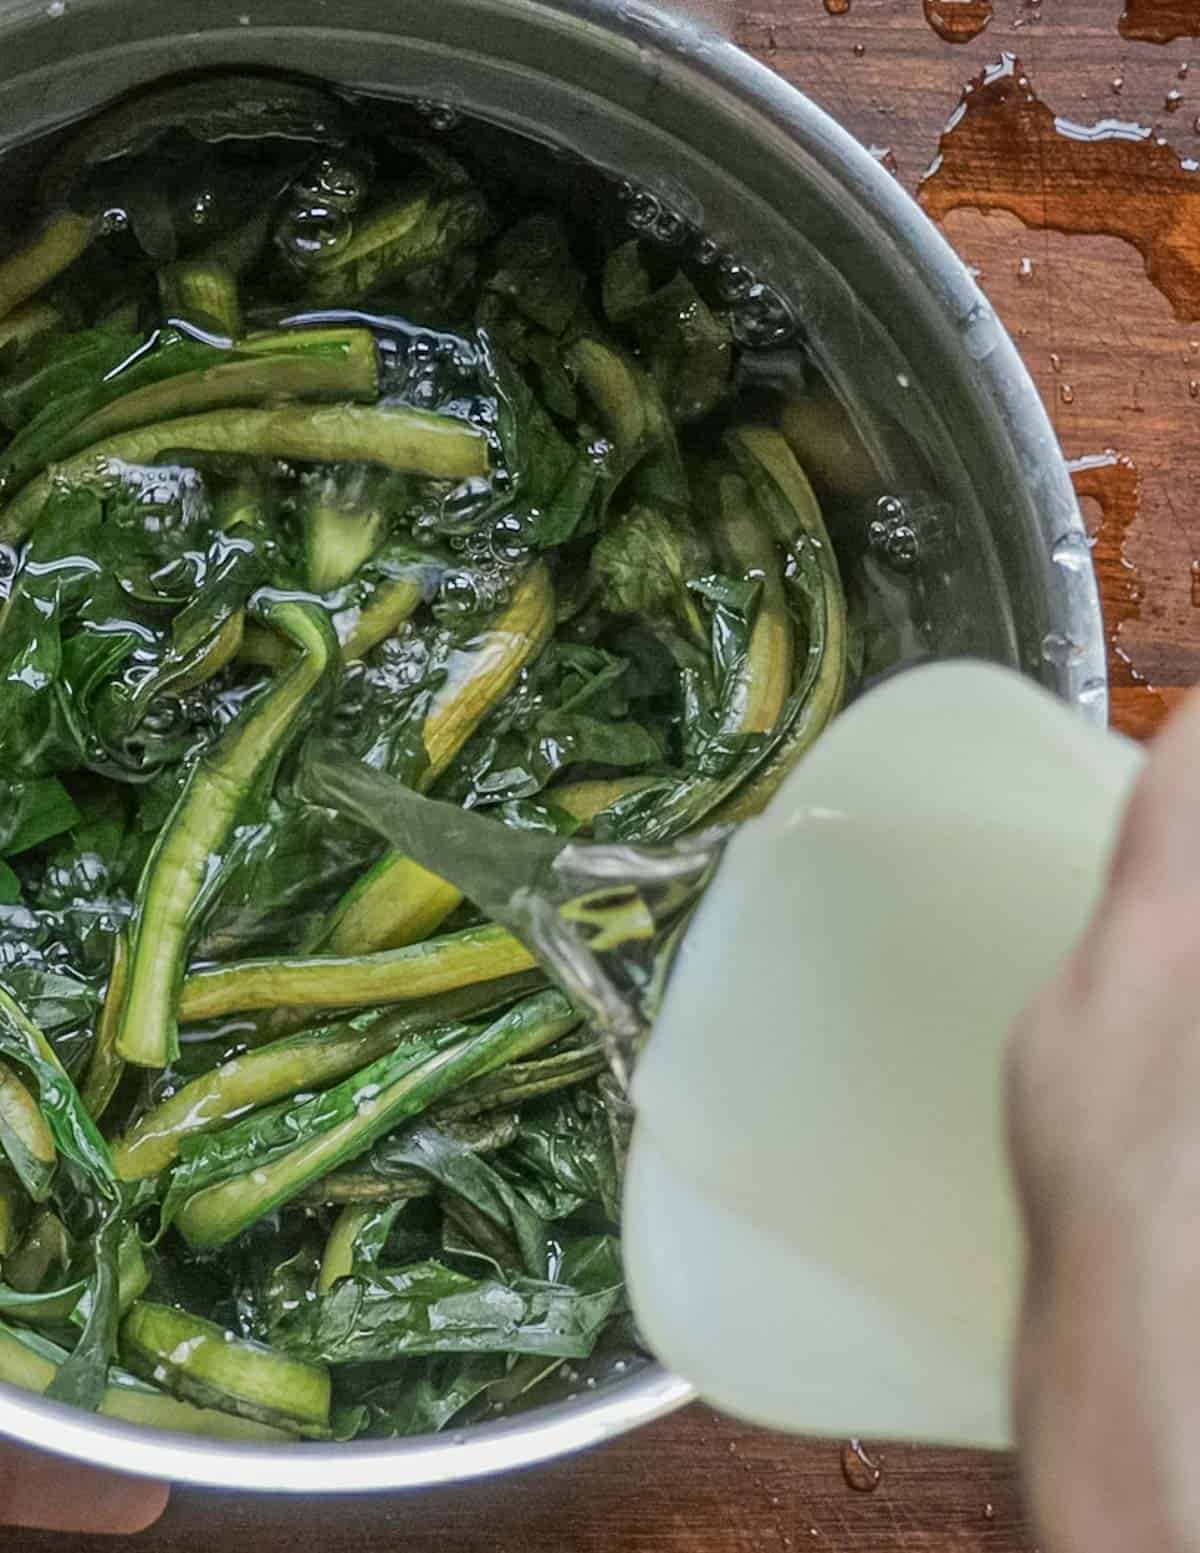
There's a few steps, but they're pretty simple and come together relatively fast. First the greens are blanched in water and laid out to cool. After cooling they're seasoned with salt and allowed to rest for 30 minutes.
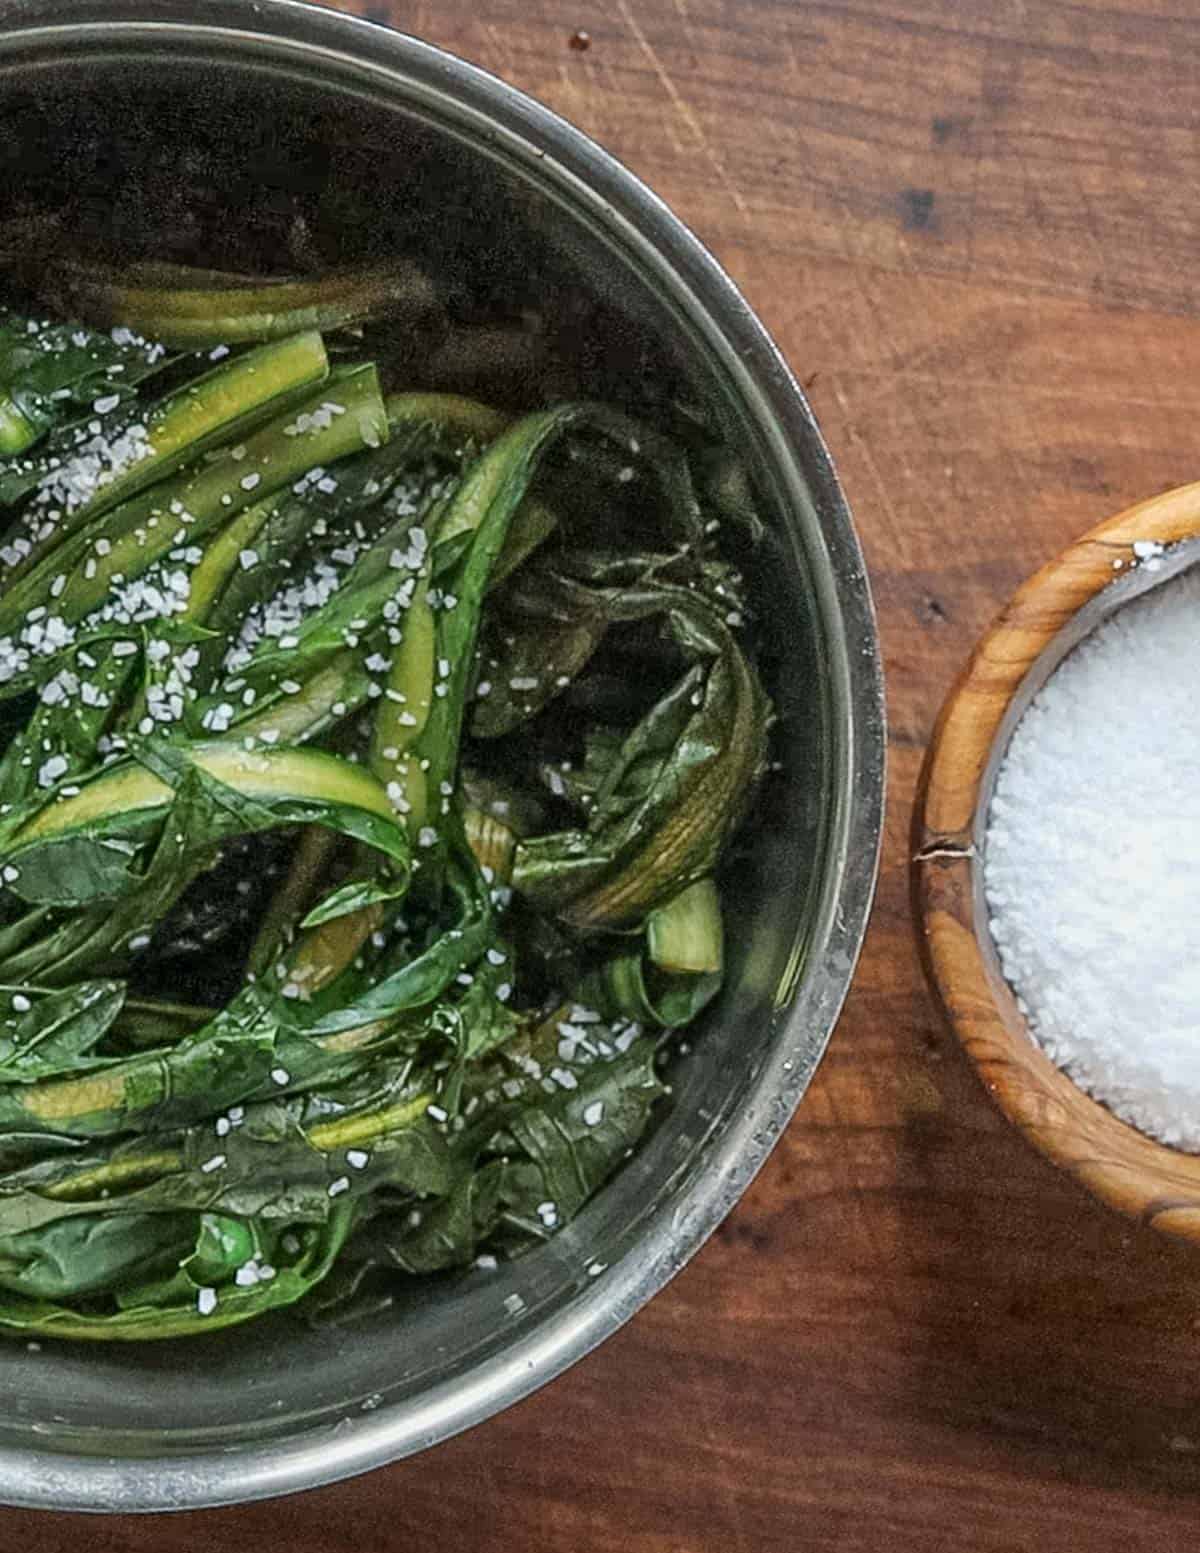
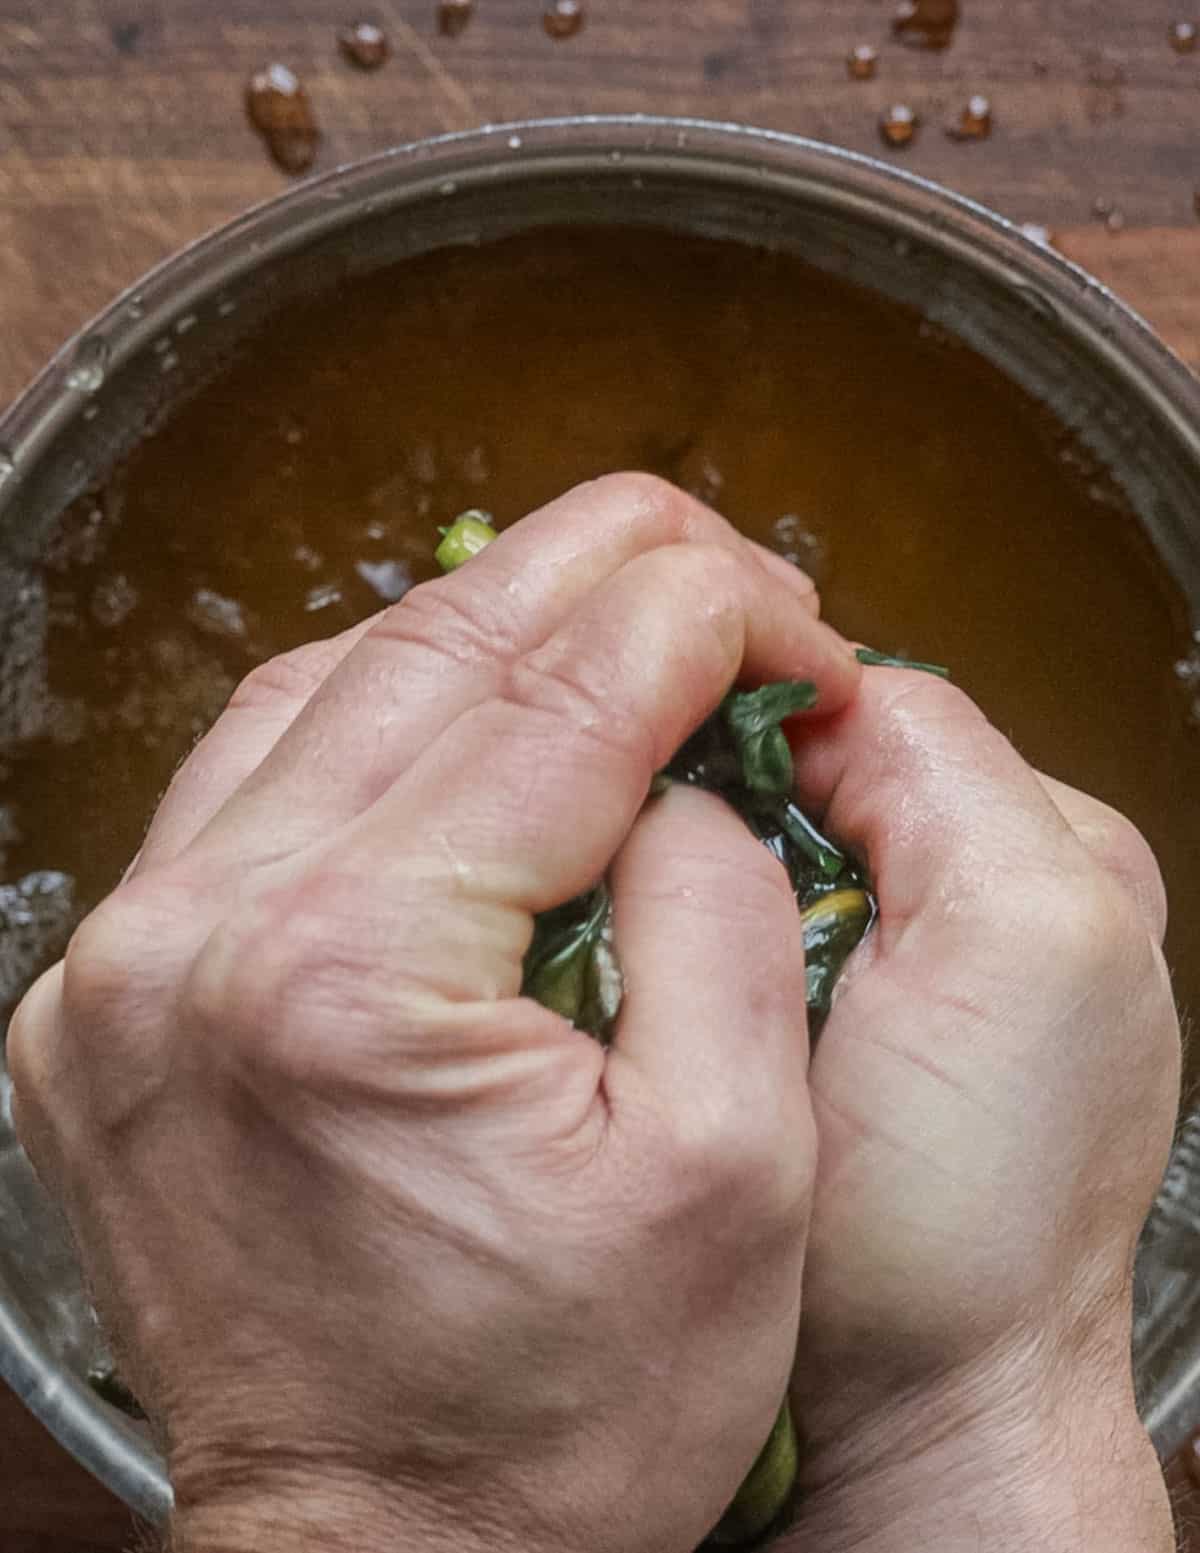
The dandelion leaves are rinsed with water to prevent it from being too salty. Then they're squeezed dry and laid out in a line.
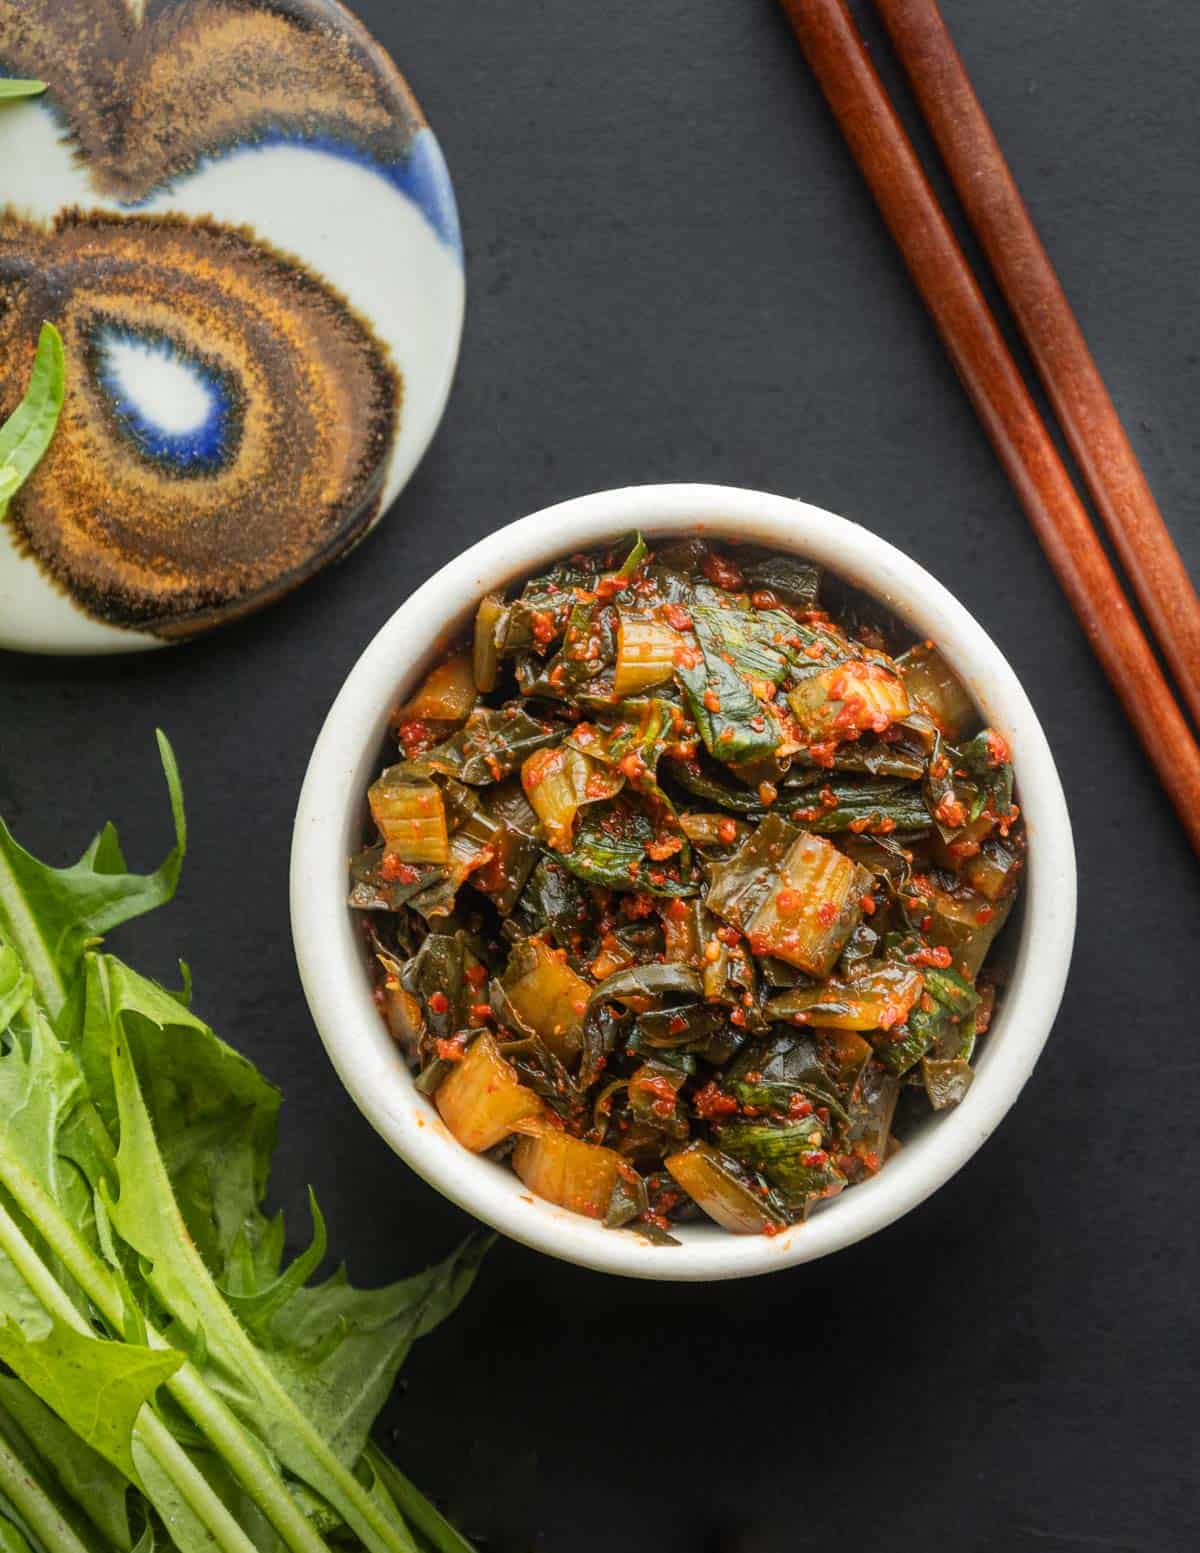
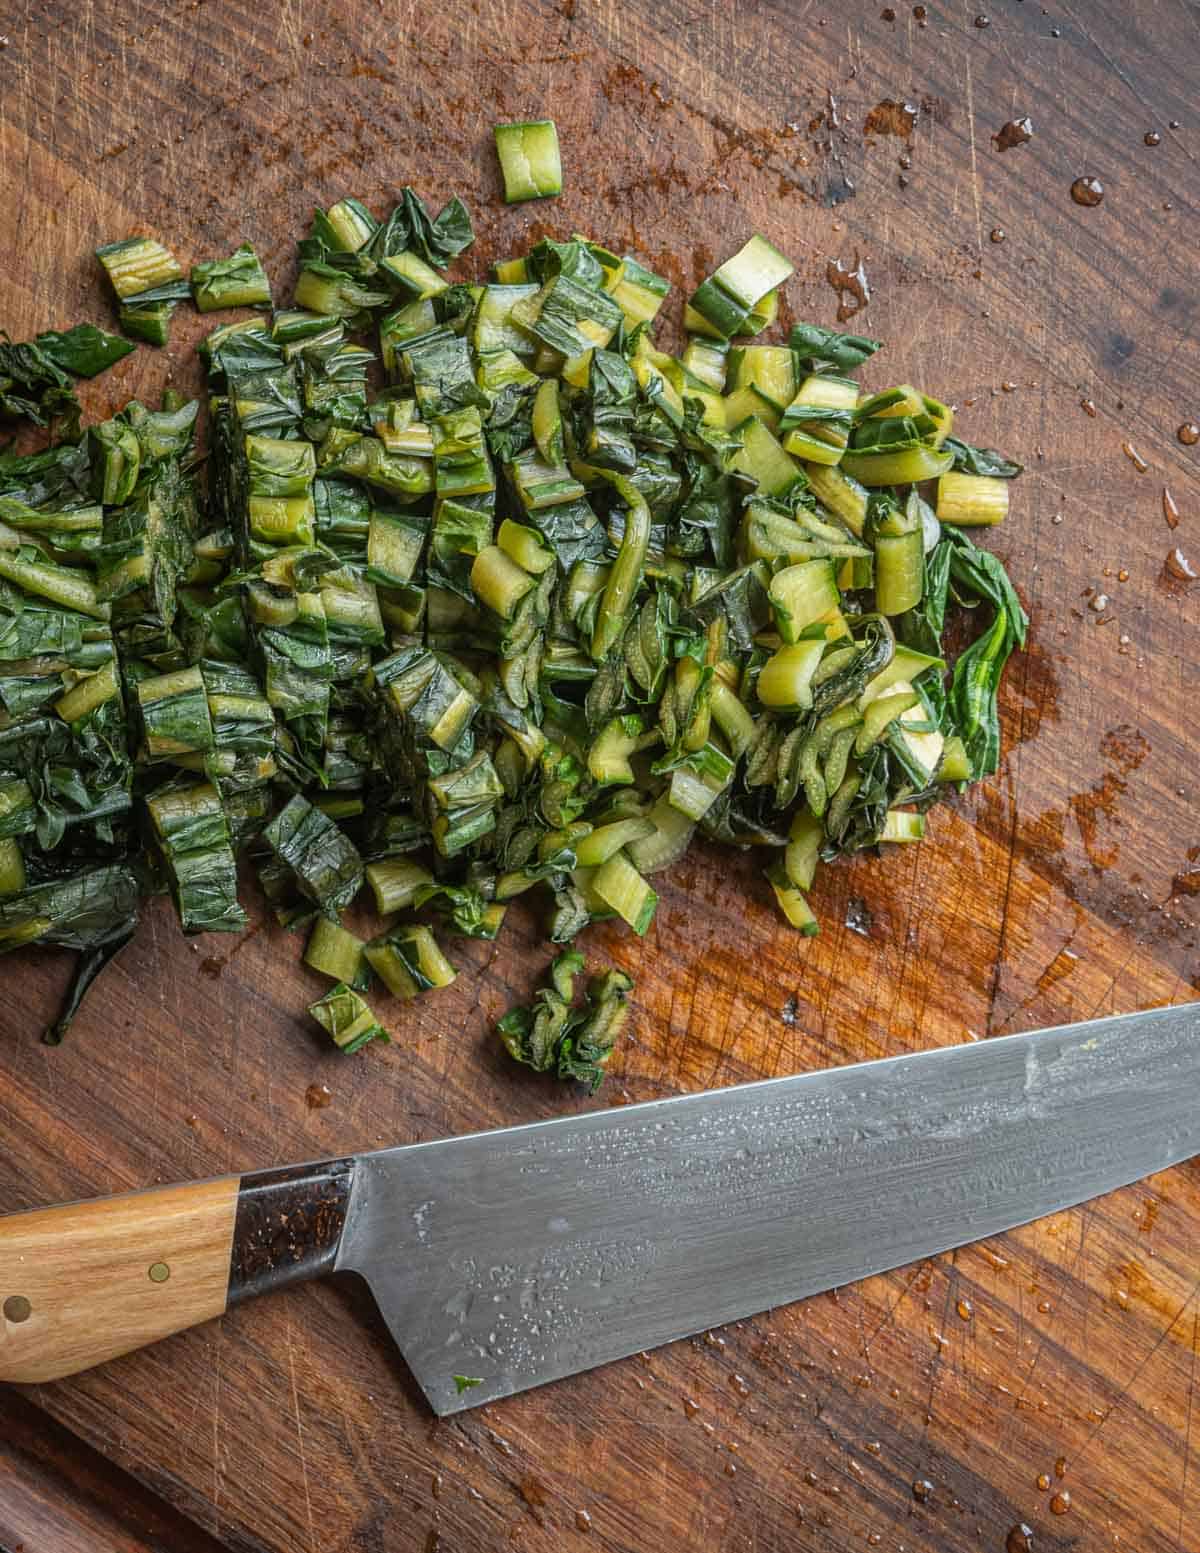
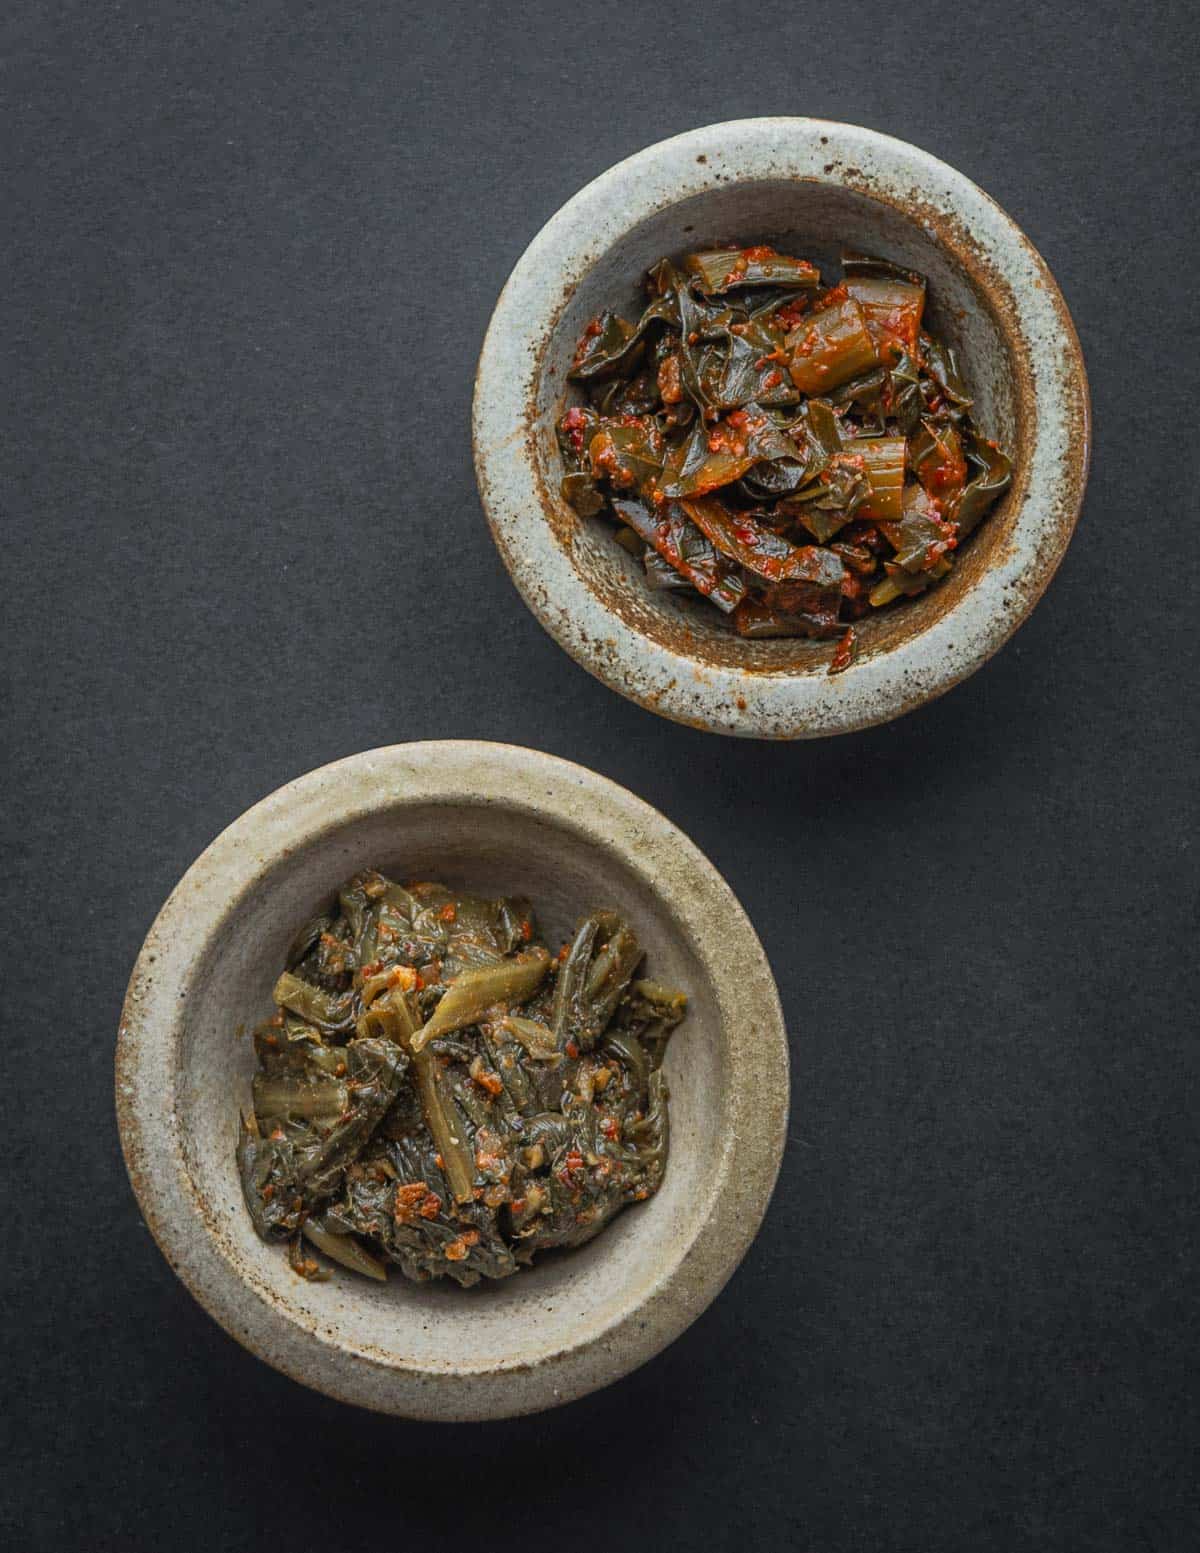
The greens are cut into bite-sized pieces for the best texture. This makes it easier to stir, cook with and eat.
Korean Chili Paste
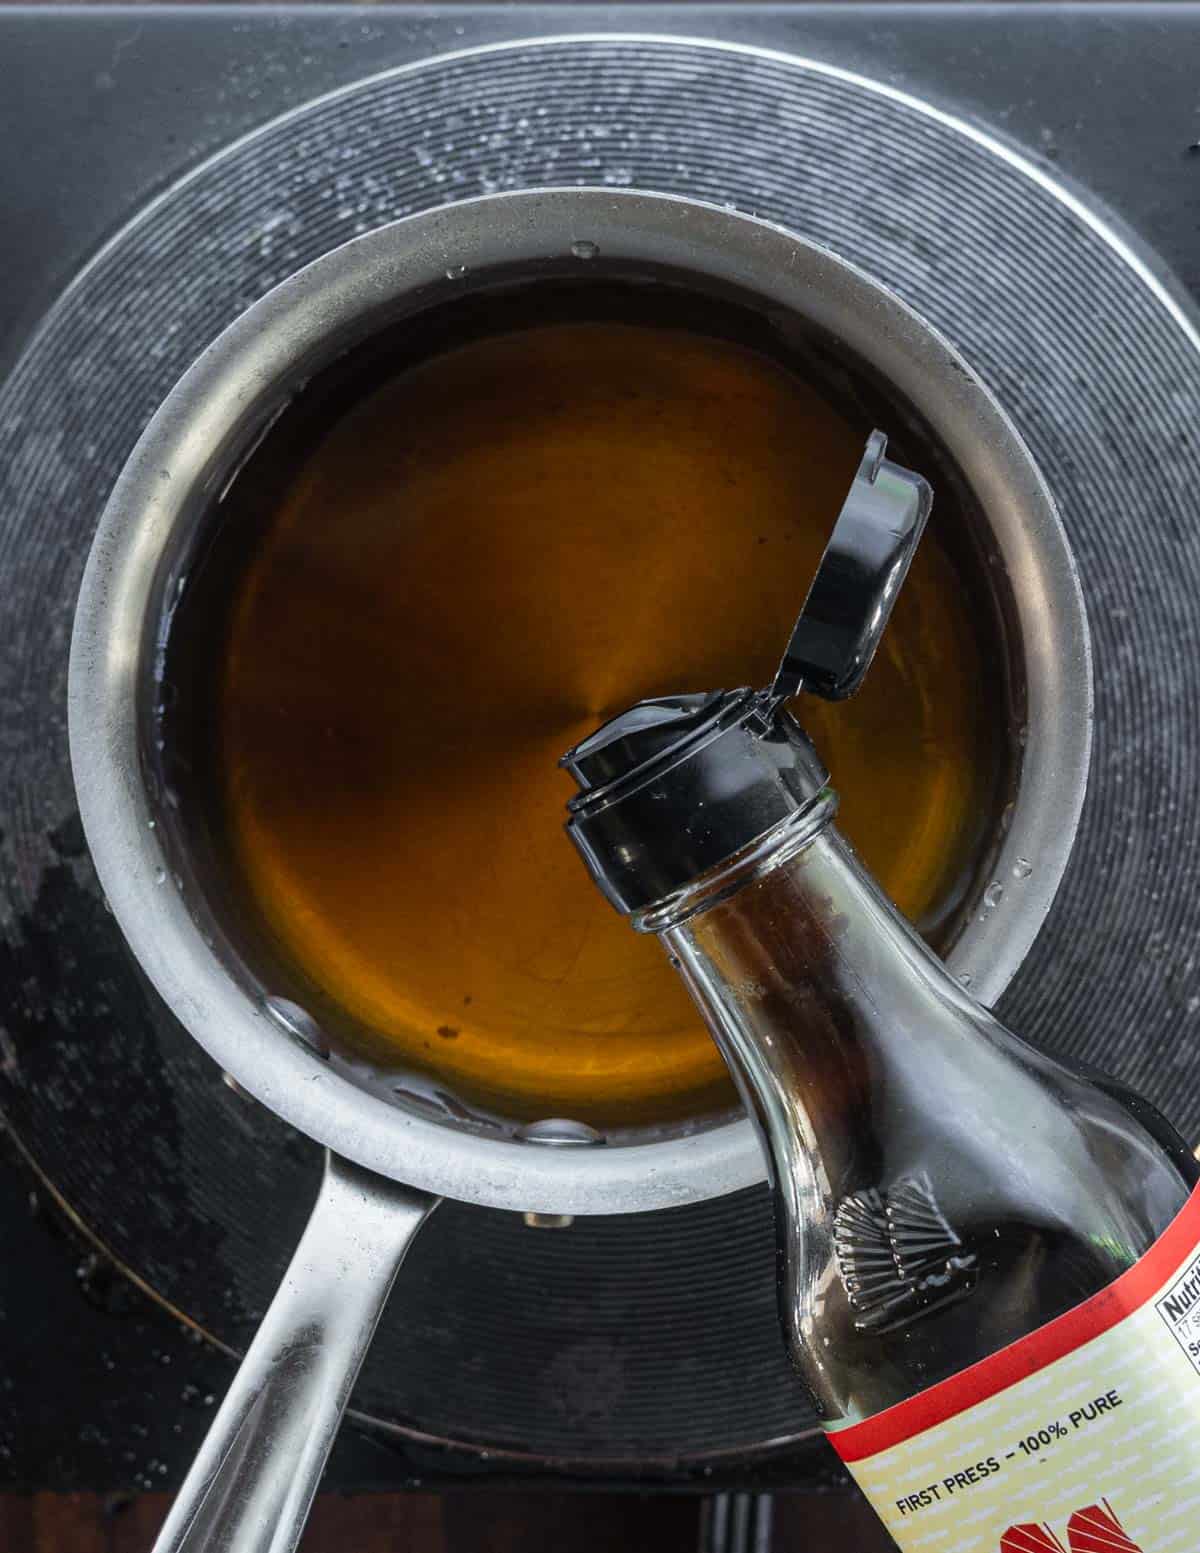
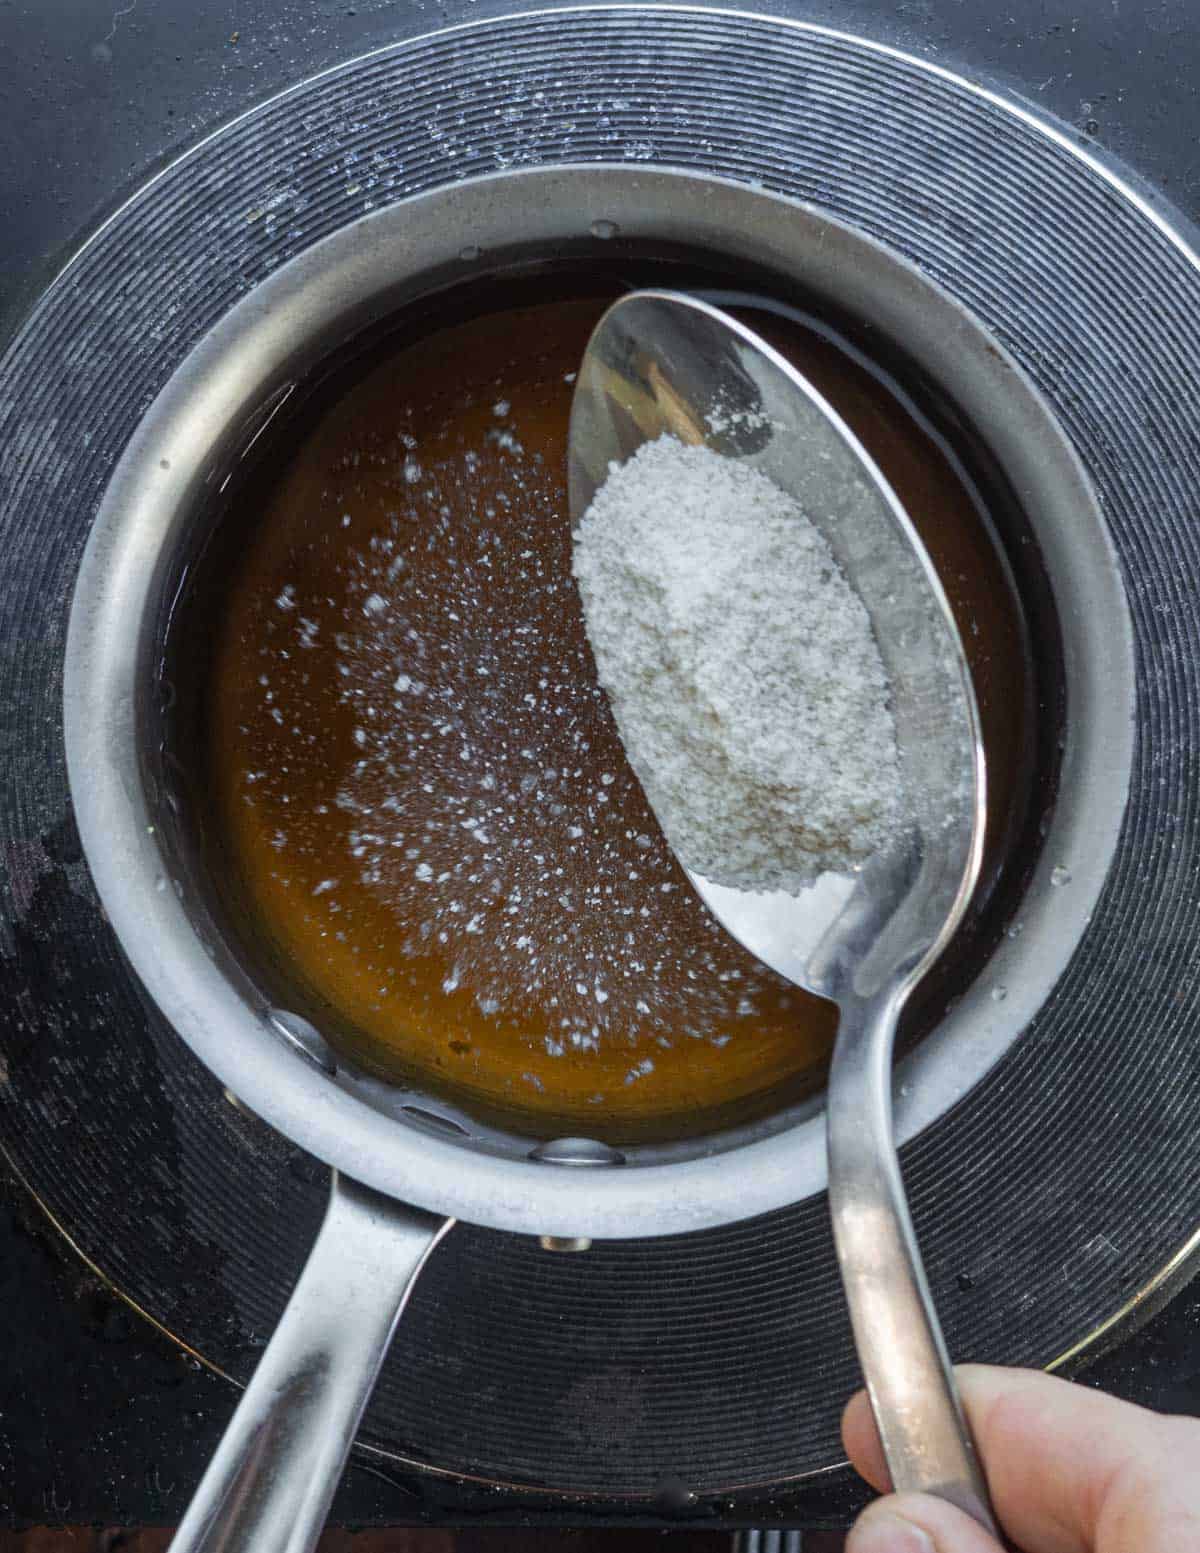
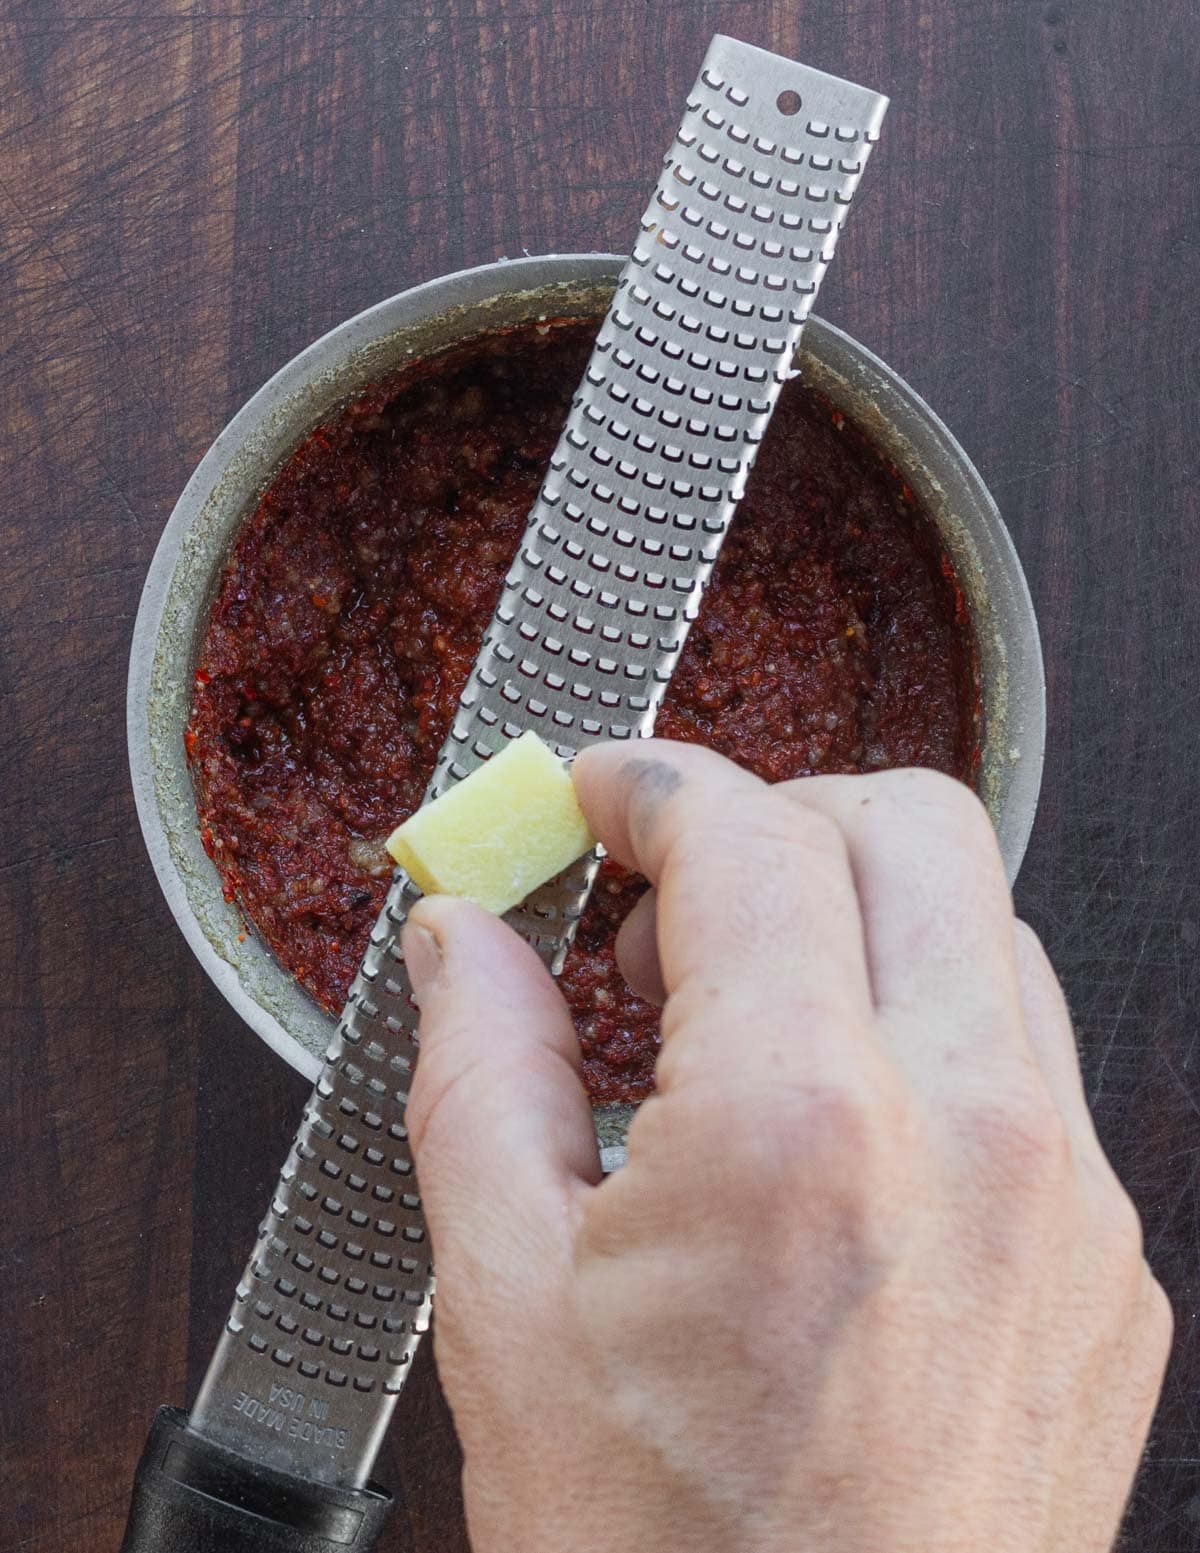
While the dandelions are cooling you make the Korean chili paste. Mix the water with fish sauce or another salty condiment like soy sauce, rice flour, a dash of maple syrup and cook until the flour thickens.
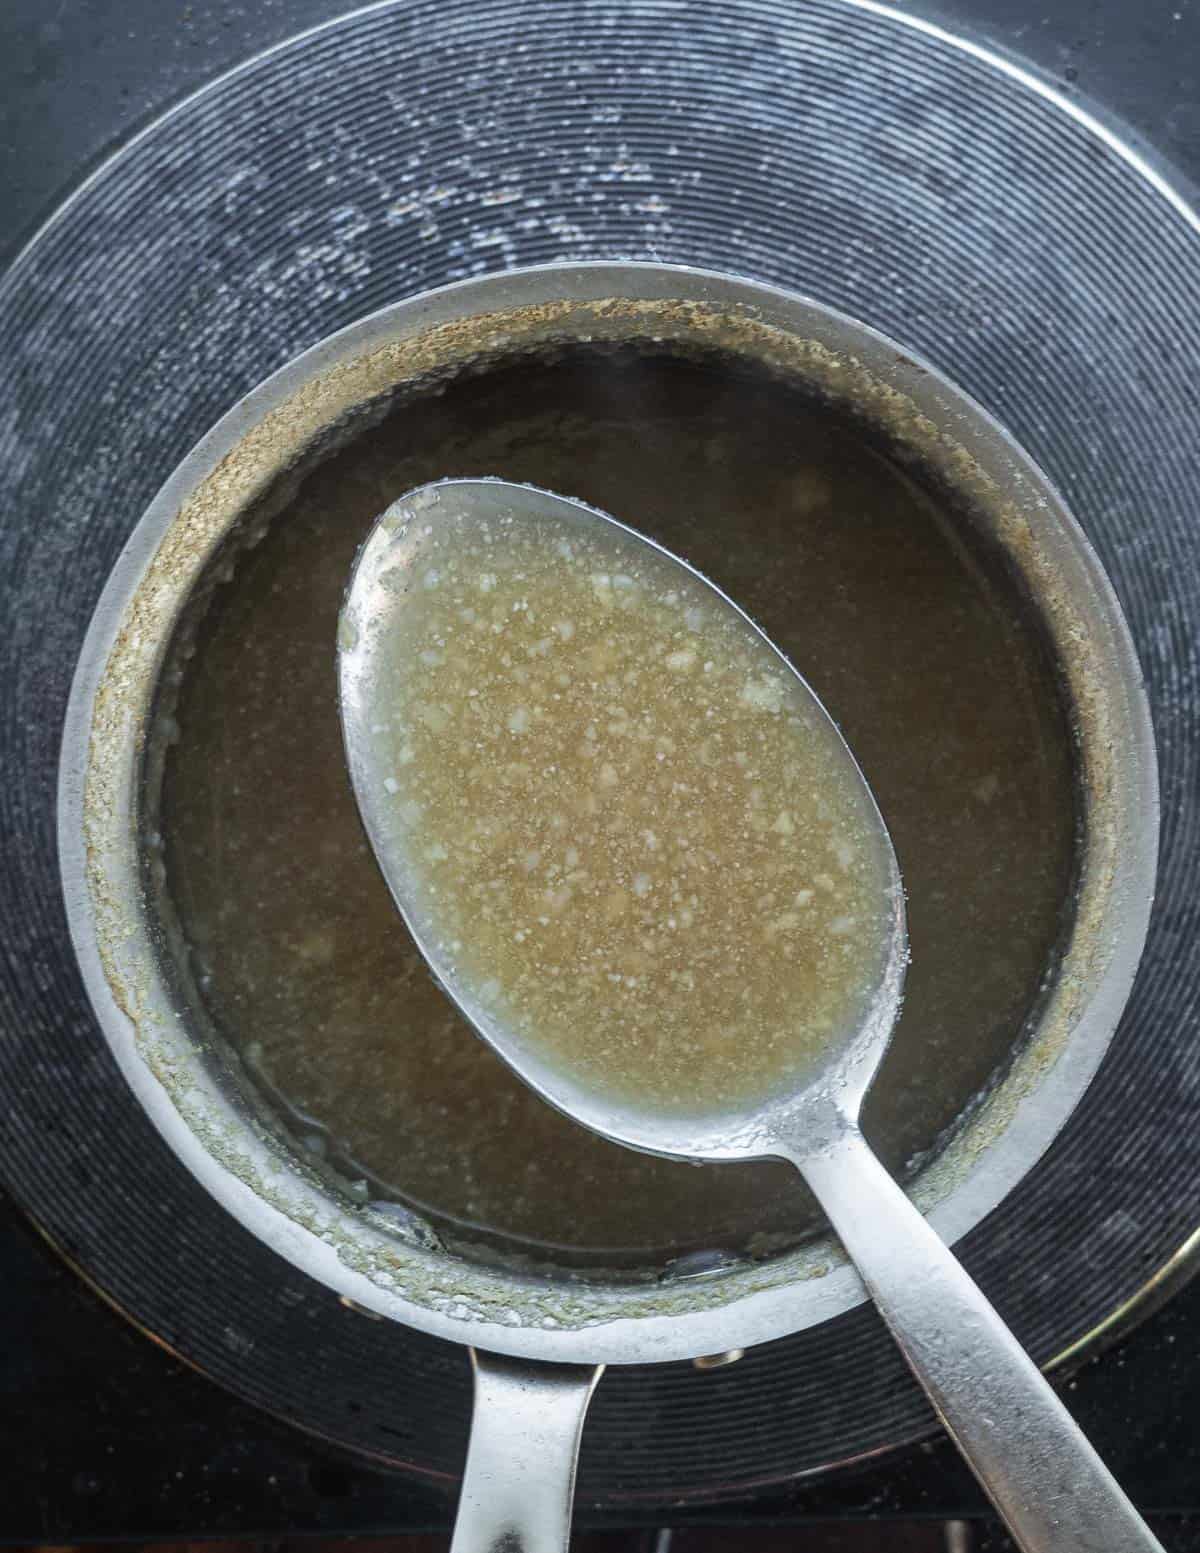
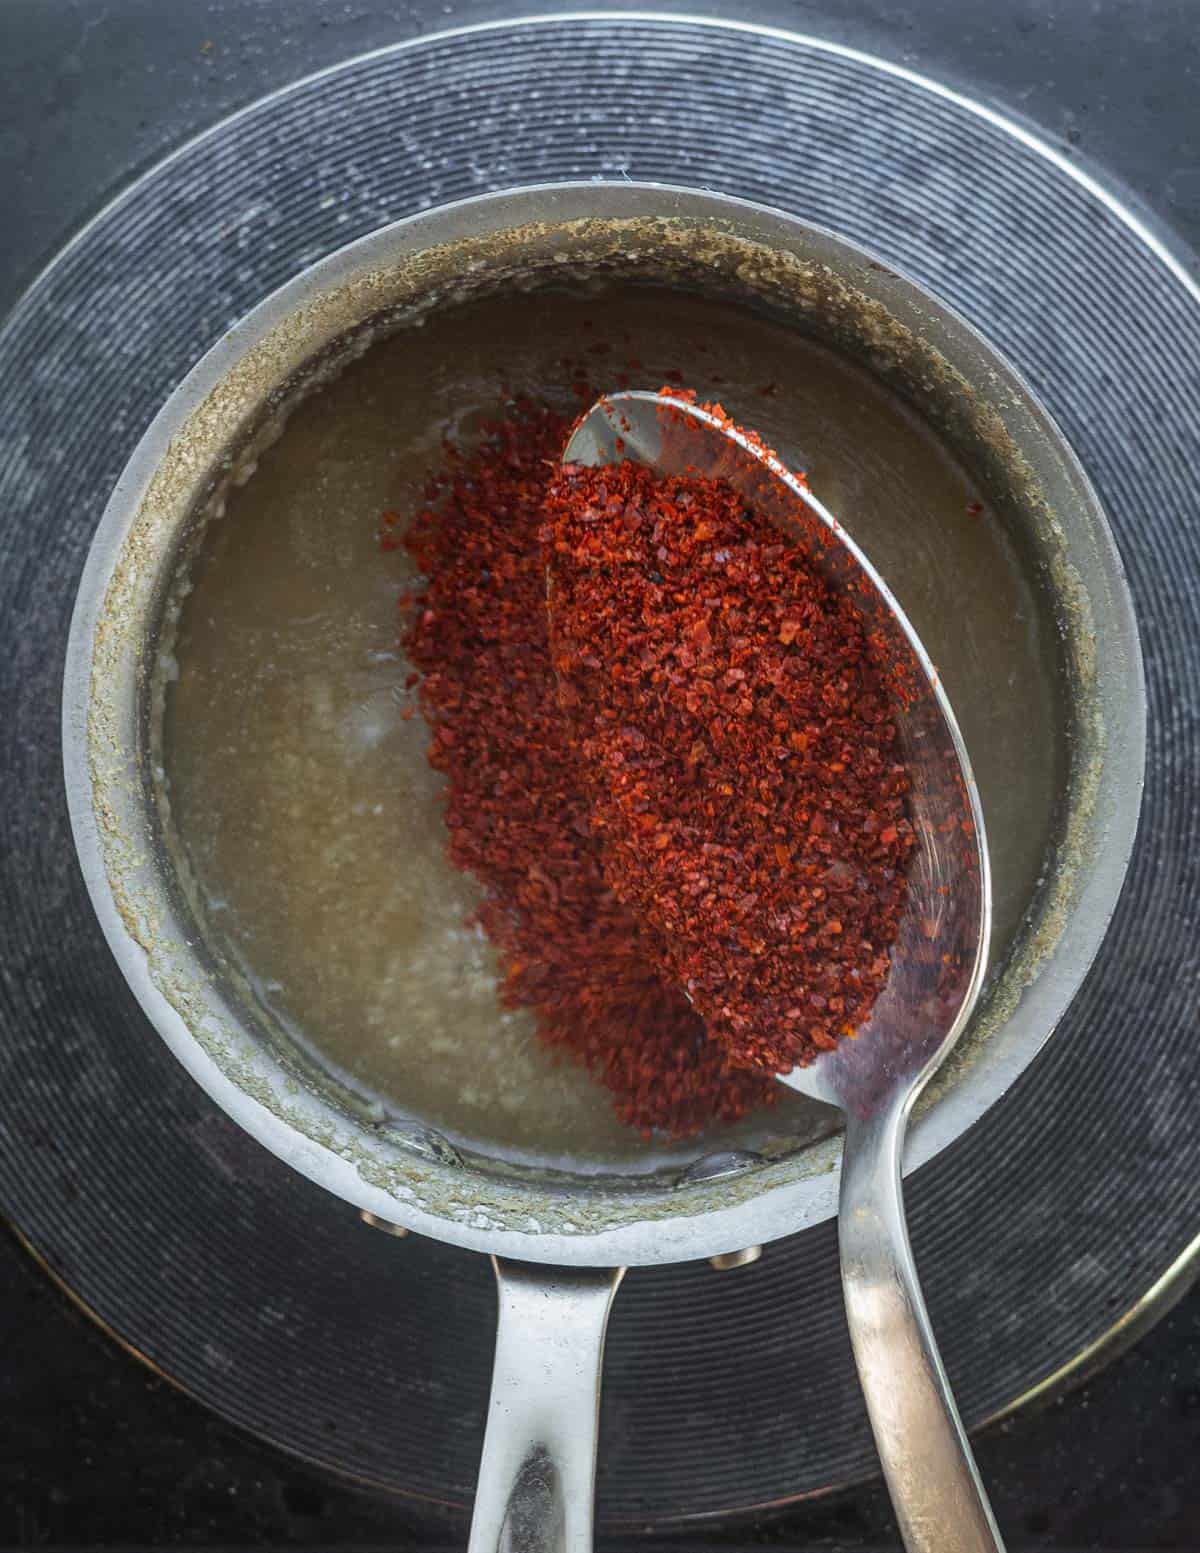
After letting the mixture cool for a bit you add Korean chili flakes. These are known as Gochugaru and easy to buy at an Asian market or online. Next grated garlic and ginger are added. You can add other chilis if you grow your own or want it extra spicy.
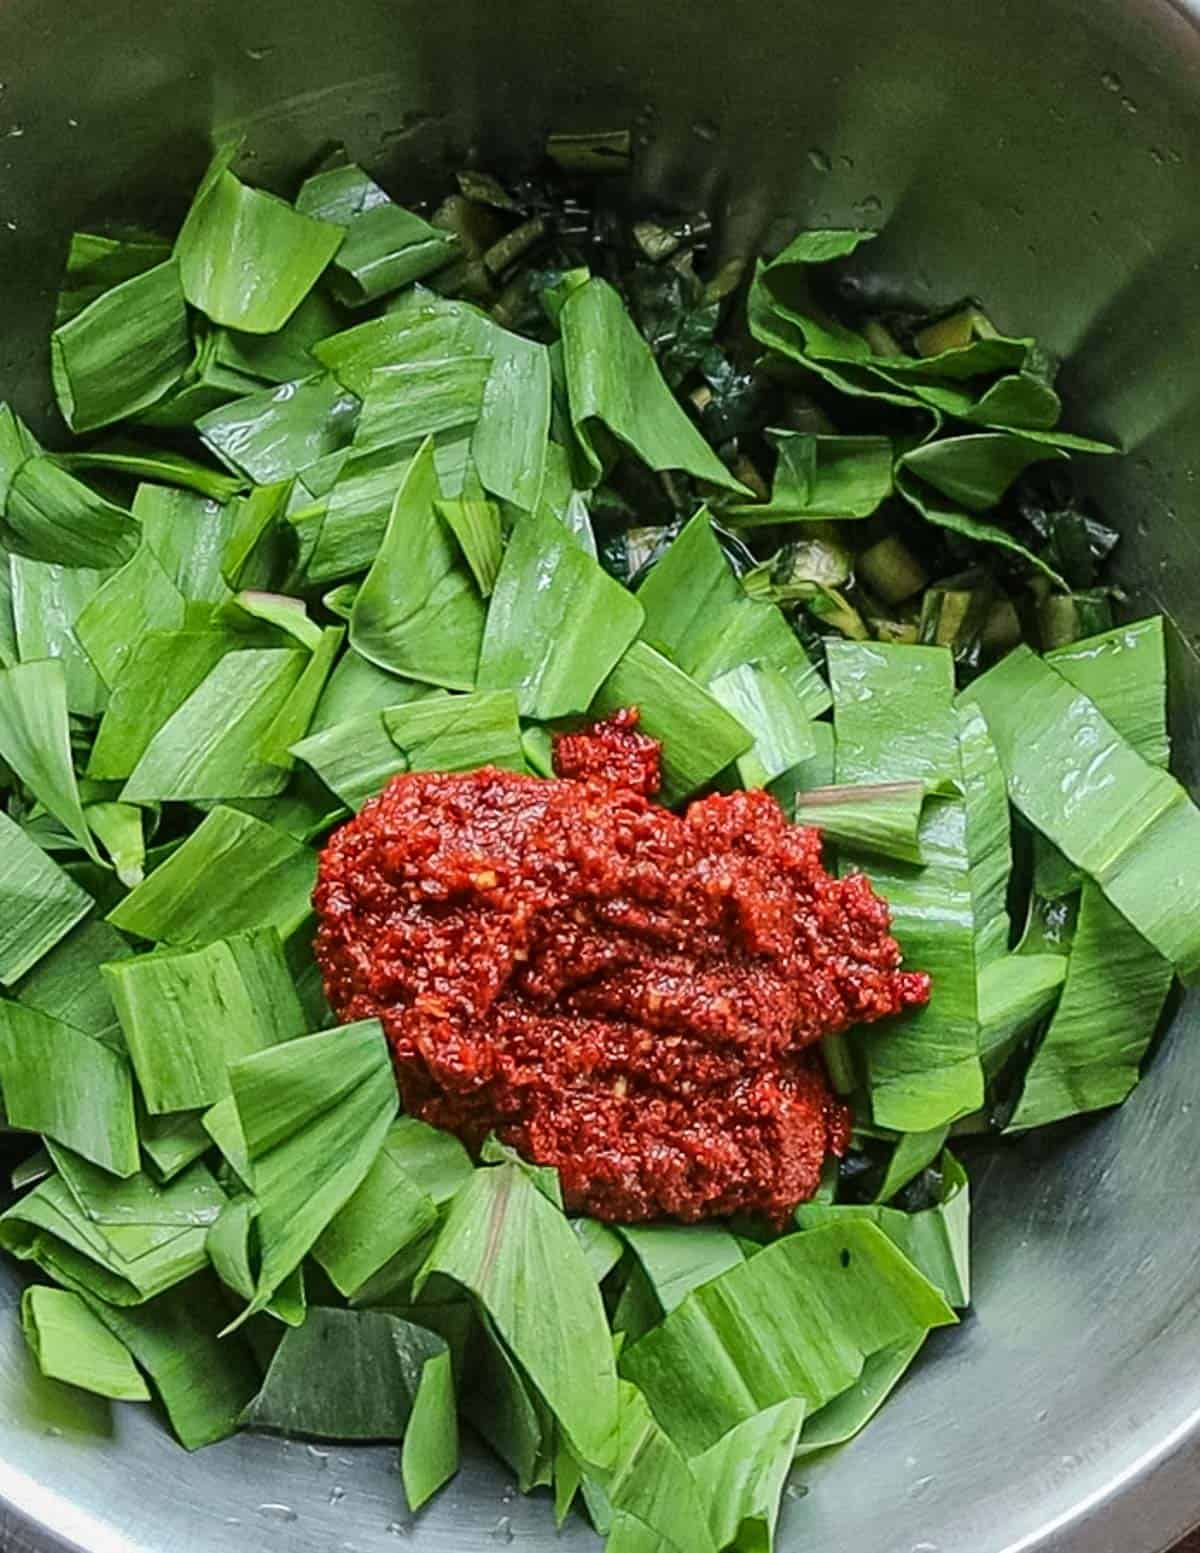
Next the greens are mixed with sliced green onions and the chili paste. You can be creative and add different alliums here too. Green garlic, ramp leaves, nodding onion, the green tops of walking onions or spring onions-there's lots of options.
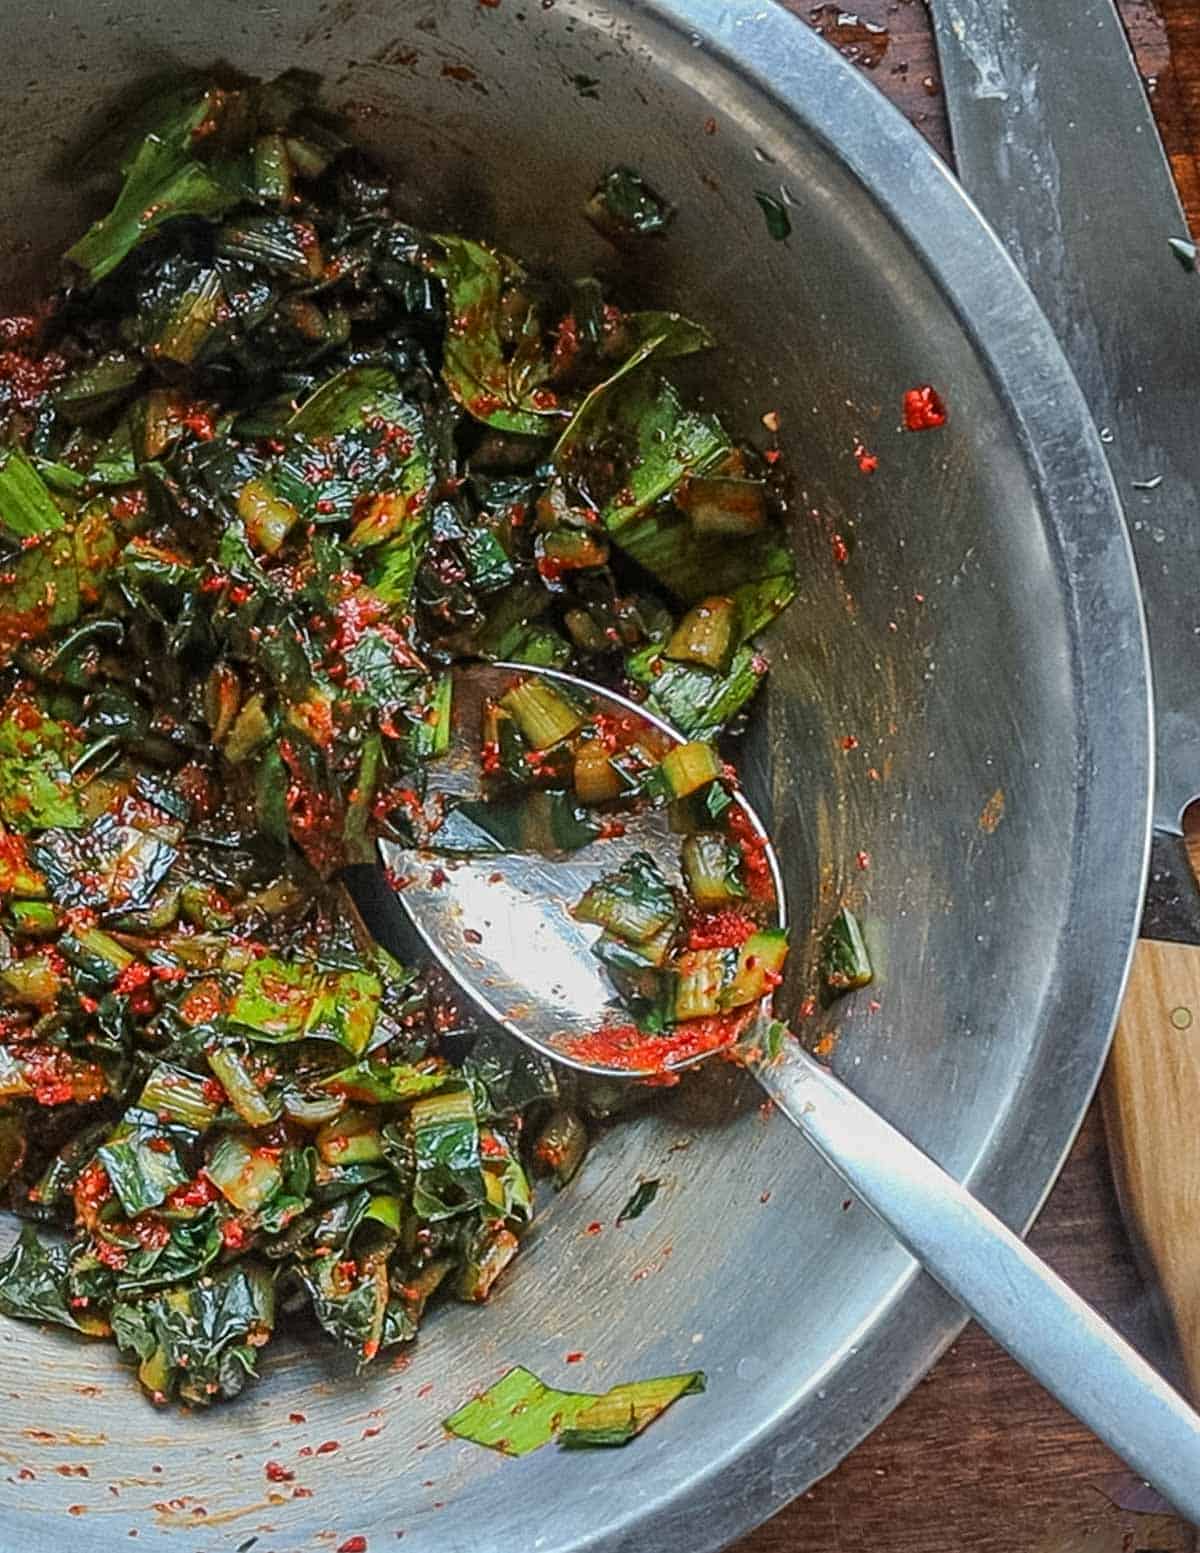
Pack the kimchi into a jar, pressing down on the leaves to cover them with the chili brine. After 24 hours you should see bubbles as in the image below to let you know the fermentation process has begun.
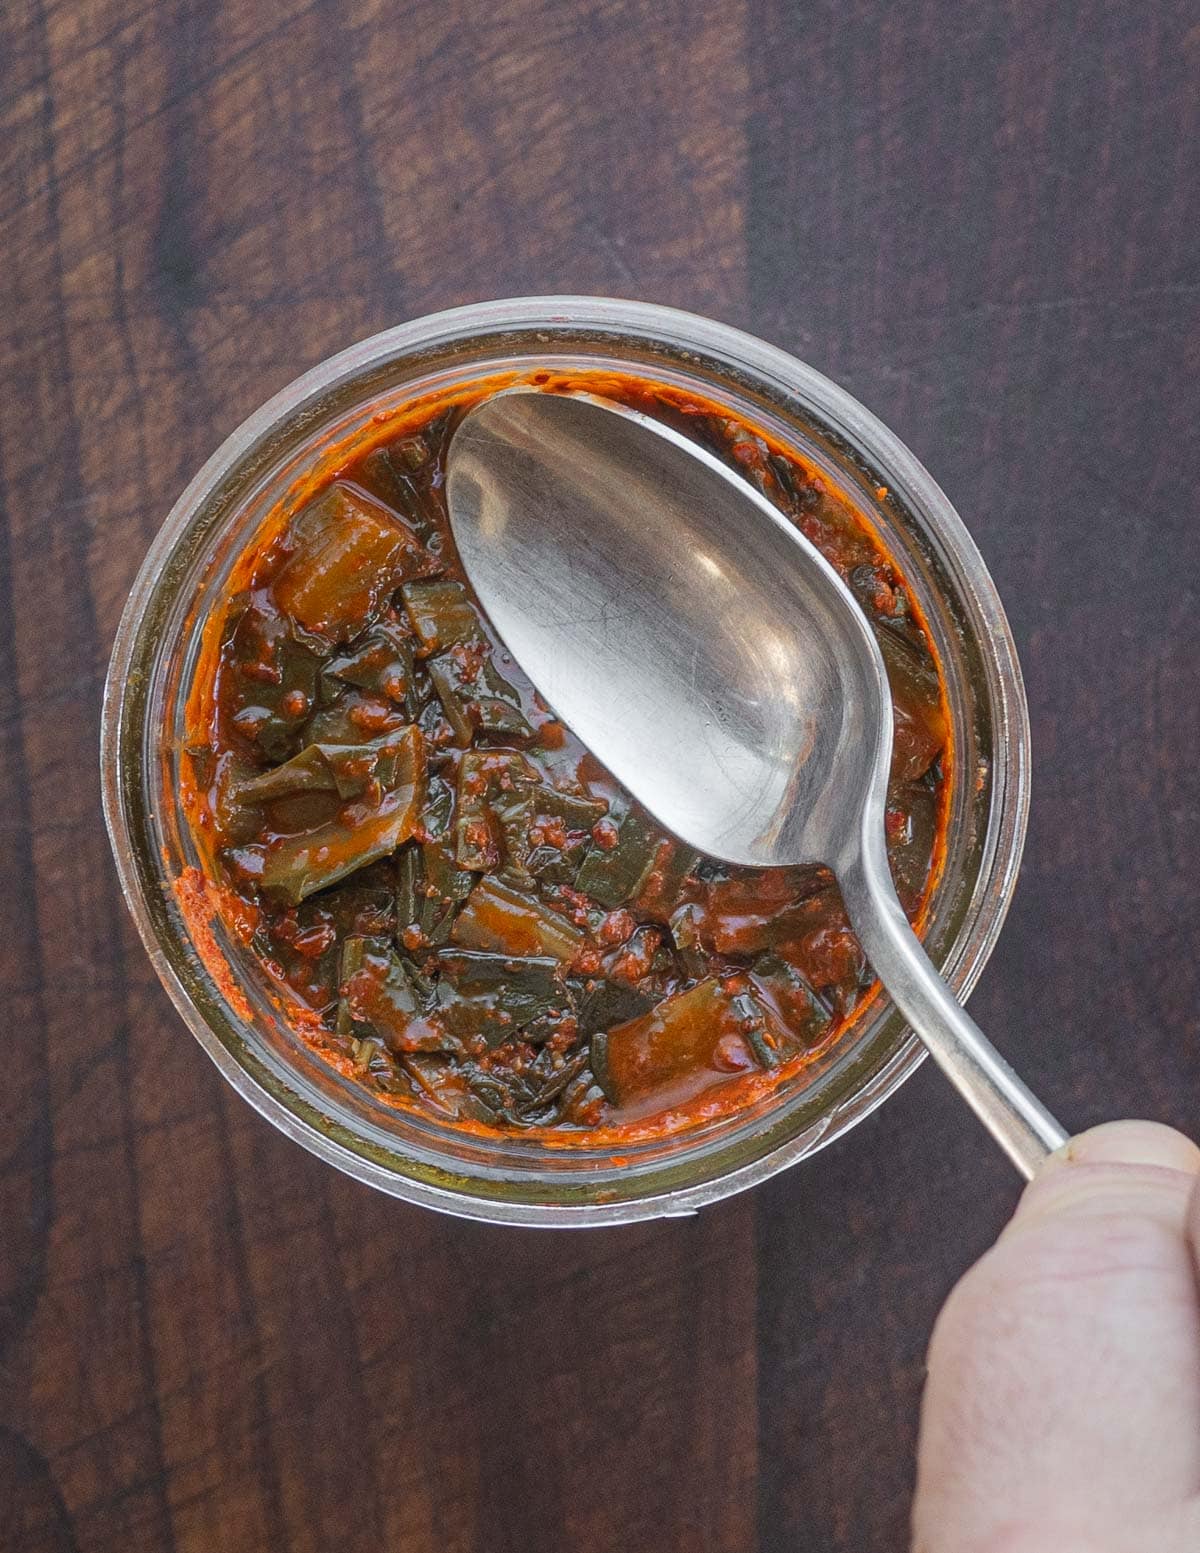
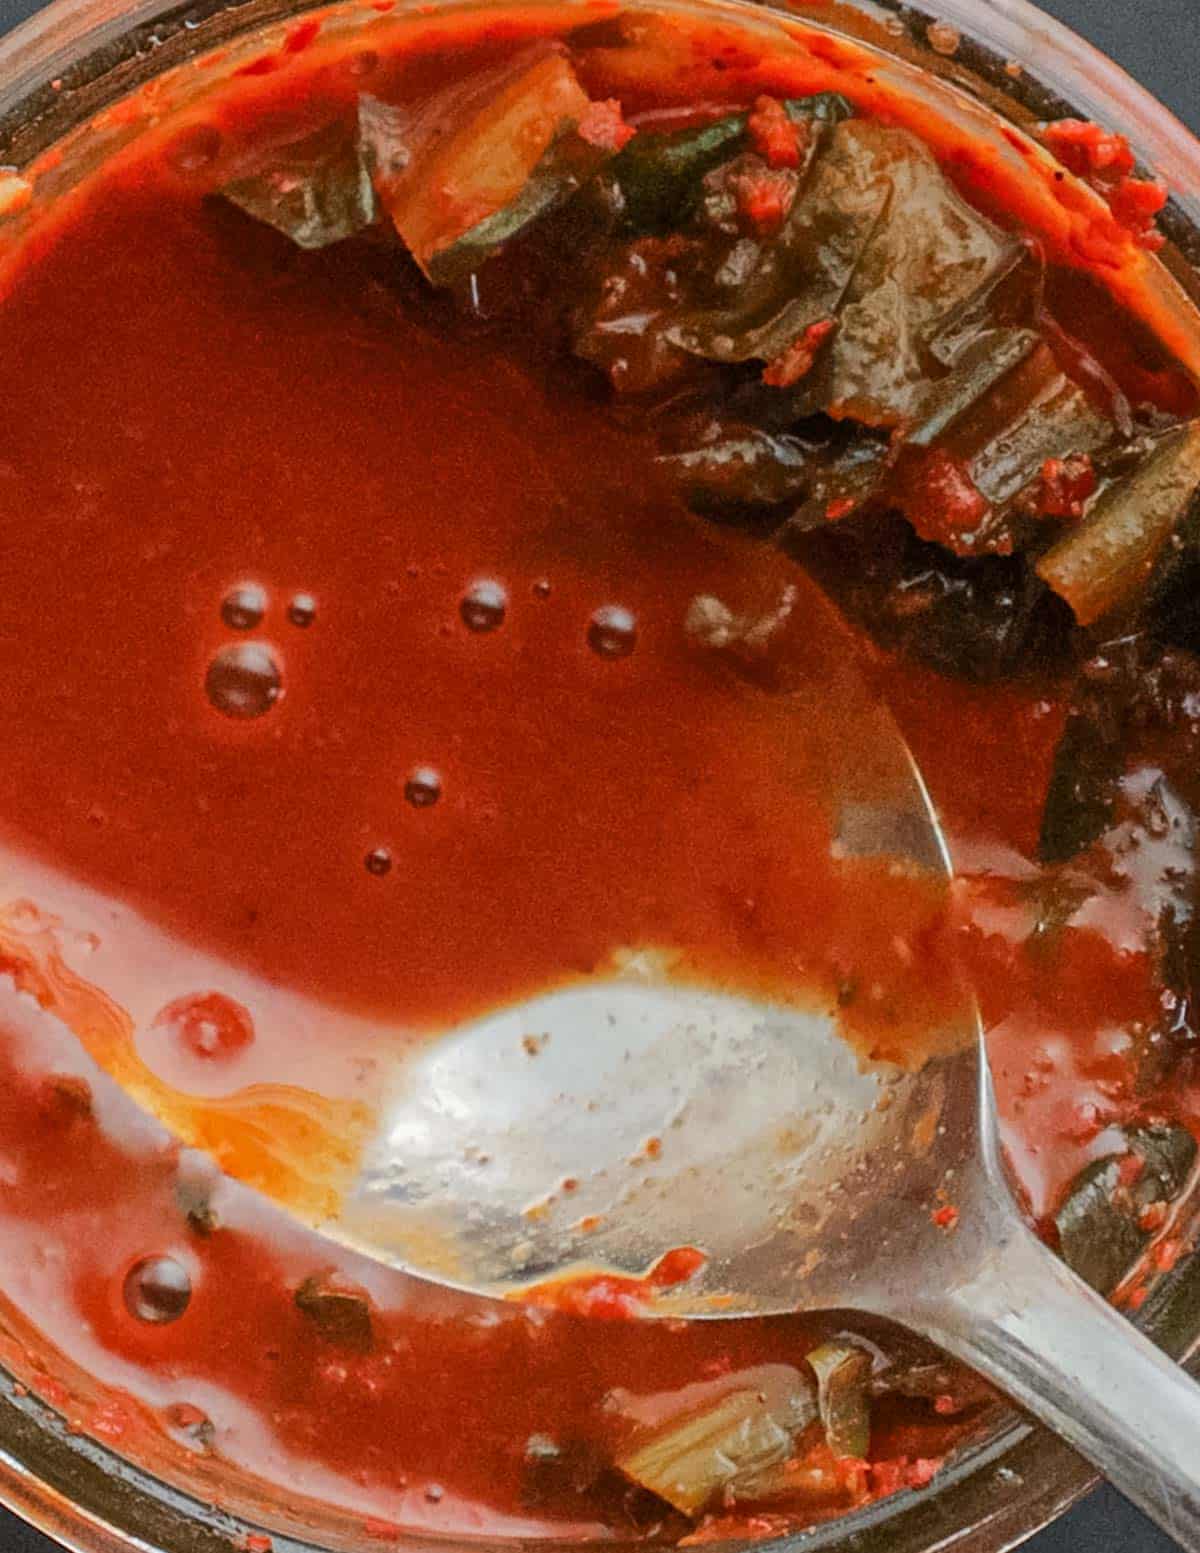
After packing into the jar it should be covered it with a non-reactive lid. Plastic Ball lids are great for fermenting as lactic acid reacts with aluminum lids, turning black and unappealing. Store the kimchi at room temperature until it's sour to your liking.

I usually leave it out for two weeks, but I've found jars multiple years old I've forgotten about that were perfectly fine to eat. The pH eventually becomes so low you could preserve something else by putting it in the kimchi jar!
What to Serve with Kimchi
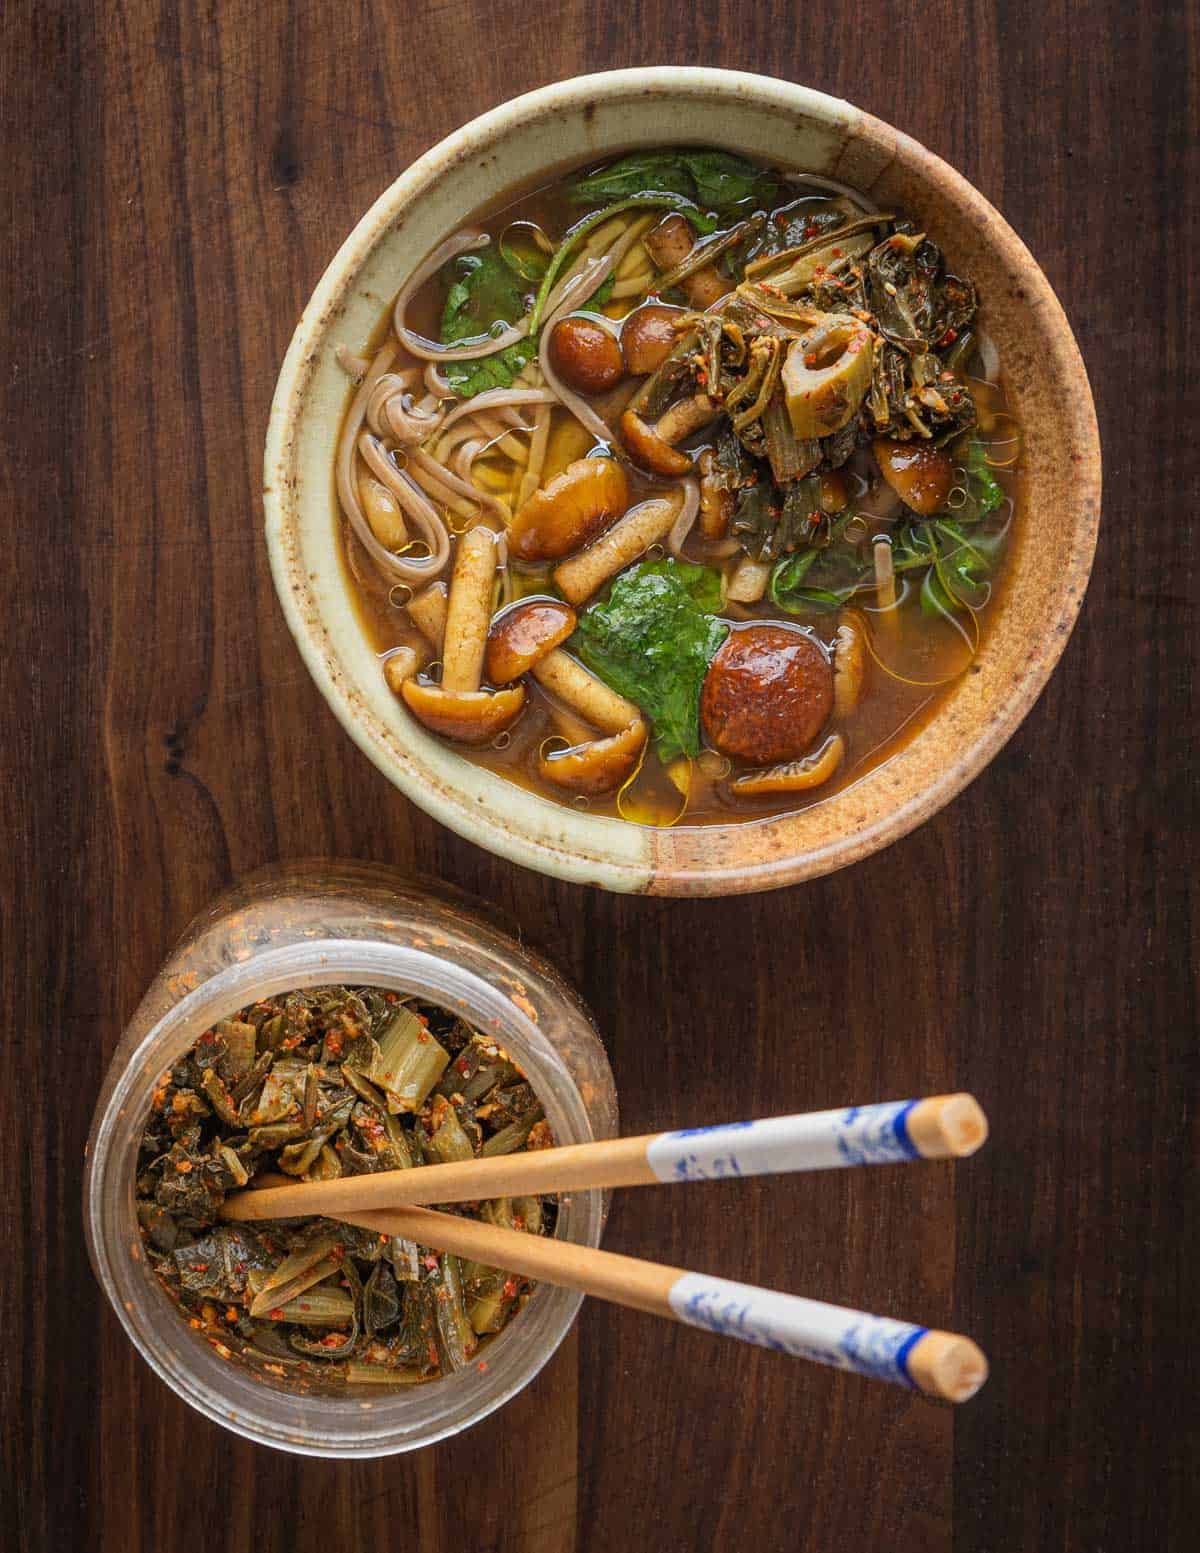
You can use the finished ferment anywhere you want a strong, bitter, spicy condiment. It's great added to noodle soups and ramens, and you can use it to make kimchijeon (김치전), traditional kimchi pancakes.
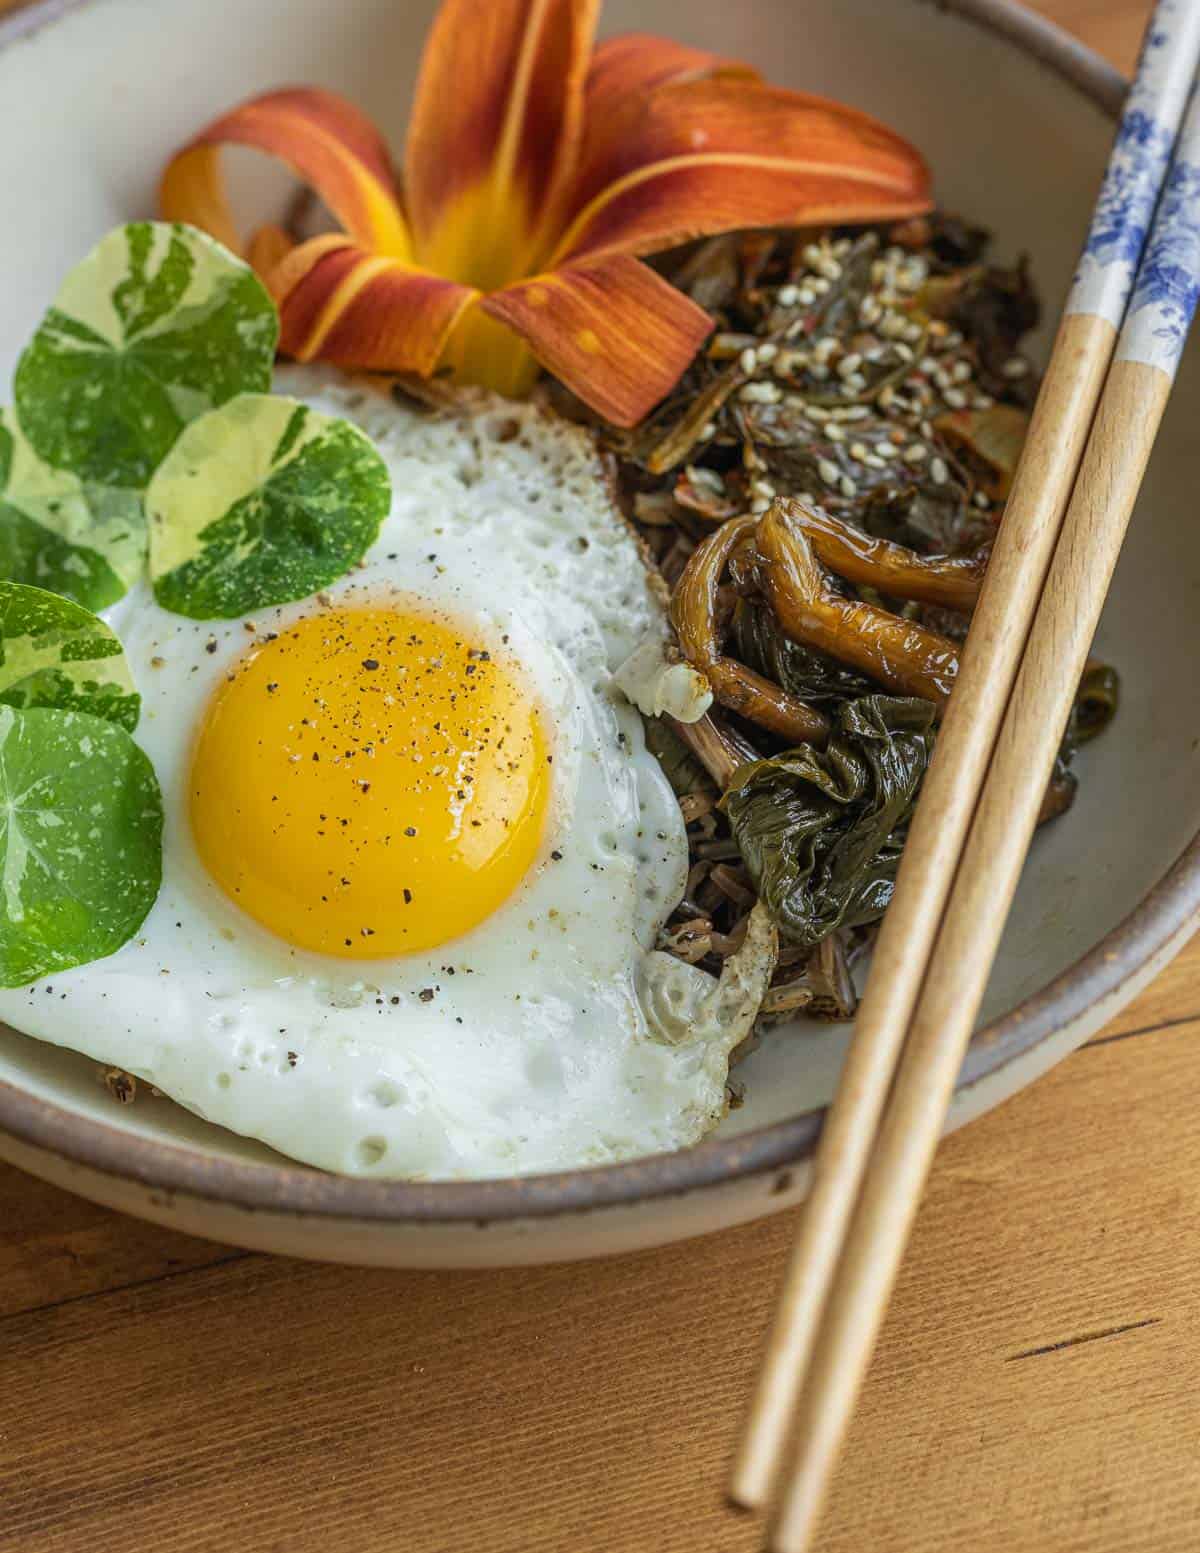
Traditionally kimchi is also served with egg and rice dishes. Think warm kimchi fried rice, scrambled eggs. Finely chopped it can be mixed into an omelet. I love it served with a rice bowl along with a few different condiments and a fried egg.
For a fun chef trick, try pureeing kimchi into a thick aioli or mayonnaise. It makes an interesting spread for sandwiches or just as a spicy condiment.
Related Posts
- Lebanese Dandelions with Caramelized Onions (Hindbeh)
- French Dandelion Salad
- Dandelion Hearts or Crowns
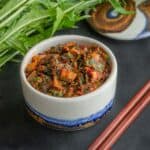
Fermented Dandelion or Prickly Lettuce Kimchi
Equipment
- 1 1 quart mason jar.
- 1 3 quart mixing bowl
- 1 microplane grater
Ingredients
Dandelions
- 1 pound fresh dandelion greens or wild lettuce tops
- 3 ounces sliced green onions or ramp leaves
- 3 teaspoon Kosher salt
Chili paste
- ½ cup water
- 1 tablespoon maple syrup or equivalent
- 3 tablespoons fish sauce preferably Red Boat Brand
- 1 tablespoon white rice flour or grind white rice as finely as possible in a coffee grinder
- ¼ cup Korean gochugaru chili flakes (coarse) 30 grams or roughly 1 ounce, or more to taste
- 3 large cloves garlic minced or grated
- 1 inch cube fresh ginger root minced or grated
Instructions
Dandelion Greens
- Blanch the dandelion or wild lettuce greens for 30 seconds in unseasoned boiling water. You could also lightly steam the greens.
- Drain the greens, spread on a tray to cool, then mix with the salt and rest for 30 minutes.
- Rinse the greens well with fresh water and squeeze them dry.
Chili Paste
- Bring the water, maple syrup and fish sauce to a simmer with the rice flour until thickened, then cool to room temperature.
- Add the grated or minced garlic and ginger.
- Mix the cooked greens, green onions and chili mixture together well. Taste the mixture for spiciness. Add more chili flakes if you want.
- At this point sometimes I add a handful of herbs like cilantro or culantro.
- Pack the kimchi into a jar, pressing it down to cover with the liquid and screw on the lid.
Fermentation
- Leave the kimchi out at room temperature for at least a week or two, When it's sour to your liking, refrigerate it. *See note
- The kimchi will for a very long time-years if you want, and will continue to get more sour in the fridge. Remember to press the greens under their liquid and stir the jar occasionally.
Video
Notes
- I may leave my kimchi out for a month or more to ferment if I want it very sour. I've even forgotten about jars in my garage for multiple years which were still perfectly fine to eat.
- This will make a mildly spicy kimchi. Feel free to add your favorite hot or dried peppers to increase the heat, or just add more gochugaru chili flakes.
Diana
I worked in a NY hotel kitchen. We had a Korean event, and afterwards had tons of Kimchi left, so we did loads of experimenting. One favorite was Kinchi and cheese sanwiches. Lol
As they say in NY, " Try it, you'll like it"
Alan Bergo
I support that
Dean Sherwood
I got roped into teaching a foraged kimchee class this weekend. I've never made kimchee in my life! I trust your recipe. It sounds wonderful. All of the ingredients are ready to go, and it's simple enough to do at an event. I'll fill in the time with pointers on fermentation. I might even get around to mentioning one of Dwight's vinegar recipes. His stuff never fails, either. Of course I'll pitch your book and your web site.
Julia
I've made it several times with dandelion greens and it's absolutely delicious. Thanks for this amazing recipe!
Alan Bergo
Hey thanks Jukia I’m so glad. I was just out picking a bunch of nettles to try with the same method. Optimistic but we’ll see.
Sara
Could you explain the role of the rice flour here? Is it crucial to a successful fermentation?
Alan Bergo
The rice flour isn’t necessary for fermentation, but it’s very traditional. The starch absorbs water and thickens the natural sauce that forms, otherwise it will be wet and watery.
Claudia Marieb
I made this in the spring with dandelion greens - bitter and loved it. Now I'm going to try it with daikon radish greens from my garden. I have a ton of radish greens and don't want it to go to waste.
I can see this becoming a spring and fall ritual, and it's so great to have it at the ready in the fridge as you said, for putting on rice, eating with eggs, and a million other uses.
Alan Bergo
Hey thanks Claudia. I ate all mine from this year. It’s so nice to have around. I love adding it to soups.
Margaret
De-lish
Alan Bergo
Hey thanks Margaret. Really appreciate you taking the time to leave a comment.
Margaret
Absolutely! You’ve taught me a lot.
Rachelle
Thank you so much, I really appreciate your sharing! I can't wait to make this! I love your entire presentation from start to finish it is always so educational and a real treat!
Does it stay on the shelf until opened and once opened put in the fridge?
Also could I used organic mixed spring salad greens you buy from the store for this recipe?
Thank you, thank you!
Alan Bergo
Hi Rachelle. Keep the jar out for a week or two, then refrigerate it. I have also left it out for months with no issue. You can't use spring greens from the store. You want to use bitter greens like dandelions or chicory, or wild lettuce.
Jackie Skrypnek
I was really excited about this recipe and went straight out to collect enough dandelions to make it! My one question: it's not weighted down or submerged in brine - will it ferment okay this way without molding? Thanks!
Alan Bergo
Hey Jackie, as you can see in some of the images here you press the greens into the jar and the brine covers them. It's the same as any other lacto-ferment there.
Flanman
Rey cool sir, love everything about this entire recipe and process. I also enjoyed your riffing on other ways to get creative with using the base recipe in other dishes as well as condiments. This would be a nutritional powerhouse using wild greens and fermentation. Awesome work and I can't wait to give it a try. Thanks Alan!
Alan Bergo
Thanks Flanman.
Carla Beaudet
Does lactofermentation mitigate the bitter of the dandelion greens?
Alan Bergo
Hey Carla, it will a bit, as will the blanching, but it will never remove bitterness completely, nor would I want it too. The bitter-spicy-sour combination of flavors here is pretty special.