Can you ferment wild mushrooms? The short answer is yes. The longer answer is that it won't be useful for most mushroom hunters. Read on and I'll explain the details.
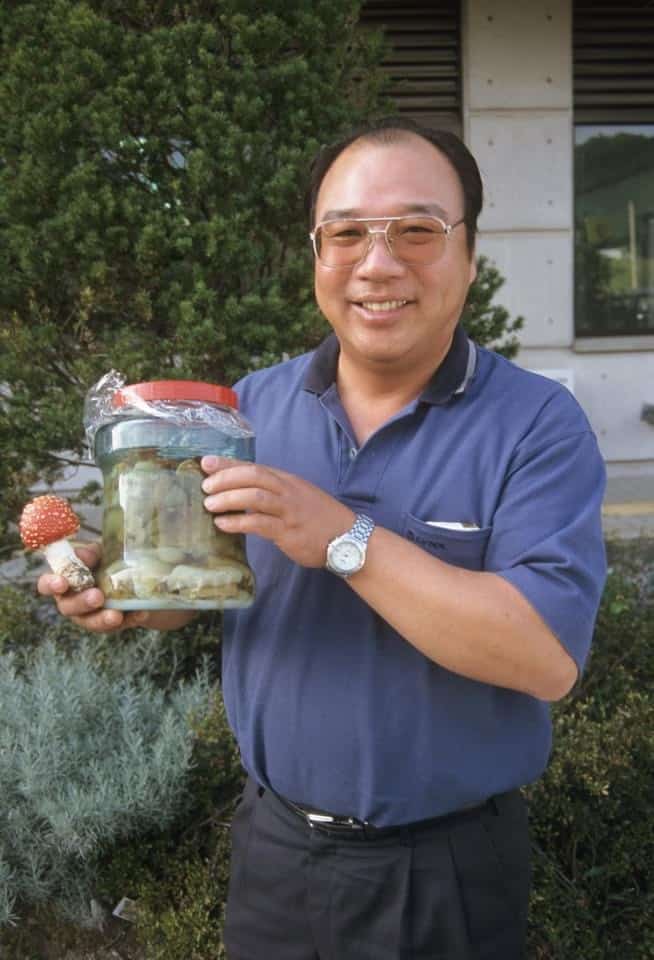
I fermented my first wild mushrooms about 7 or 8 years ago one day during the winter. It was prime time for Canthatellus formosus that come from Oregon to Minnesota. I salted up some chanterelles and let them ride for the same requisite 1-2 weeks as the sauerrubens (turnip kraut), kimchees, hybrid kraut-chees, Kim-krauts, and most other fermenty things.
When the time came to unveil my creation, I ran downstairs to the secret area, ripped the cling film and bags of water off, knelt down, put my face deep in the metal third pan, and inhaled a cutting smell of alcohol so sharp it felt like it would burn my eyes.
The couple pounds of wasted chanterelles went silently, quietly, into the pig bucket, along with my confidence.
I swore mushrooms were impossible to ferment, I swore they had different chemical properties than the vegetables I was skilled at krauting, somehow producing alcohol instead of lactic acid.
Turns out the only thing I was skilled at was blaming my failure on anything but where it belonged—me. To be clear, I'd fermented the chanterelles dry, where I should've used vacuum sealing or brine, and I suspect it created ethanol in the process.
It took me a few years to understand what I did wrong, and understand that mushrooms can be fermented like anything else. Recently, I've been getting a few consistent questions on the topic, so I thought I’d try to be helpful and answer them. The big questions regarding mushroom fermentation I've been getting, more or less, are:
- What’s the science?
- Is it safe?
- How do you do it?
- And, most importantly: does it even taste good/is it worth it?
The Science
First, there’s more than one way to get from fermenting point a to b, but all I'm talking about here is lactic acid fermentation. Koji fermentation and inoculation, fermentation with wild yeast(s) other than Lactobacillus species, and other one-off things like primitive fermentation without salt are beyond the scope of this post.
Simply put, lacto-fermentation is exactly the same process sauerkraut goes through. Salt is added to the mushrooms either by itself or via brine, and air is reduced or ideally completely removed, creating hospitable conditions for good anaerobic bacteria and Lactobacillus species, which, as a byproduct of consuming sugars from the fermenting product in question, also creates lactic acid along with carbon dioxide.
The acid lowers the pH, which makes it further inhospitable to bad bacteria, just like vinegar in your pickles. Eventually, the fermentation will stop, and the pH will stabilize (FDA guidelines for safe canning pH will be 4.6 or under). Most of my mushroom ferments have come in around a pH 3-3.5 or so after two-four weeks, in other words, they're completely, positively, safe.

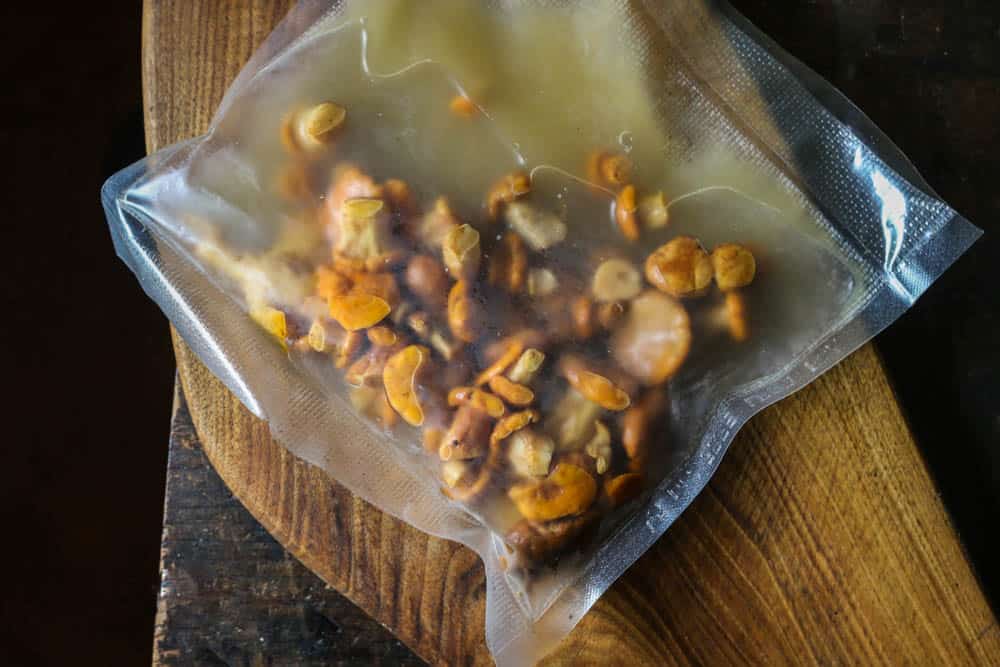
Vacuum sealing ferments is clean, odorless, easy and safe. Kimchees, like the one pictured, produce less carbon dioxide since they often include a higher percentage of salt that slows the fermentation process, generally around around 7% salt from my experience, as opposed to typical sauerkraut, which hovers around 3%. If you don't want to burp your bag during the fermentation process, try kimchee.
How to do it
There’s a few options here. The simplest, is covering mushrooms with salted water. For that, you might use a concentration of 2-5% salt, or 2-5 grams of salt for every 100 grams of water. But, you could also use 2-5 % of salt for the combined weight of mushrooms and water. Both will work, but will ferment faster (2%) and slower (5%) according to the amount of salt.
Kimchee-style is slightly different, and a slower ferment from from my experience as it typically includes a higher salt brine around 7%, along with other ingredients. Simply weighing down salted mushrooms like sauerkraut is not recommended, unless it's only for a handful of days.
Vaccum sealed ferments and air locks
In my opinion (and the opinion shared by other well-known chefs in the space) is that the most stable, trustworthy, and most importantly the safest ferment, is salting and vacuum sealing, or using an air lock on a mason jar. I primarily use vacuum sealing, but both methods work, and air-locks use glass mason jars, if you're worried about your plastic consumtpion.
Both are effortless, and makes it possible to ferment mushrooms with a low-moisture content (Ischnoderma, and likely Meripilus sumstinei, and others) without a care in the world. I've never had mold grow on a vacuum ferment, but if I had a nickel for every time a jar of something in brine grew mold in a jar, well, you get the idea.
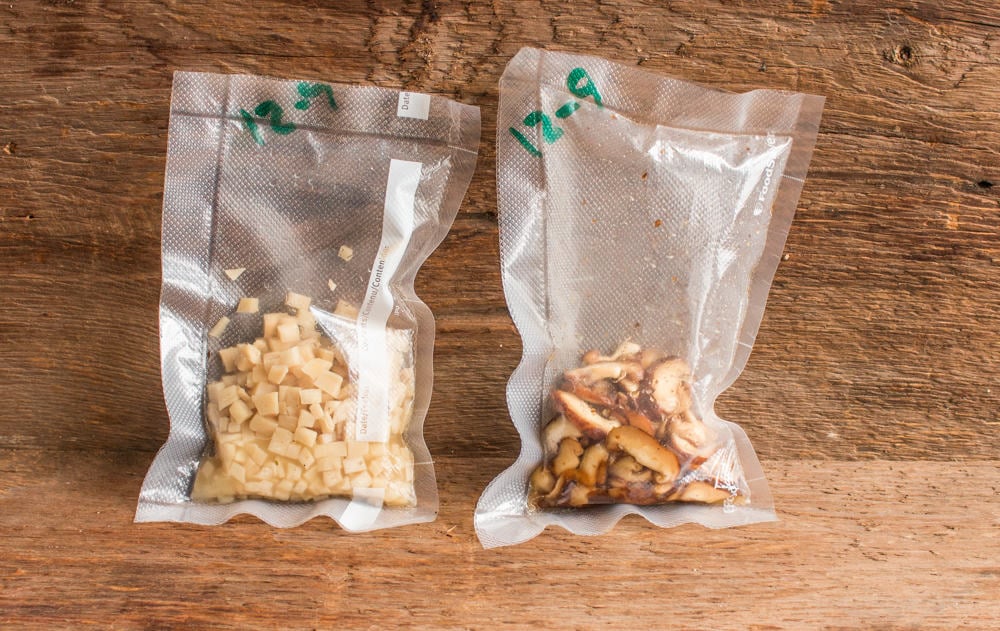
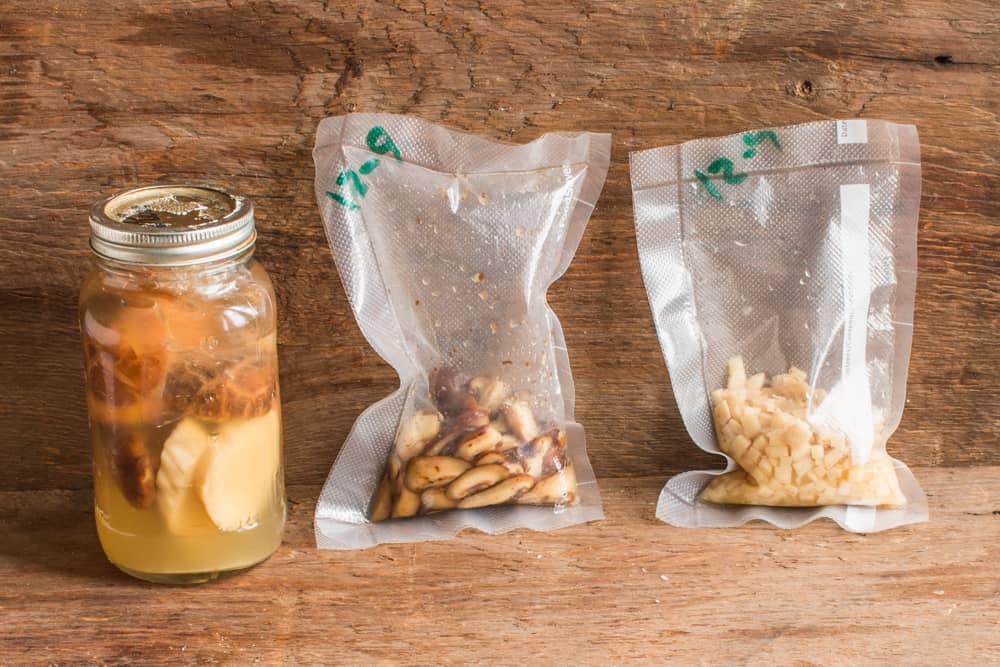
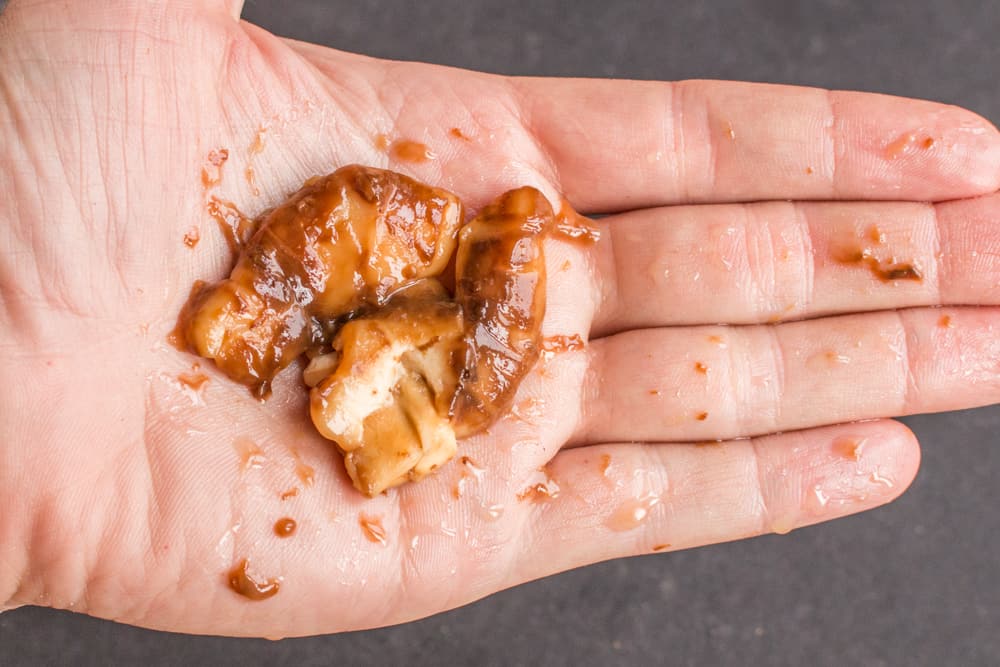
The added bonus here is that there isn’t any added water, and the mushrooms cure in nothing but their own liquor, so, when you crack that bag open, you can harvest two concentrated culinary products for the price of one.
If seasoning food with something like sour mushroom soy sauce sounds attractive, buy a copy of the Noma Guide to Fermentation, which has both condiments made from lacto-fermented dried (porcini) and fresh mushrooms (dryad saddle).

Does it taste good?
Yes, with caveats. Have you ever tasted sauerkraut? Not the sauerkraut from a can. I’m talking about the real stuff, the fizzy, effervescently sour stuff. That sour taste is the taste of lactic acid, and whatever you lacto-ferment, will taste of it.
In short, fermented mushrooms taste exactly like whatever species of mushroom you use, just crossed with sauerkraut. So far I’ve fermented milkcaps, chanterelles, dried black trumpet mushrooms, Ischnoderma, crimini buttons, oysters, king oysters, and shiitakes. If you're wondering, cultivated mushrooms, with the exception of shiitakes, are very mild tasting, and in my opinion, boring if you’re a mushroom hunter. Come at me.
Cooking and Sterilization
Some wild mushrooms, like black trumpet, porcini, a few choice Amanitas (Caesarea group), and plenty of cultivated species can taste ok, bitter, or delicious raw. Plenty of other mushrooms aren’t safe to eat raw at all, like morels, the Gyromitras, honey mushrooms, Leccinum and others.
While lactic acid fermentation does “cook” the mushrooms, problem compounds that cause gastro-intestinal upset are widely known to be denatured by heat, specifically starting at 212 Fahrenheit (the boiling point of water) sometimes for extended periods of time, say, as in the case of muscaria.
It follows that simply fermenting that pile of morels, honeys, or whatever species that needs high heat or boiling to be safe, and slipping it in your ramen directly out the bag, is likely to make you, or someone else sick, not to mention the texture of the mushrooms themselves, which we'll get to.
You can get past any safety worries by cooking the mushrooms before, or after fermentation (I prefer the latter). If you want to cook them beforehand, steaming is a good idea, since boiling will remove tasty solutes into the water.
Mushrooms to be careful with
Of course, in the case of some specific mushrooms that have water soluble toxins (Amanita muscaria, Gyromitra species) I would definitely boil them beforehand. If you want to eat your fermented shrooms raw (I ate all my ischnoderma raw from the bag) or more importantly, serve them to others raw, (a risky proposition as sensitivities vary from person to person) you should only use a species that is widely known to be safe uncooked, and inform the diners beforehand of your Dr. Evil intentions.
Some species get mushy
The drawbacks, and there are some, are that sour mushrooms are an acquired taste, take time and resources to make, and most importantly of all, fermenting mushrooms long enough to actualize a good amount of flavor can quickly turn them into a mushy, flaccid paste of goo.
I'd wager even the most die-hard slippery jack eater will find the texture of fermented mushrooms repulsive. But, some very firm polypores hold up very well, as did re-hydrated black trumpets fermented in brine.
All species of amanita I've fermented were excellent, unsurprisingly considering fermenting them is a localized Japanese tradition. Don't throw those slimy agarics out with the bath water just yet though.
Seasonings, soy-like sauces, etc
So, the texture of many fermented mushrooms will be outright offensive to most people, but the flavor can be excellent. Herein is the big takeway: think of long-fermented shroomies as a seasoning, not a foodstuff. I've generally used the them as you would an umami rich paste, say, puréed in soup like miso, or as a background flavor, not something to put on a cracker, or a steak.
If you look online, you'll also find articles that say they ferment mushrooms quickly overnight for artistic-sounding culinary goals like "concentrating glutamate flavors". Cool. But, the amount of flavor you'll get from 24 hours of "fermentation" is negligible, and a precious waste of time similar to proclaiming the ground breaking flavor you'll get from 1 day old sauerkraut.
In closing, fermenting wild mushrooms is perfectly safe, natural, and is useful as it's a historical preservation method in the same family as sauerkraut and fermented grape leaves. (look to Eastern Europe and their salted mushrooms).
The only tricky part is figuring out what to do with it that you and yours will eat. The best tip I have for you, if you experiment yourself, is to start by making a filling like ravioli, pelmeni, or, my favorite: pierogi. The potato and cheese are perfect, mild vehicles for stretching a mushroom flavor bomb, and, everyone loves crispy fried things.

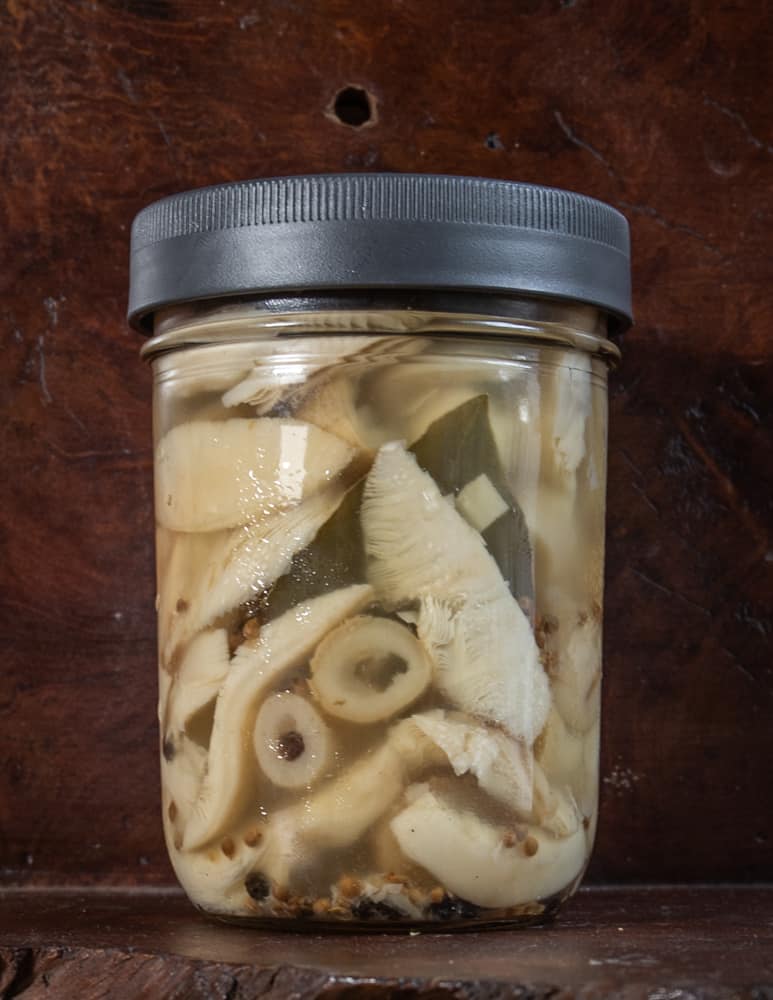
Brine Fermented Mushrooms
Ingredients
- Kosher salt
- Wild or cultivated mushrooms freshest possible
- Water
Instructions
- Put the jar or vessel you'll ferment the mushrooms in on a scale, weighing in grams, then tare it to zero.
- Add the mushrooms and enough water to cover them completely, then make a note of the total grams.
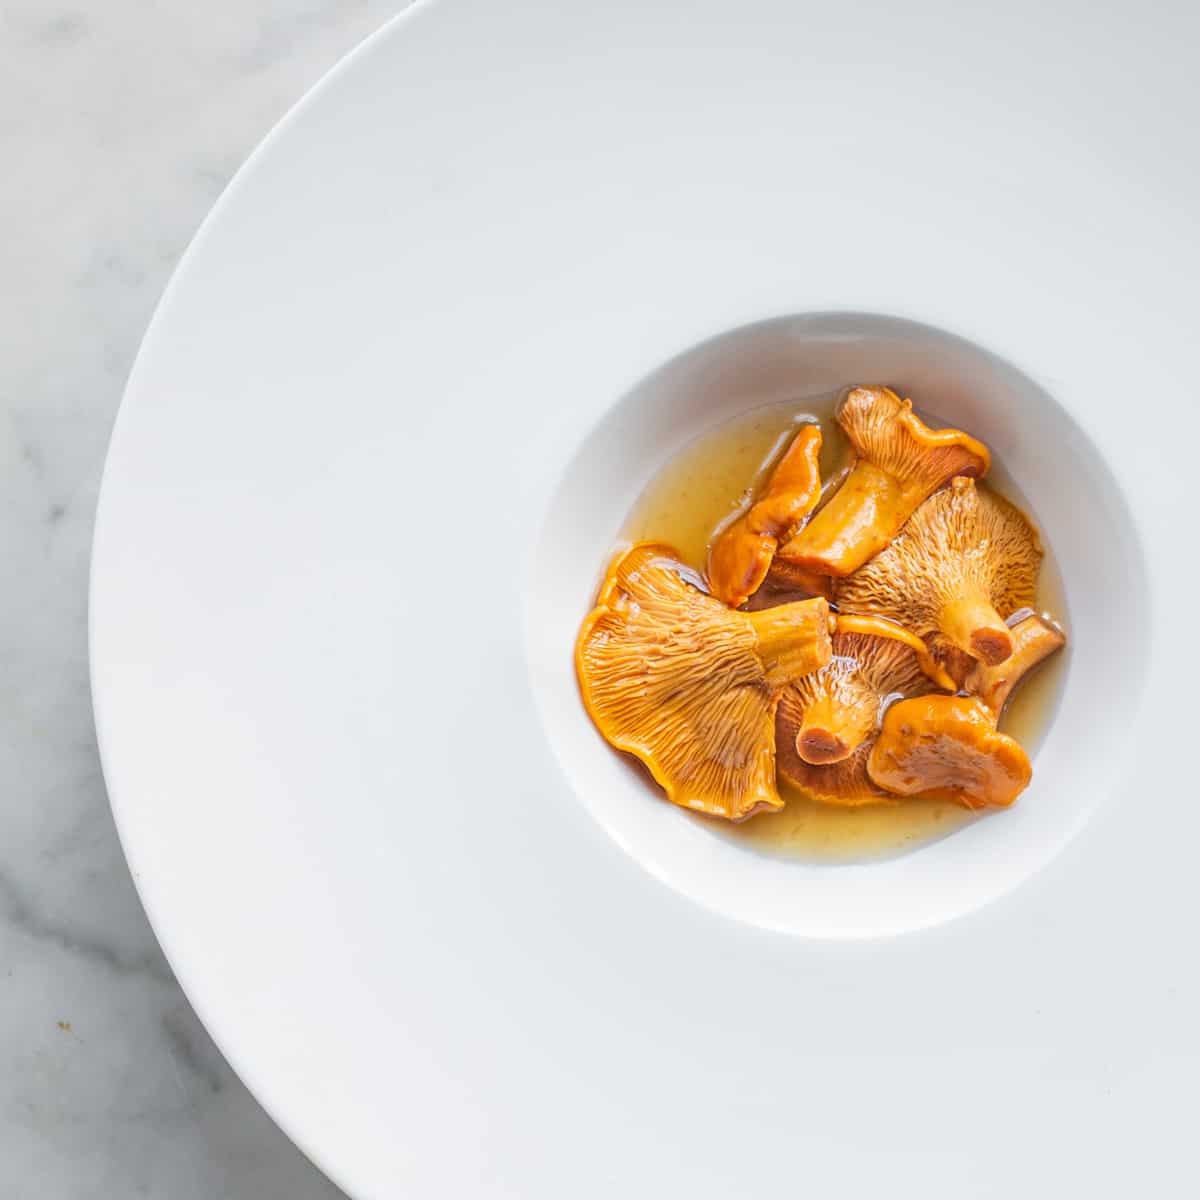
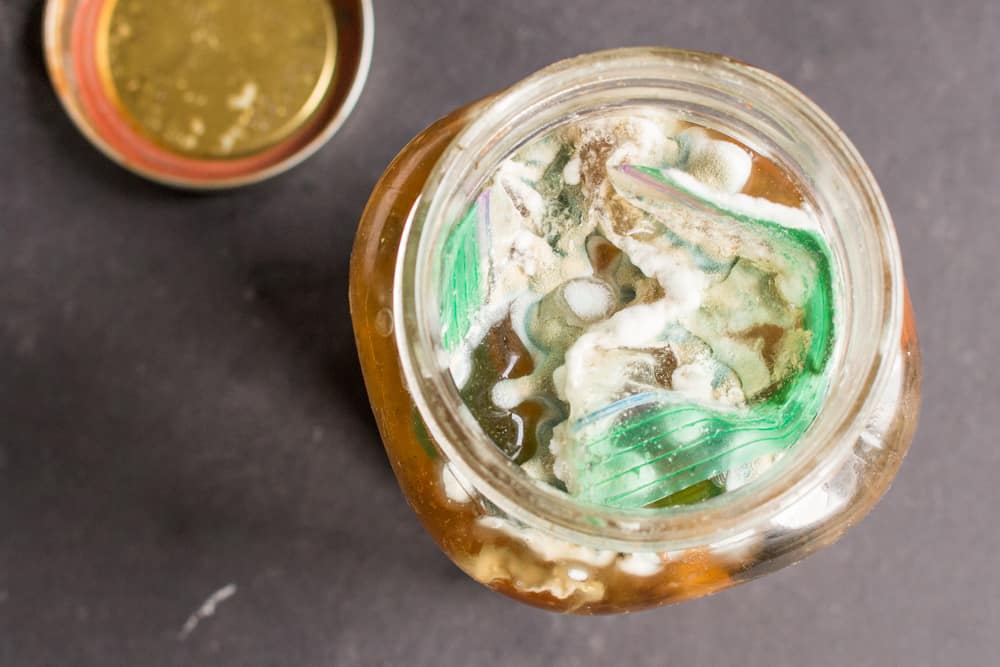
- Multiply the total grams by anywhere from .03 to get the needed amount of salt, then add that much salt to the jar, mix well to dissolve, weigh the mushrooms down, (pictured was a bag filled with the same % of salt brine) seal the jar, and leave out at room temperature.
- Burp the jar every few days to release carbon dioxide, or so until you're pleased with the flavor. Know that if any mushrooms poke out above the brine, even a little, they can quickly discolor, soften, and mold.
- After fermentation, (5-10 days or so, I like to refrigerate mine after about 5) store the mushrooms in their brine in the fridge, making sure they're still completely covered with brine. The mushrooms will last as long as they're covered with brine, and will continue to ferment slowly.
Notes
Fermentation Time
You'll get decent flavor from these after 7-14 days of fermentation. After they are ripe to your taste, refrigerate them. You also need to watch these closely for mold, during the fermentation at room temperature, and after in the fridge. While mushrooms underneath the brine won't rot, the aroma of the mold can eventually permeate the whole jar if you forget about them.Vacuum fermentation
You can vacuum-ferment the mushrooms by combining them with 3% of their weight in salt and vacuum sealing, leaving them at room temperature for the same time as fermented mushrooms in brine.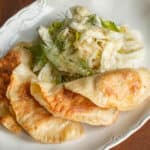
Fermented Chanterelle Mushroom Pierogi
Ingredients
Filling
- 4 oz fermented chanterelles
- 8 oz cream cheese
- 12 oz rice potato scant 1.5 cups
- Fresh ground black pepper to taste
- Fresh chopped dill a teaspoon or two (optional)
Dough
- 2.5 cups all purpose flour
- 8 oz sour cream
- 1 teaspoon kosher salt
- 1 tablespoon soft butter
Instructions
Filling
- Puree the fermented chanterelles with the cream cheese and potato in a food processor. Mix in the dill if using, then taste and adjust the seasoning as needed for pepper and dill and adjust until it tastes good to you.
Dough
- For the dough, whisk all the wet ingredients together, then add flour and knead into a soft dough. Chill the dough to make it easier to work with.
- To roll out the dough, use a pasta roller or a rolling pin, and roll the dough out a little thicker than you would fresh pasta, about ⅛ inch, it doesn’t have to be perfect.
- Flour the work surface as needed to make the dough easier to work with. Use a drinking glass or ring mold to cut out roughly 3.5 inch rounds, then estimate two generous teaspoons of filling in each circle of dough, fold them closed, crimping the edges with a fork.
- Save scrap to re-roll as needed. Cook the pierogi in boiling water until they float, then remove to an oiled pan and refrigerate until needed.
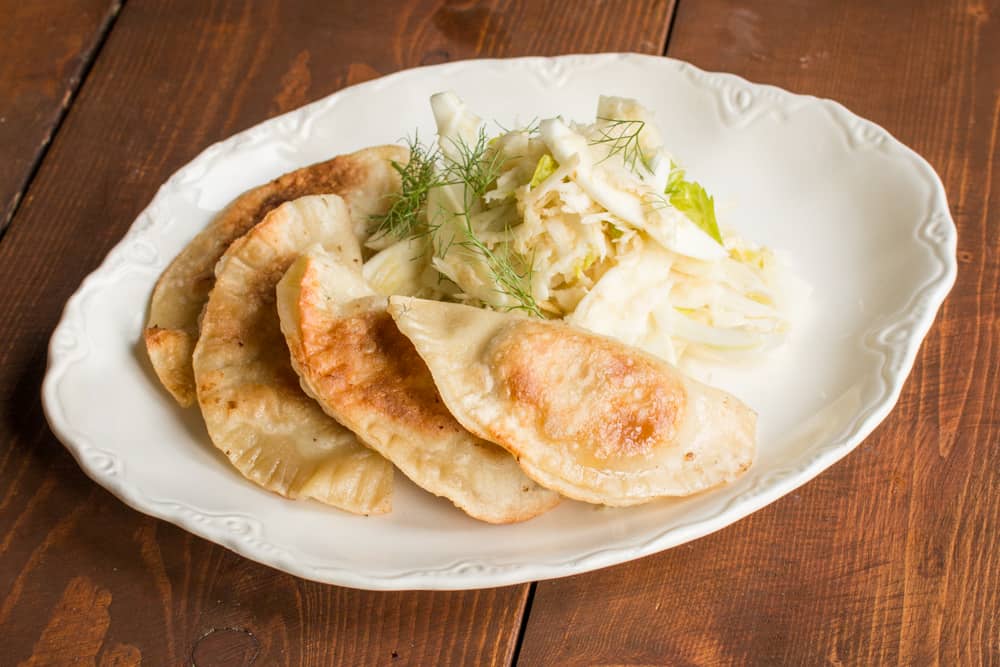
- To serve, saute freshly cooked pierogi in a little oil until browned on both sides. As pierogi are rich, I like to serve them with things like freshly cooked vegetables, especially wilted greens, or something like a crisp fennel salad, as pictured.
Online Resources
Books referenced in this post
Wild Fermentation by Sandor Katz
Nico
I just fermented foraged chanterelles & cultivated cinnamon cap mushrooms (separately) but I chose to not use a brine and to let the salt bring out the mushroom liquid. I had ziplock bags filled with water taking up unused space & pressing down the contents in the jar. There was a cap and a stem exposed to air and I noticed today (the last day of my fermentation) that there was some white mold. So I discarded the molded exposed ones & switched out the mushrooms and liquid to a new jar. Since this is my first time fermenting mushrooms, I am trying to trust my nose here, but unsure if the strong smell from the cinnamon caps is safe. If there was mold forming on exposed caps and they were discarded are the submerged ones and the liquid still safe to eat? Even if the liquid may have brushed over the molded spot (that I cleaned)? May be overthinking, but would love other opinions! If I test the pH would that be a good indicator?
*Next time I am going to try making the brine, just to be sure there is enough liquid to cover. Thanks for sharing this recipe.
Alan Bergo
If you don't want mold, use a vacuum bag, or keep them under brine. Mushroom fermentation is strange, and every species is a little different. Sometimes there are very strong aromas, but that doesn't mean they aren't safe. I do worry a little about fermenting pholiotas, I would definitely cook them after fermenting, put them in a stuffing, etc. The submerged ones are safe to eat as long as they're not discolored. I wouldn't bother to test the pH as fermenting for a length of time to get it under 3.5 and shelf stable usually makes them unpalatable for me.
Mary Perz
How do you cook them after fermentation? Could sous vide do the trick?
Alan Bergo
Kind of. Sous vide doesn't get to 212F though, and I would recommend bringing them to that temp. You could just boil the bag without using the circulator. Or just cook them before you eat, assuming they're added to a dish in such a way to ensure they're exposed to killstep temperatures, say boiled in ravioli filling.
Jerry Aurand
I came here by a very roundabout path
I read an article on dipping sauces for French fries. They focused on various taste values, but none of the international examples focused on unami.
So, I sought ingredients that featured that taste. I found that the British had a long history with mushroom ketchup.
The basic recipe should sound familiar to you: shiitakemushrooms and salt fermented together than boiled in an oven.
But I sought ways to heighten the unami
Various ingredients could be added: rausu kombu seaweed, tsmari soy sauce, balsamic vinegar, parmigiano reggiano rind, anchovies, katsuobushi dried bonita flakes, prosciutto do Parma, dried tomatoes.
Herbs and spice with either their own unami or the ability to highlight it, plus traditional additions to mushroom ketchup: mace, nutmeg, black pepper, smoked paprika, cumin, tumeric, rosemary, thyme, toasted seseme seeds, garlic, shallots, cloves, bay laves.
Red wine is also a possibility.
I have no idea how to combine any or all of these harmoniously.
Do you have any suggestions?
Will K.
I find this topic fascinating since it combines two of my passions in one- foraging wild mushrooms and lactofermentation. I’ve only tried lactofermenting mushrooms twice, both times with Lactarius piperatus. In both cases, I boiled the mushrooms first and discarded the water. The first attempt was only “meh”- way too salty- but the second one, where I covered the mushrooms with a brine, fresh herbs and garlic, was promising enough that I’d try it again. It’s got me thinking that the technique would work well with other species, like L. indigo, that I’m not a huge fan of fresh.
Olivia
I am getting ready to ferment 1 lb of cultivated shiitakes via the Noma vaccum seal method, from a grower that has already very objectively clean and beautiful mushrooms. How much more do I need to clean them? I don't know what kind of organisms live on the surface of cultivated mushrooms that may affect fermentation, but I was planning on at least rinsing. Does removing 1/4 inch from the bottom of the stem also sound appropriate or is it unnecessary? What have you typically done when fermenting shiitakes? Thanks!
Alan Bergo
You're overthinking it here. If they're cultivated, all you need to do is remove some substrate by brushing with a cloth, with wild species, you would want to remove any grit. Lactobasilii are powerful and resilient, and you have nothing to worry about, especially vacuum sealing them. Completely unnecessary to trim them, especially if you'll make them into a puree or similar afterwords, since shiitake stems are always tough--good for broth though. --A
Marion Sansing
I have been fermenting nearly everything for years as well, so when the Noma Book came out, I thought I give the mushroom fermentation a try. I had a bunch of Purple Laccaria and followed Redzepi's recipe. I swore I would never ferment another mushroom - so nasty. I am glad you are giving me hope. I always have lots of Chanterelles in the summer, I will try this. Are they anything like the vinegar pickled chanterelles? Pierogies sound great
Alan Bergo
Yeah, Laccariaceae are so mild, they prob wouldn't be too interesting. RE: flavor, just imagine chanterelles crossed with sauerkraut--it's a real doppleganger for the flavor, lactic acid, etc etc. Each species will be a little different. Super important to not think of them as a "foodstuff" though IMO. Puree, drying for umami-broth, pastes, and soy sauce analogs are going to be the best unless you want to eat slime.
Mark Sprinkle
First try was with Maitakes, which were amazing in their umami flavor, producing a super versatile sauces. BUT, When I tried a bunch of wild oysters, the result was pretty weird even for my tastes: strangely fruity, with color and texture also like a fermented mango (or, actually, a pawpaw) almost, with a sharp bite. Because I was expecting a dark, earthy flavor, it may just be cognitive dissonance right now, but I haven't found a way to use them that i really like, though the juice itself it still great under other flavors. Looking forward to trying some different species this spring to see if the flavors are just as wildly different.
Lane Hall
What is a good brand/type of vacuum sealer? I've done some nice "shroom-chi" is Mason jars, but would like to try the bags.
Alan Bergo
The air locks for jars should work similarly. I keep a vacuum sealer around because I use it for way more than just fermenting. A good budget model is a foodsaver in the 150$ range--do not go cheaper than that or they will break on you. I figured that out after going through 2 different 50$ models, and trying to do it on the cheap, not worth it. I've been using this one and another as backup the company sent me, and they've been good for 2 years. https://www.amazon.com/dp/B076MJ3HTR/ref=dp_cerb_2
David Swanson
The avidarmor.com brand of chamber vacuum is far superior to the Food Saver. Chamber vac bags are in the .10- .20 range of cost. Food saver bags in the .60-$1 rang. The extra cost of a sturdy $350 chamber vac. will pay for itself quickly.
I have over 40 years of experience with preserving and fermenting.